

Blender 4: Your Complete Beginner's Guide to 3D
Part 5 - Building a Planet: Basic Modelling in Edit Mode


💥 Grab your free copy now on Gumroad:
👉 https://grantabbitt.gumroad.com/l/fufbi
Whether you're testing the waters or committing to the full course, this free guide is the perfect place to start. No risk. Just your first steps into the world of 3D.
If you want an in-depth, detailed and methodical course, then check out my
Complete Blender Creator Course for only $15
OR Learn Blender with my 4-course Blender Beginner Bundle for only $30.
If you think my tutorials are helpful to you, you can also just click on the button below to support my work:
Let's create a new scene for our planet.
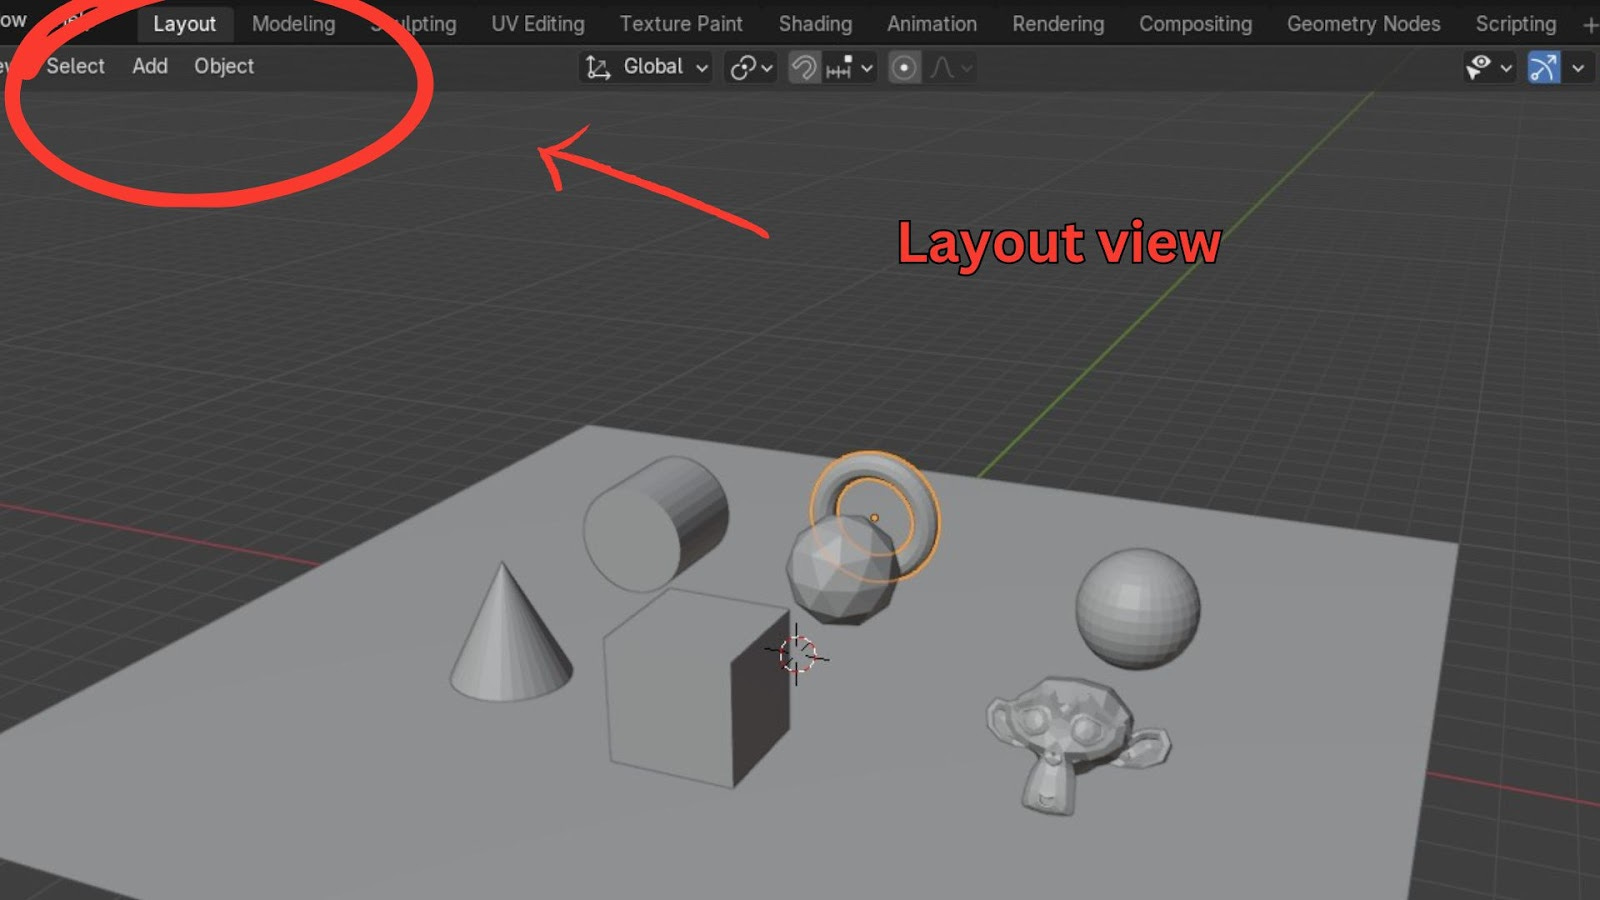
Go back to Layout view.
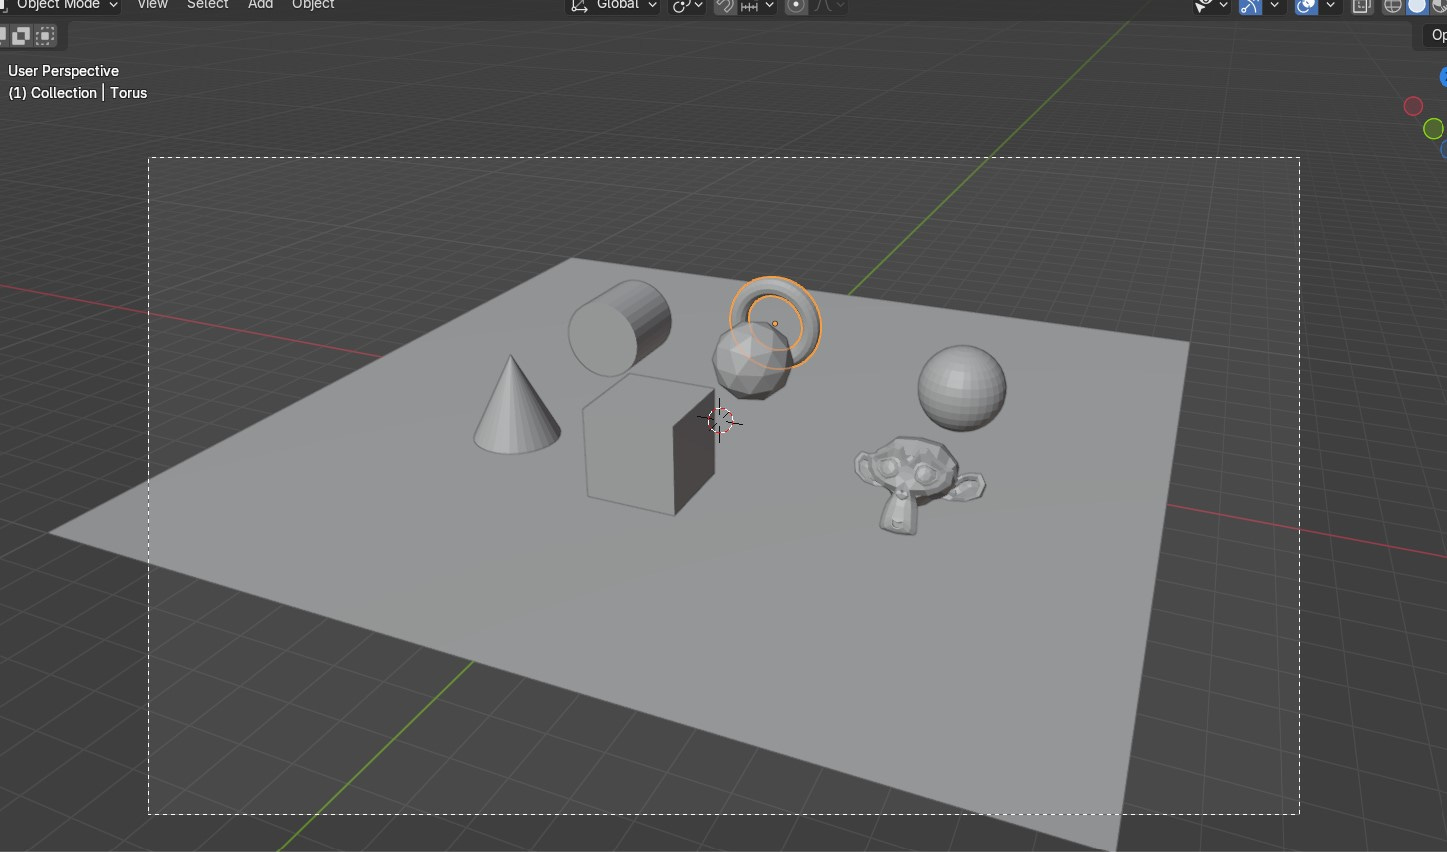
Select all your existing objects (you can box-select them).
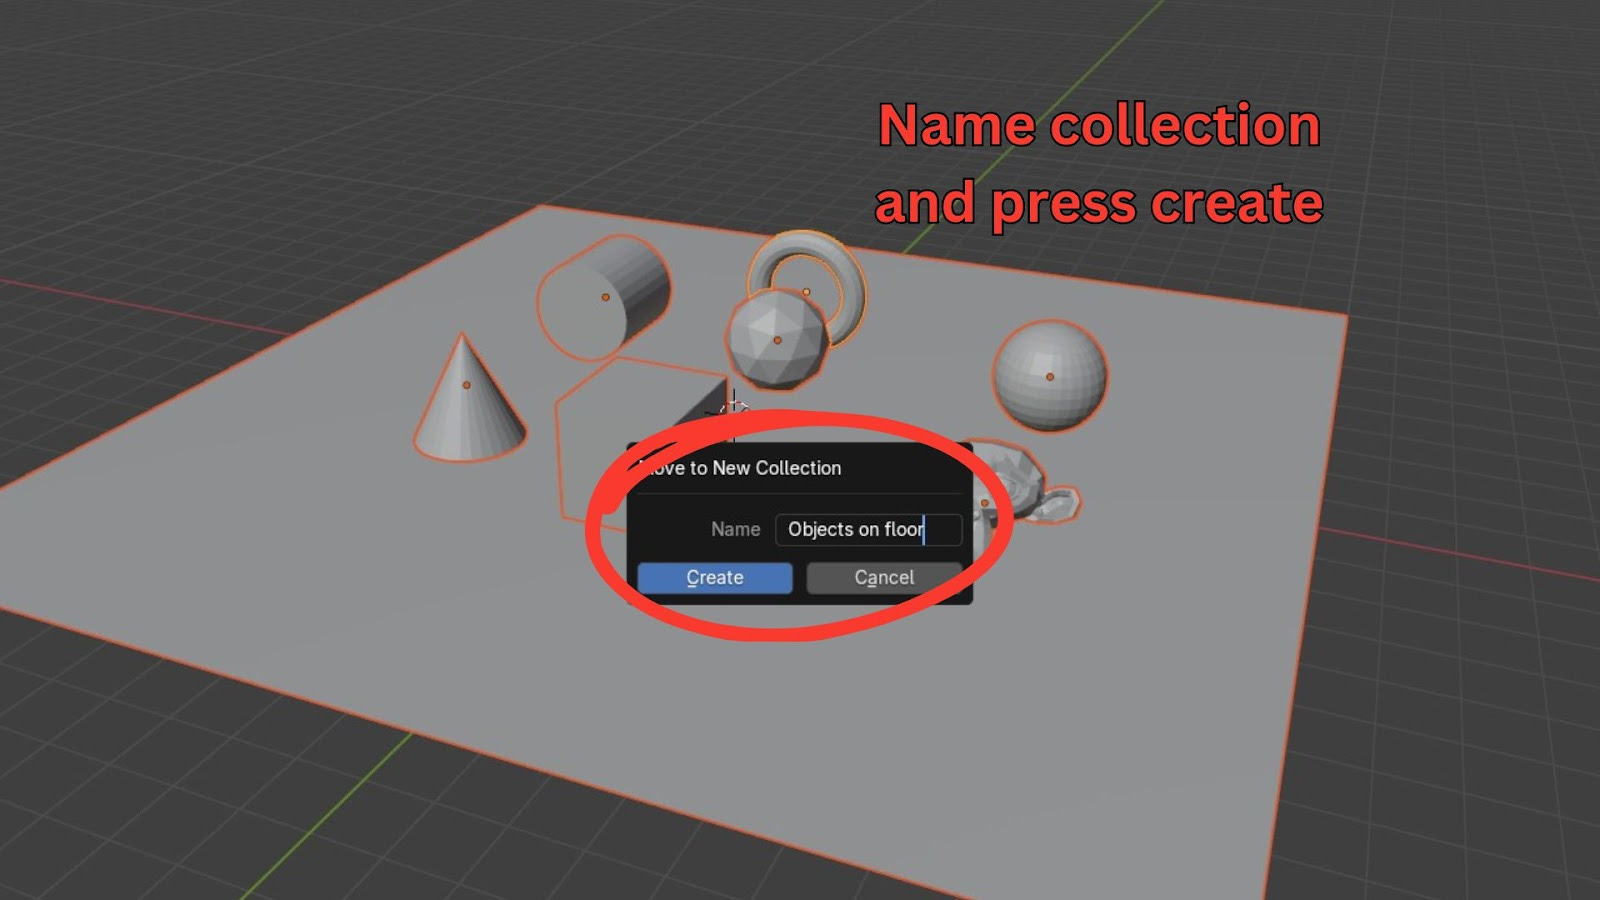
To organise, move them to a new Collection: Press M > New Collection. Name it Objects on Floor and press Create.
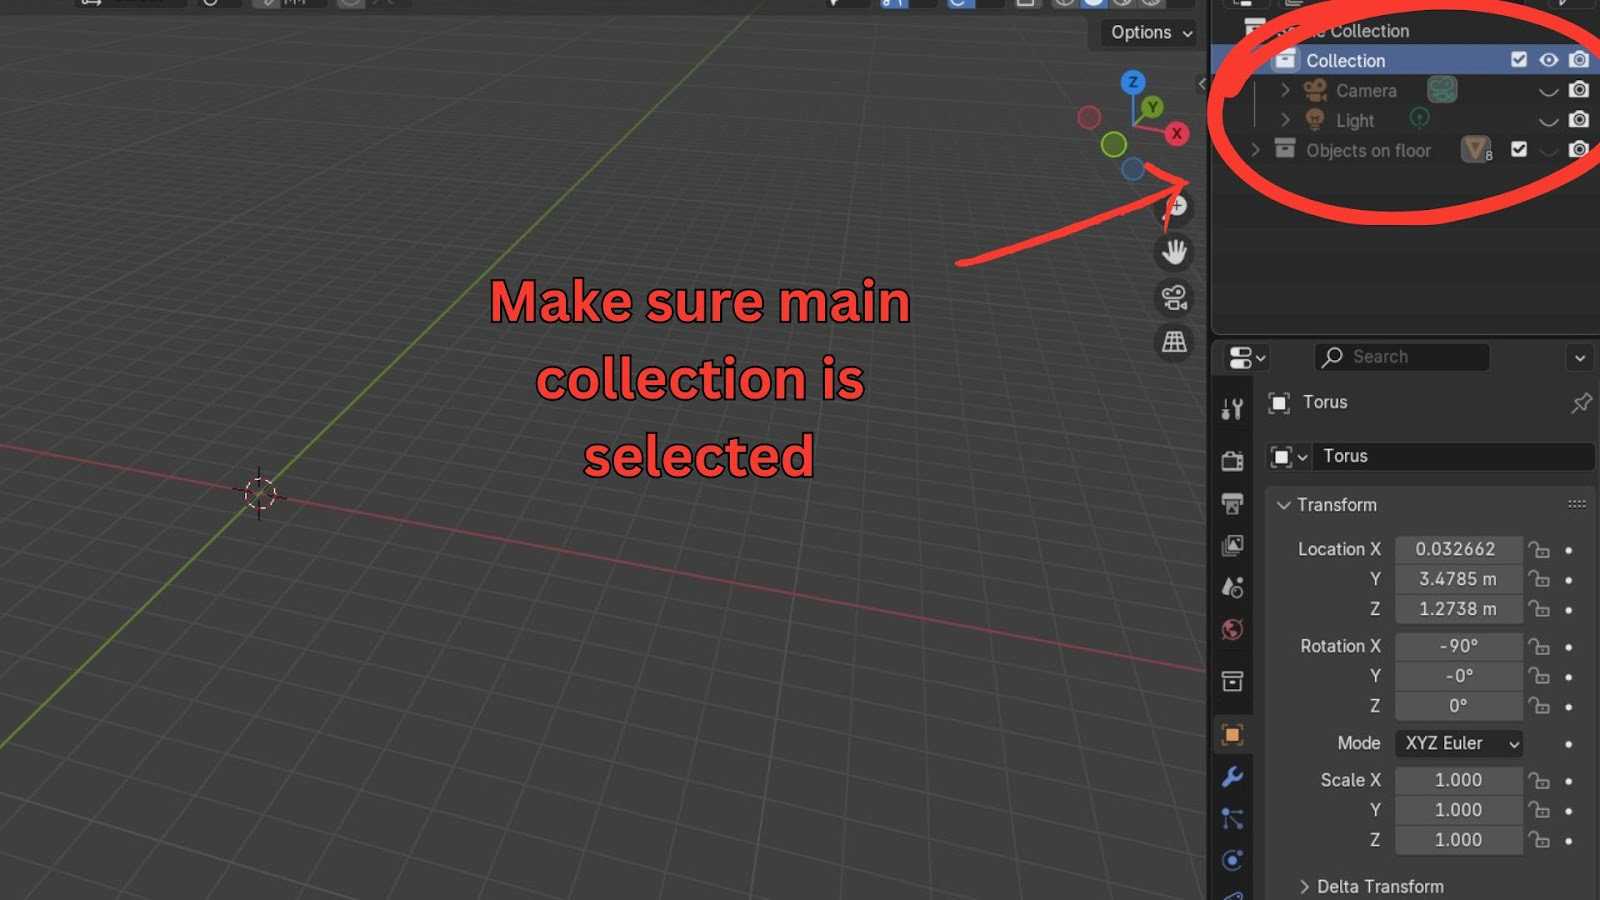
In the Outliner, click the eye icon next to Objects on Floor to hide the entire collection.

Make sure your main Collection is selected in the Outliner so new objects are added there.
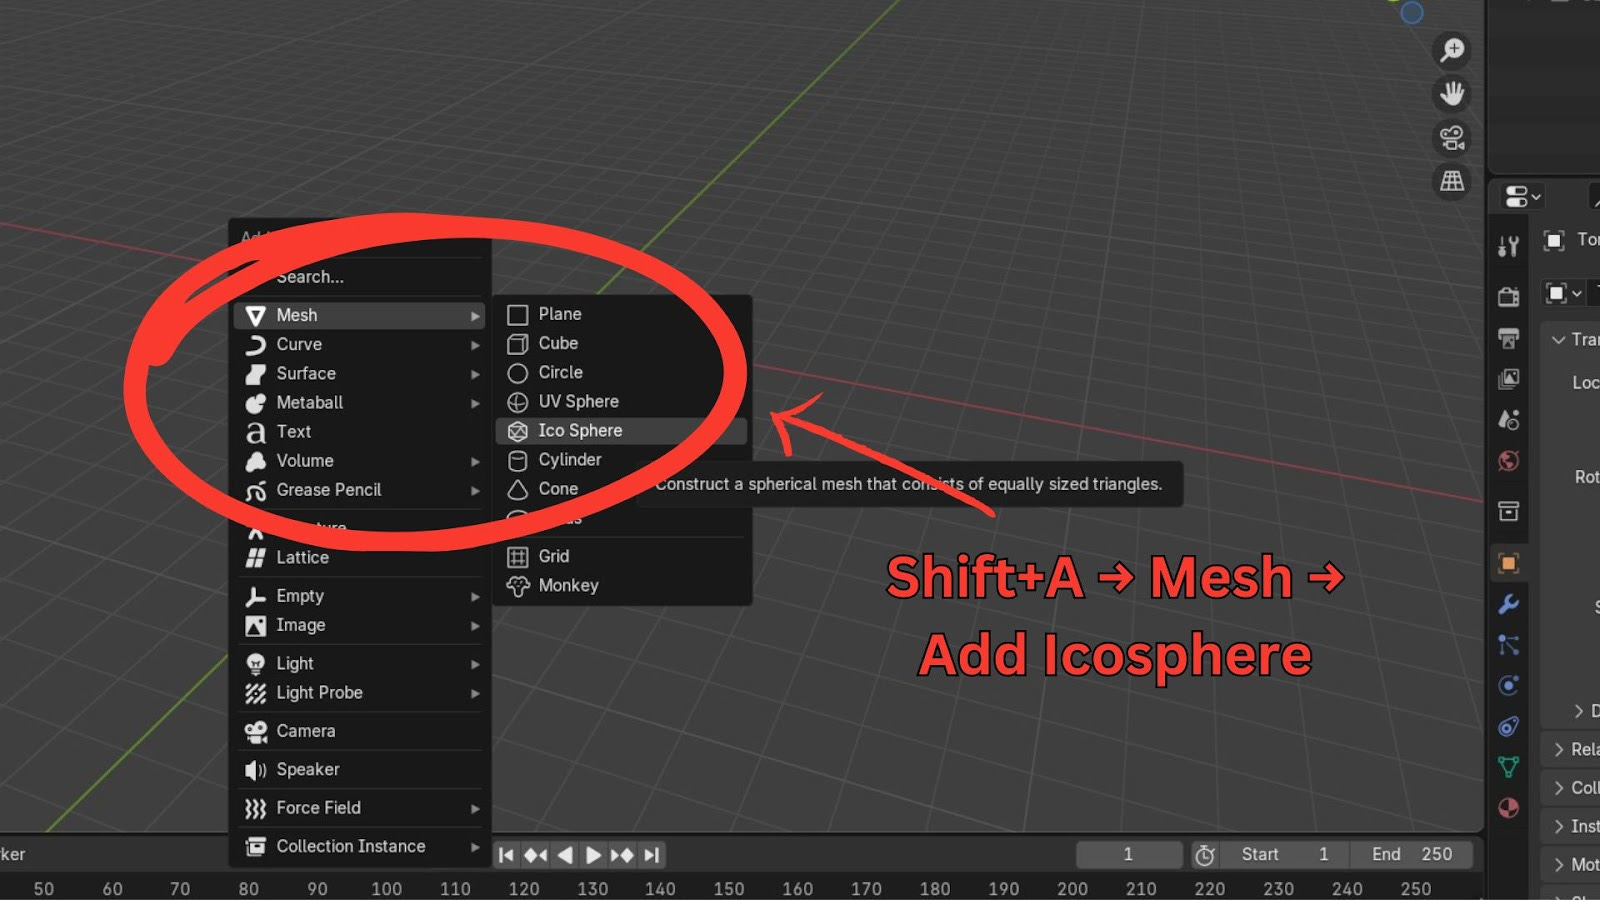
Add a new mesh: Shift + A > Mesh > Icosphere.
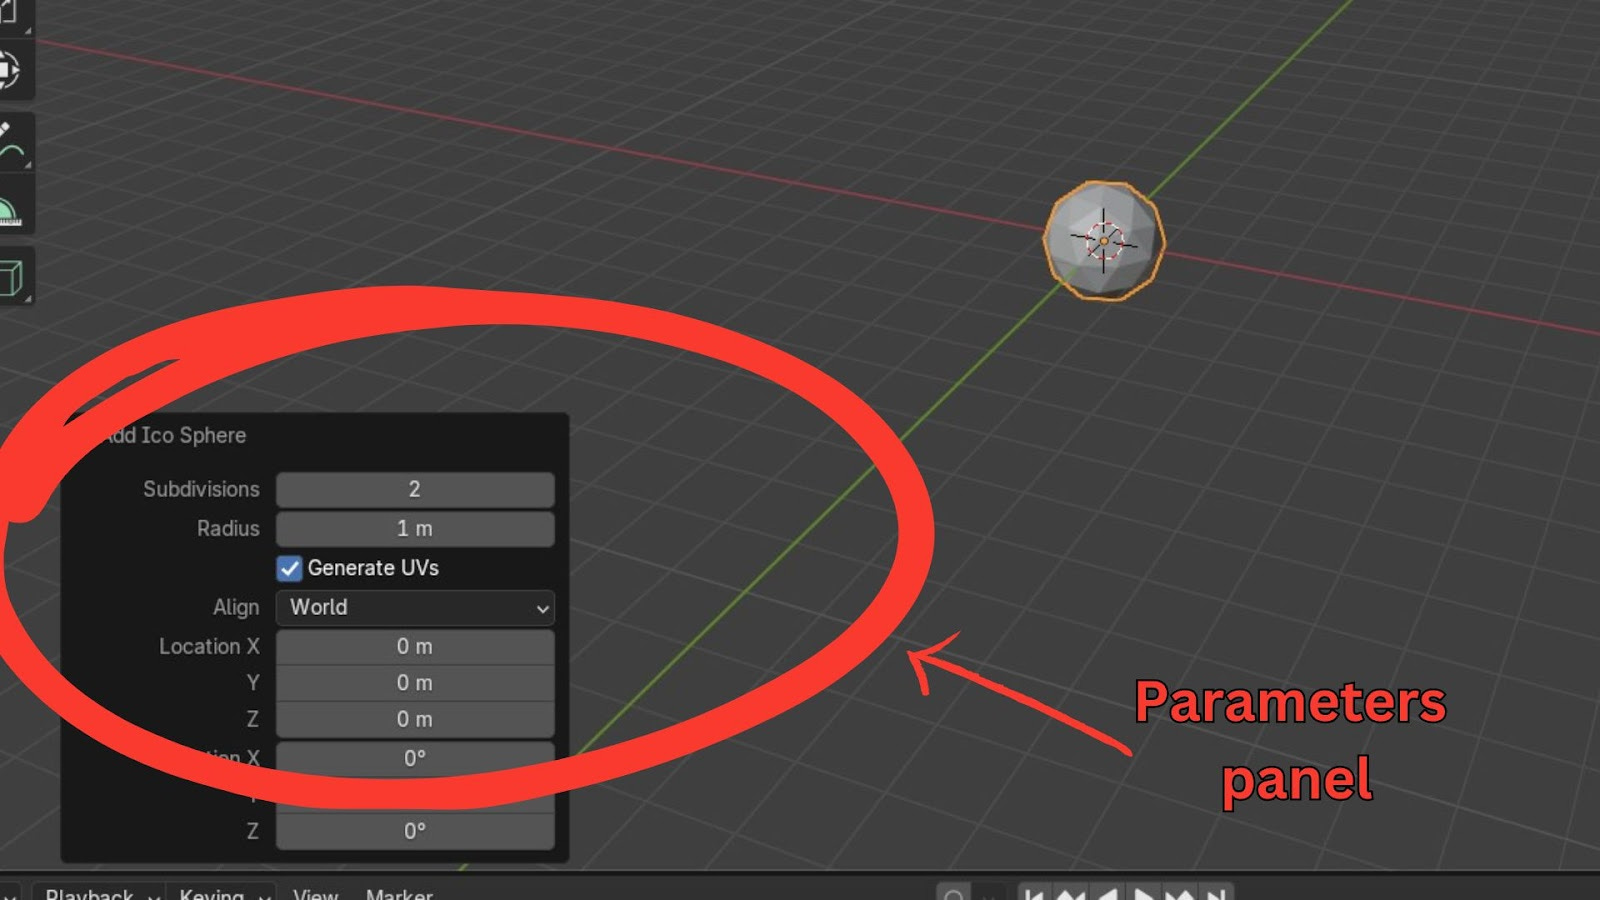
Importance of Parameters
Before you move or scale your new Icosphere, look at the parameters panel that appears in the bottom left of the 3D Viewport.
Here, you can adjust Subdivisions (detail level) and Radius.
Crucially: Once you perform any other transformation (like moving or scaling), this panel disappears, and you can no longer change these initial parameters. If you need to, you'd have to delete the object and add it again.
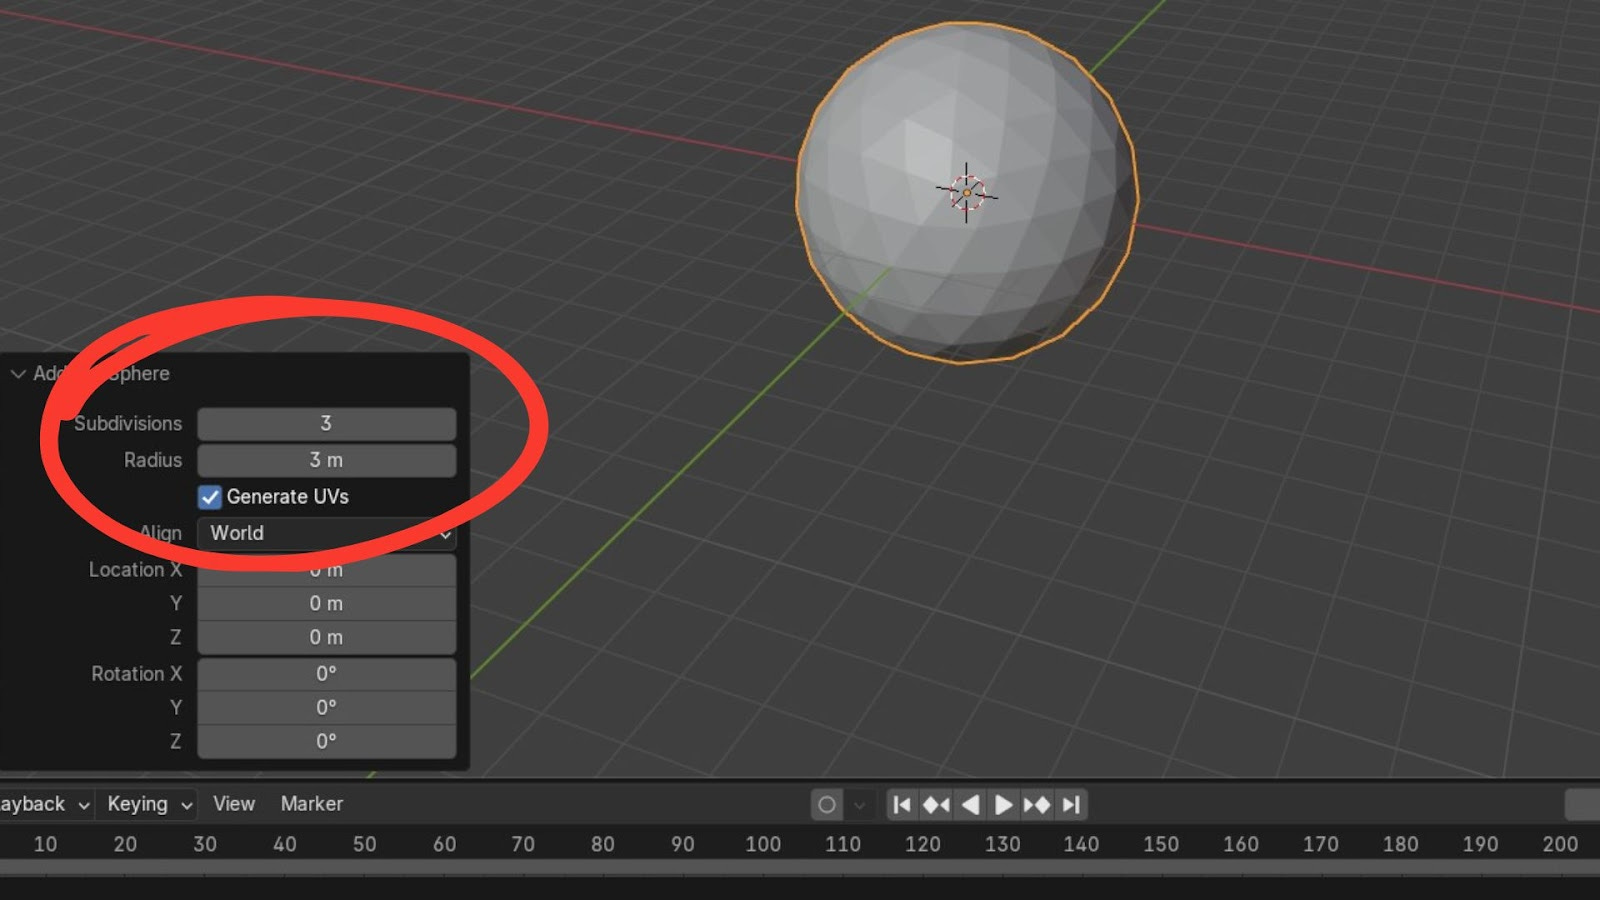
For our planet:
Set Subdivisions to 3.
Set Radius to 3m.
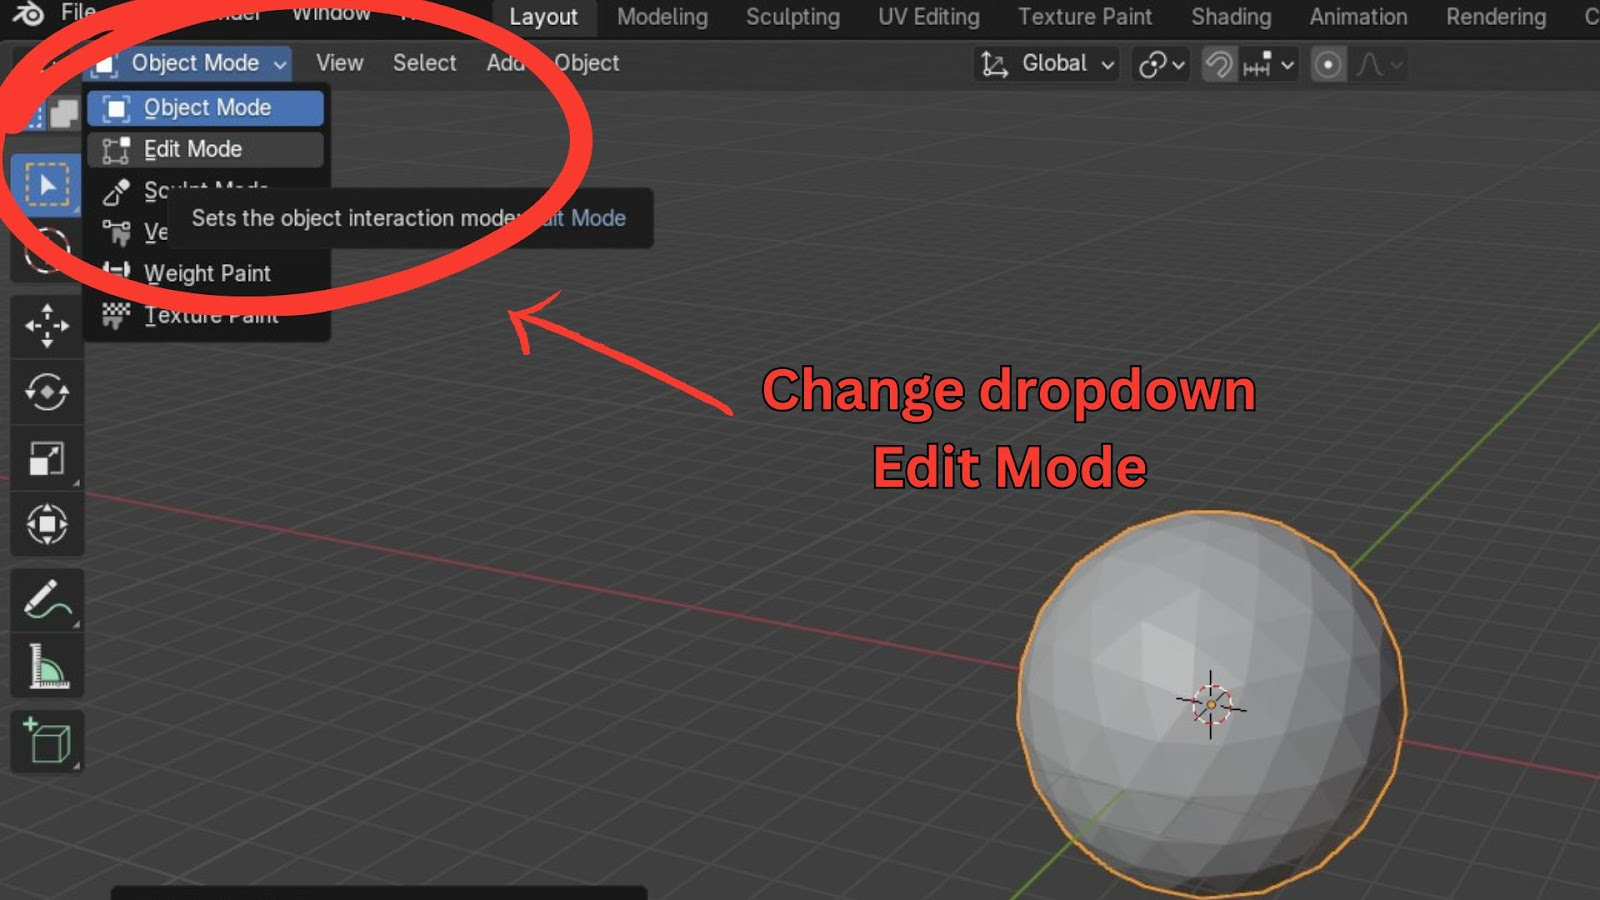
Introduction to Edit Mode
To modify the actual geometry of an object, you need to enter Edit Mode.
Select your Icosphere.
In the top-left of the 3D Viewport, change the Interaction Mode dropdown from Object Mode to Edit Mode.
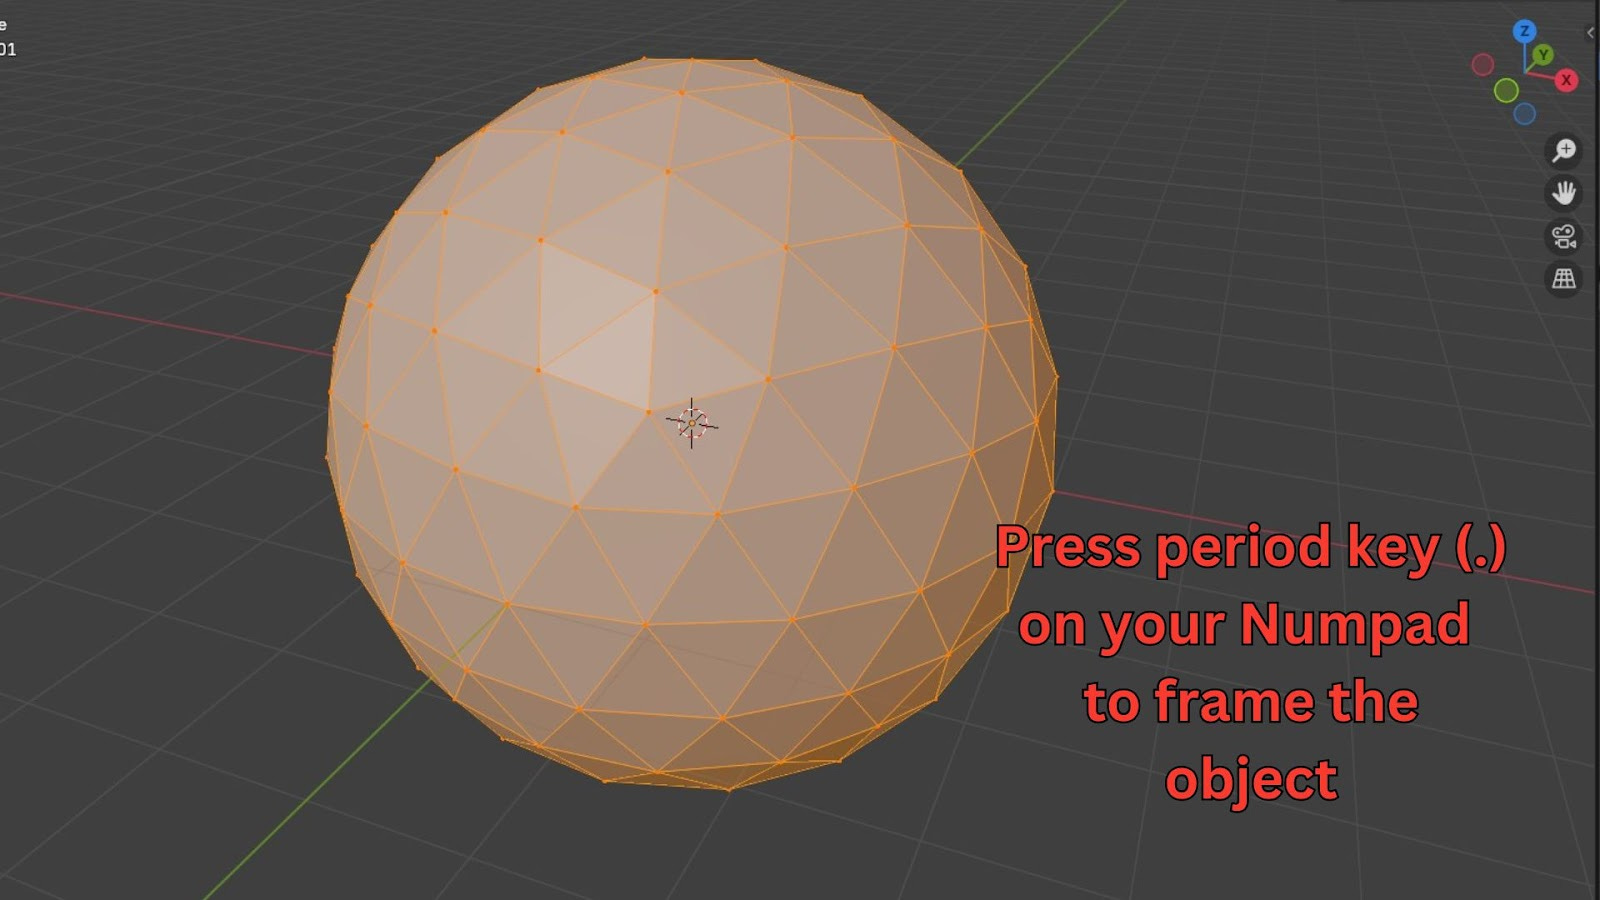
The Icosphere will change its appearance, showing its underlying components. If your camera isn't centred, press the Period key (Numpad) to frame the object.
In Edit Mode, you work with different components:
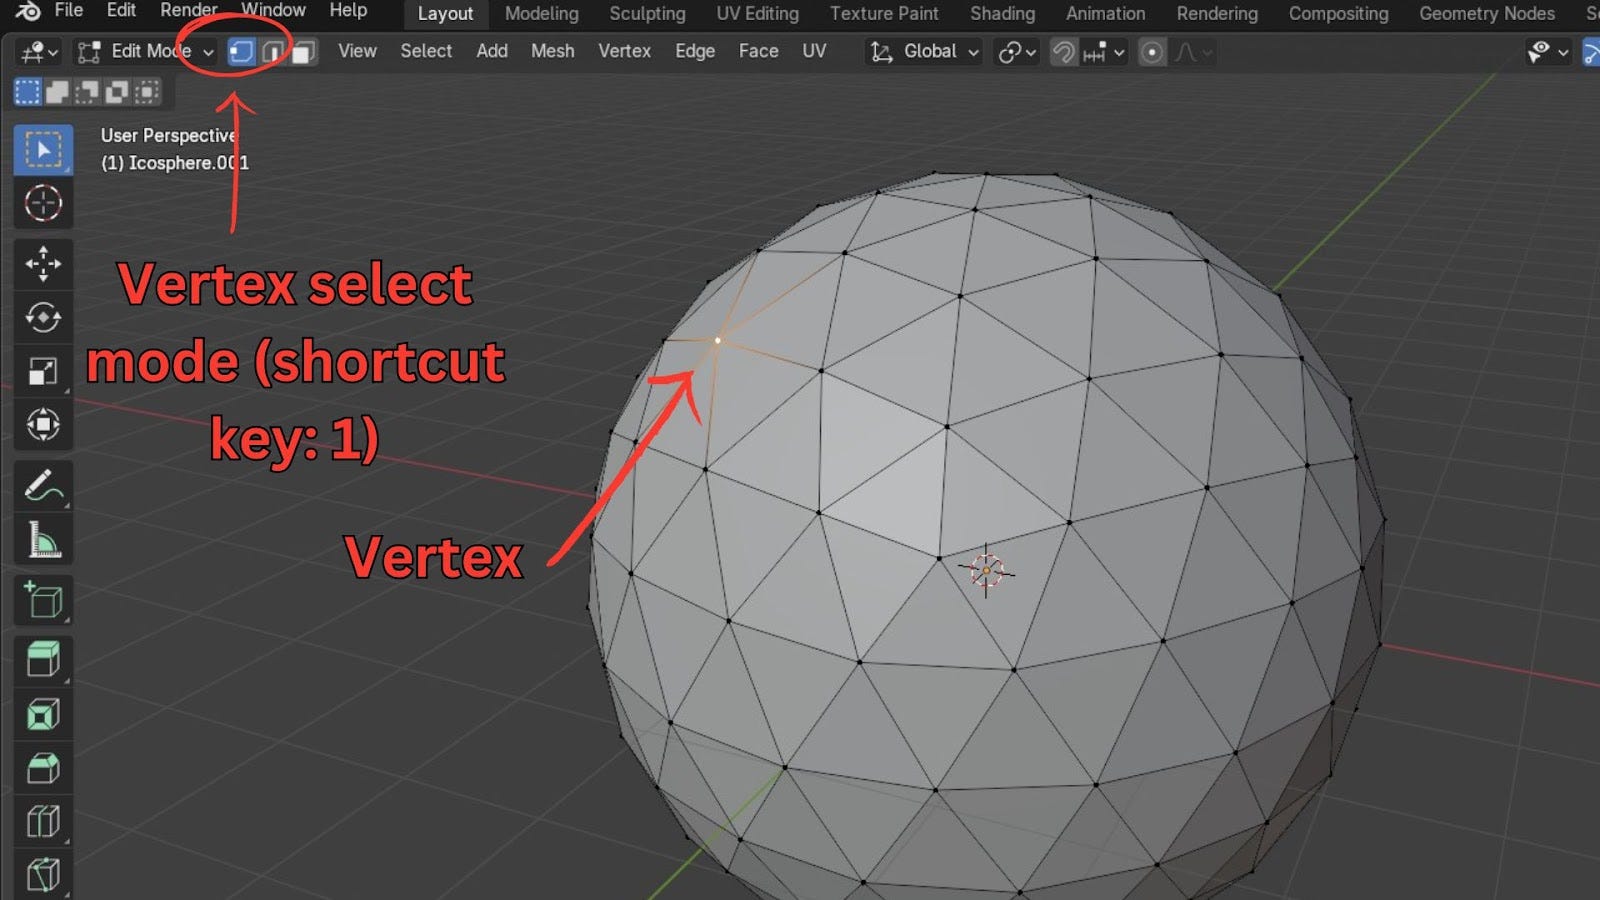
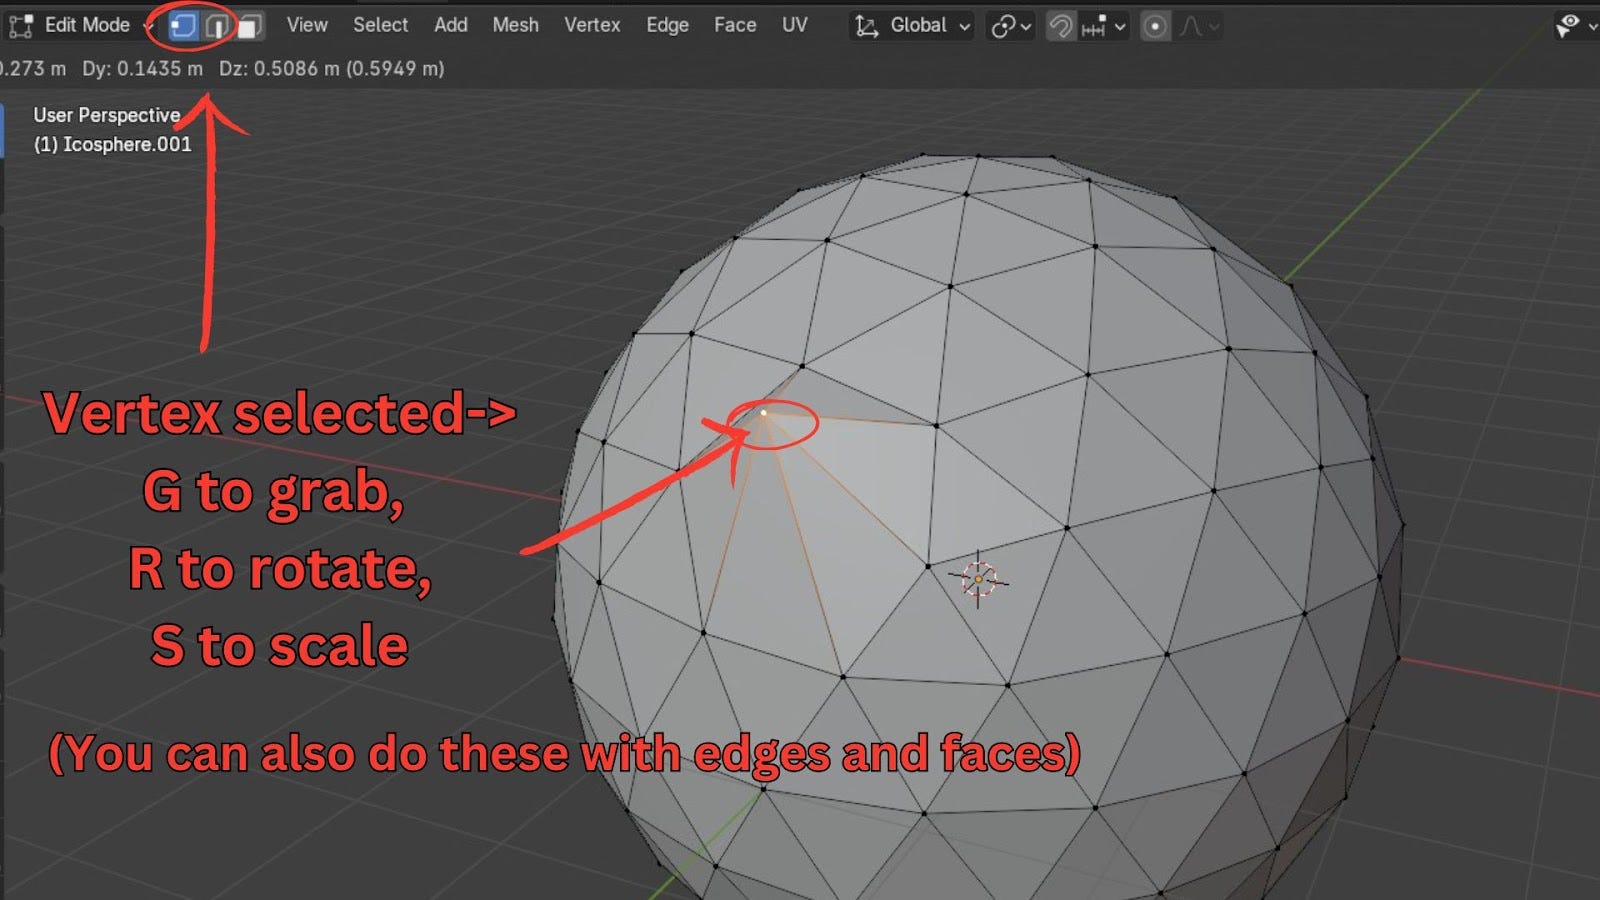
Vertices (Points): The individual points that make up your mesh. Select them with Vertex Select mode (the first icon next to the Interaction Mode dropdown, or keyboard shortcut 1).
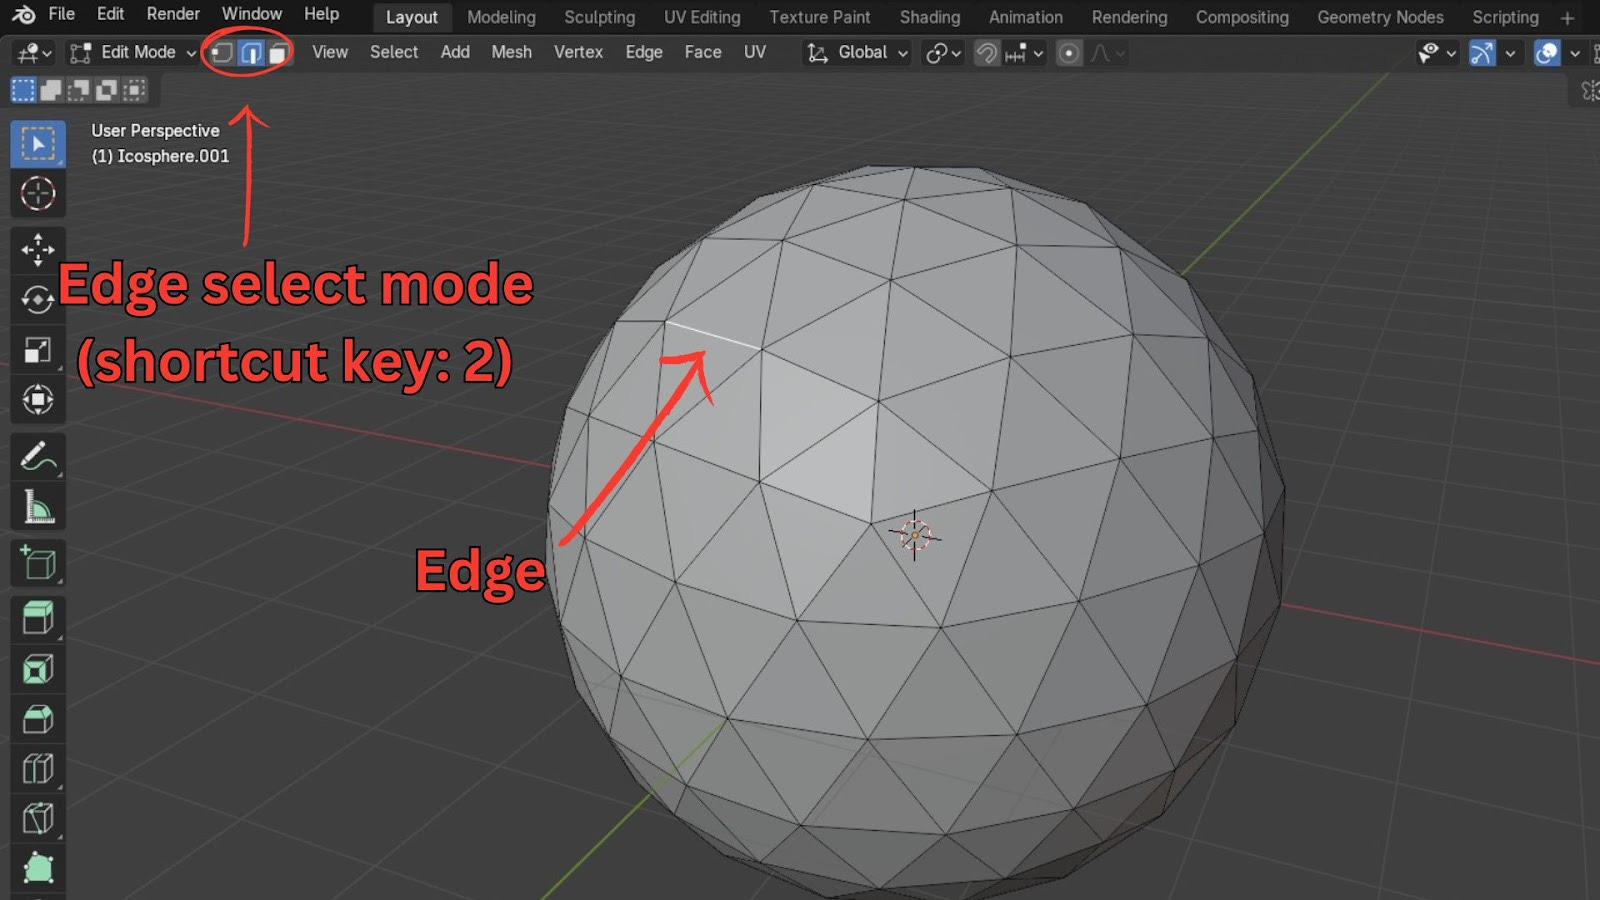
Edges (Lines): The lines connecting the vertices. Select them with Edge Select mode (the second icon, or keyboard shortcut 2).
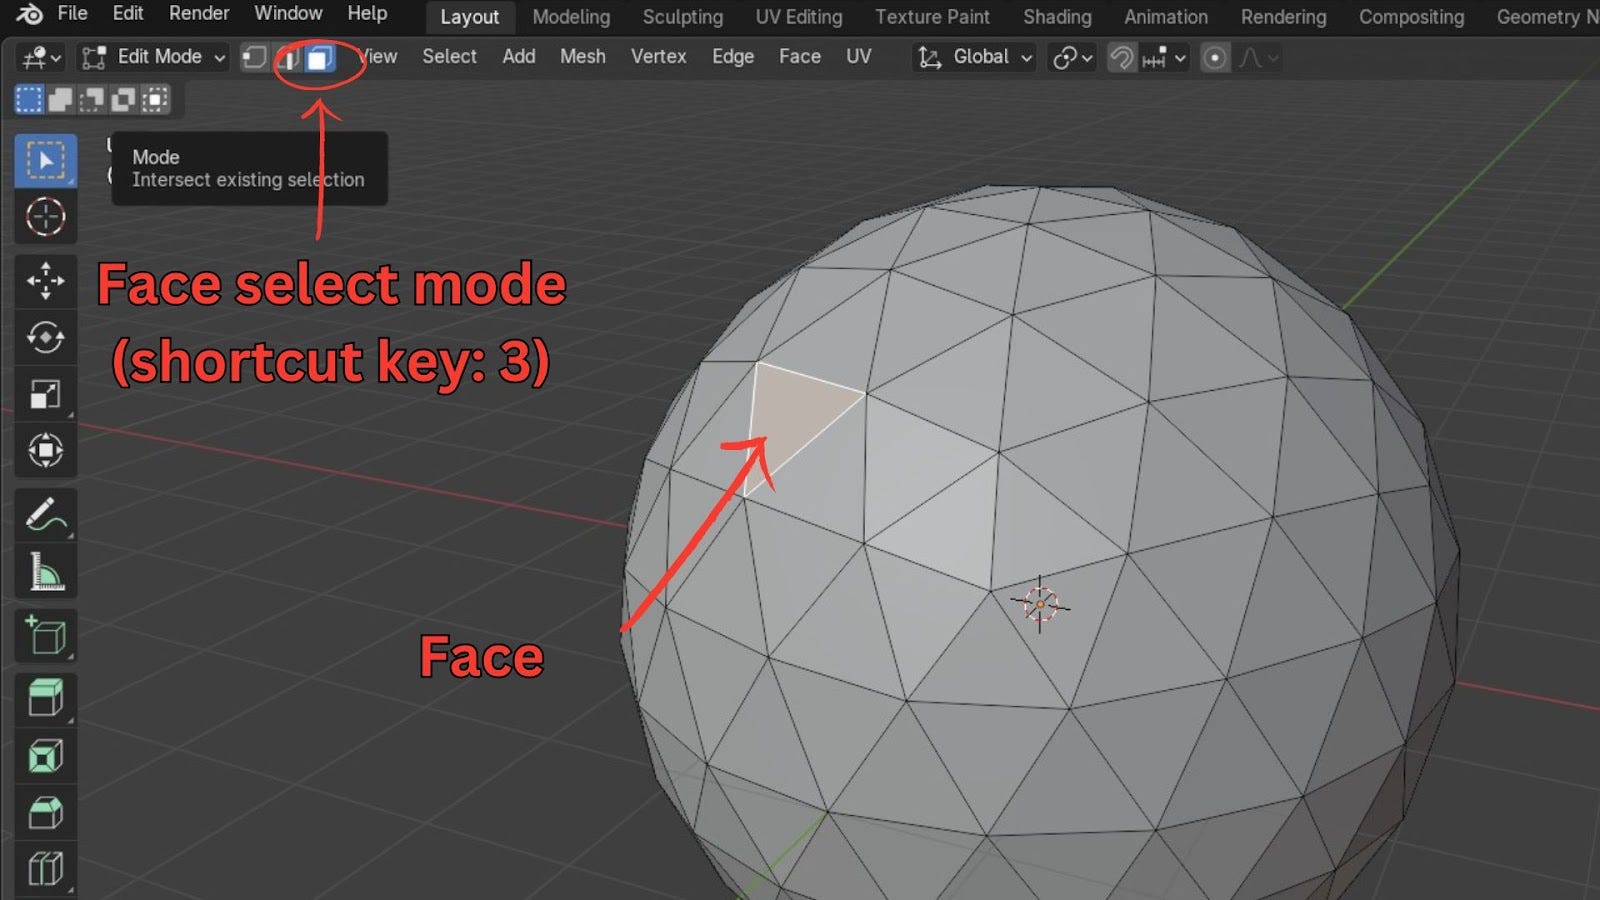
Faces (Surfaces): The flat surfaces enclosed by edges. Select them with Face Select mode (the third icon, or keyboard shortcut 3).
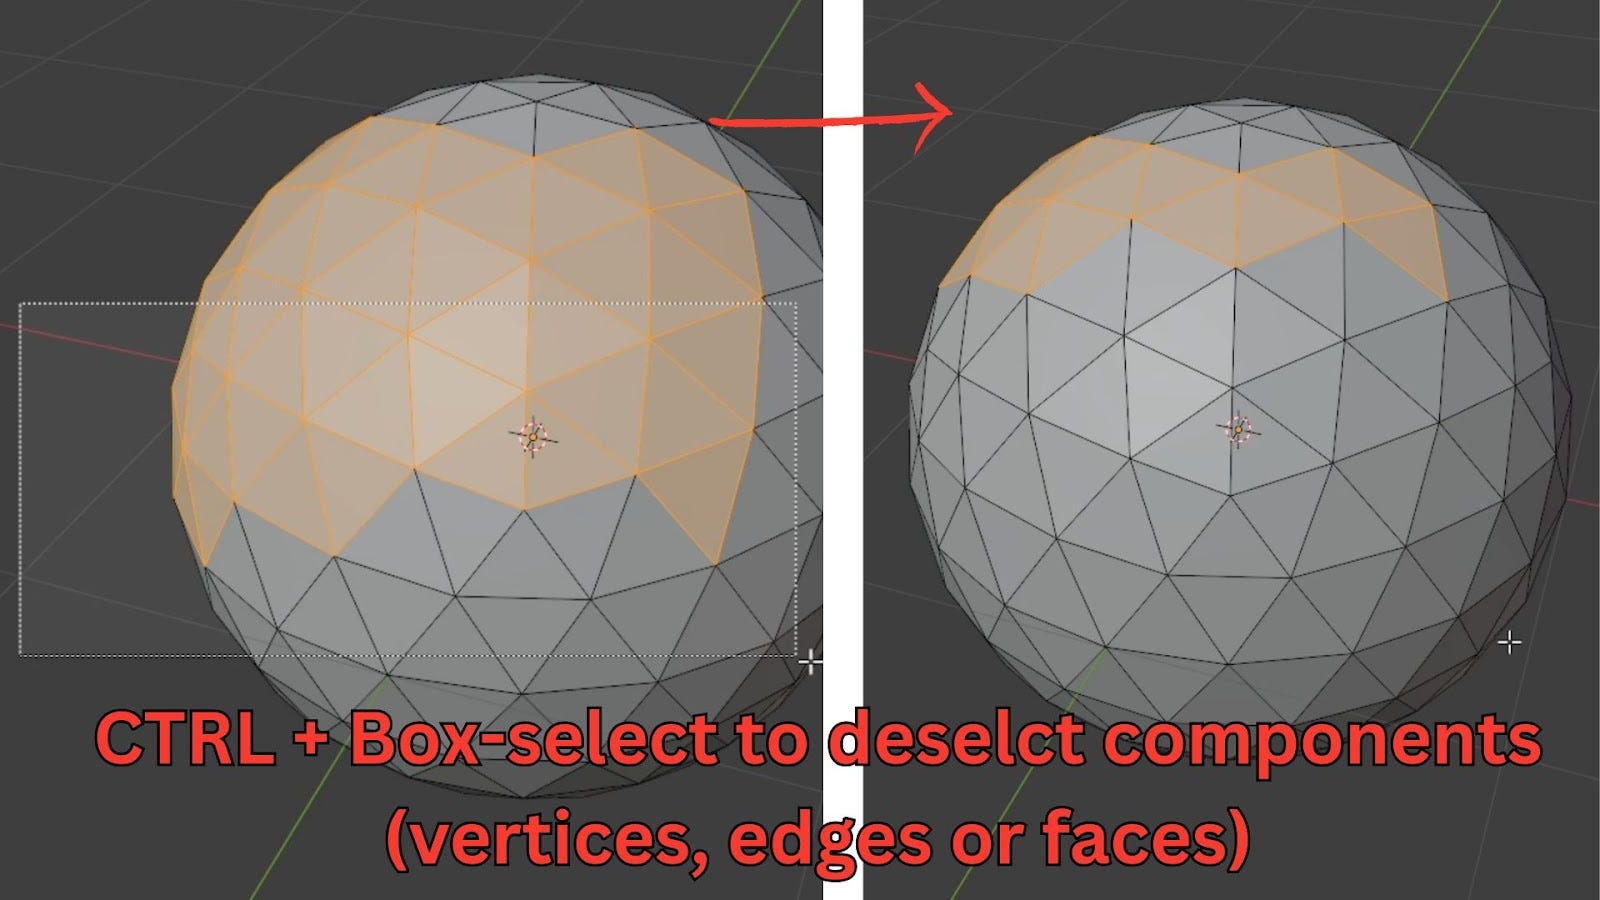
You can select these components by left-clicking or box-selecting. You can also Ctrl + Box-select to deselect.
In Edit Mode, you can still use G to grab/move, R to rotate, and S to scale, just like in Object Mode.
Practice by selecting some vertices, edges, and faces and trying to move them around. Always undo your changes to revert to the original Icosphere before proceeding.
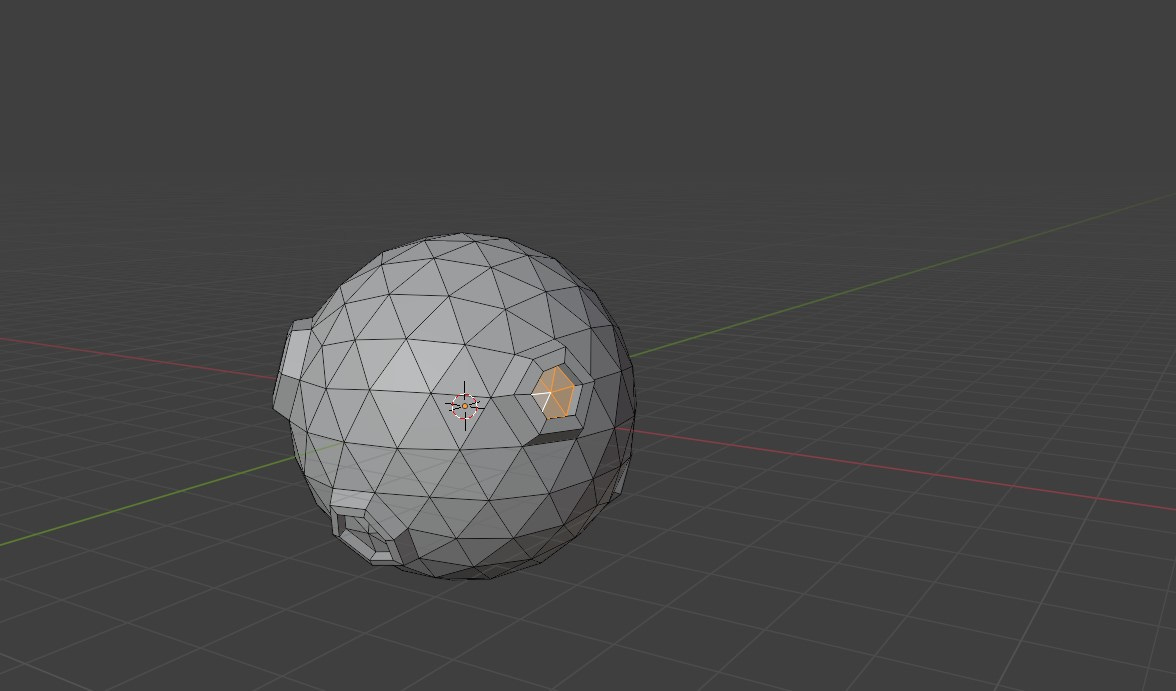
Creating Craters: Extrude and Inset
We'll use two fundamental modelling operations to create craters for our planet: Extrude and Inset.
Ensure you are in Face Select mode (shortcut 3).

Select a group of faces on your Icosphere that form a roughly pentagonal shape.
Extrude (E):
Press E. As you move your mouse, the selected faces will pull outwards, creating new geometry.

Pull them out a bit.

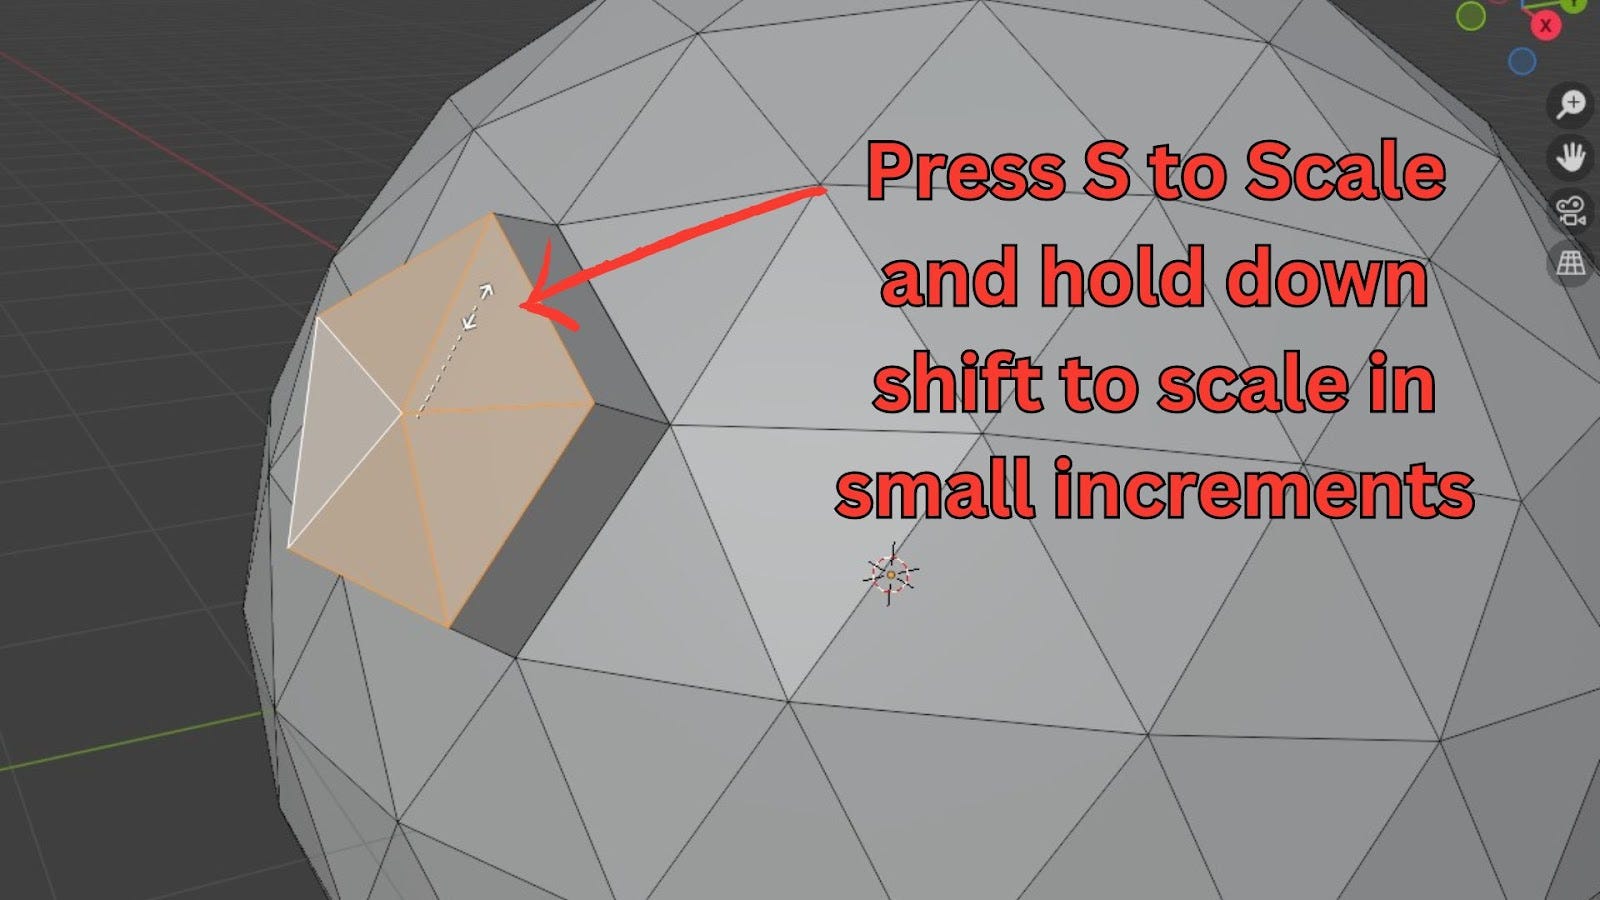
Then, press S to Scale them down slightly. Hold Shift for smaller increments. This creates the initial crater shape.
Inset (I):
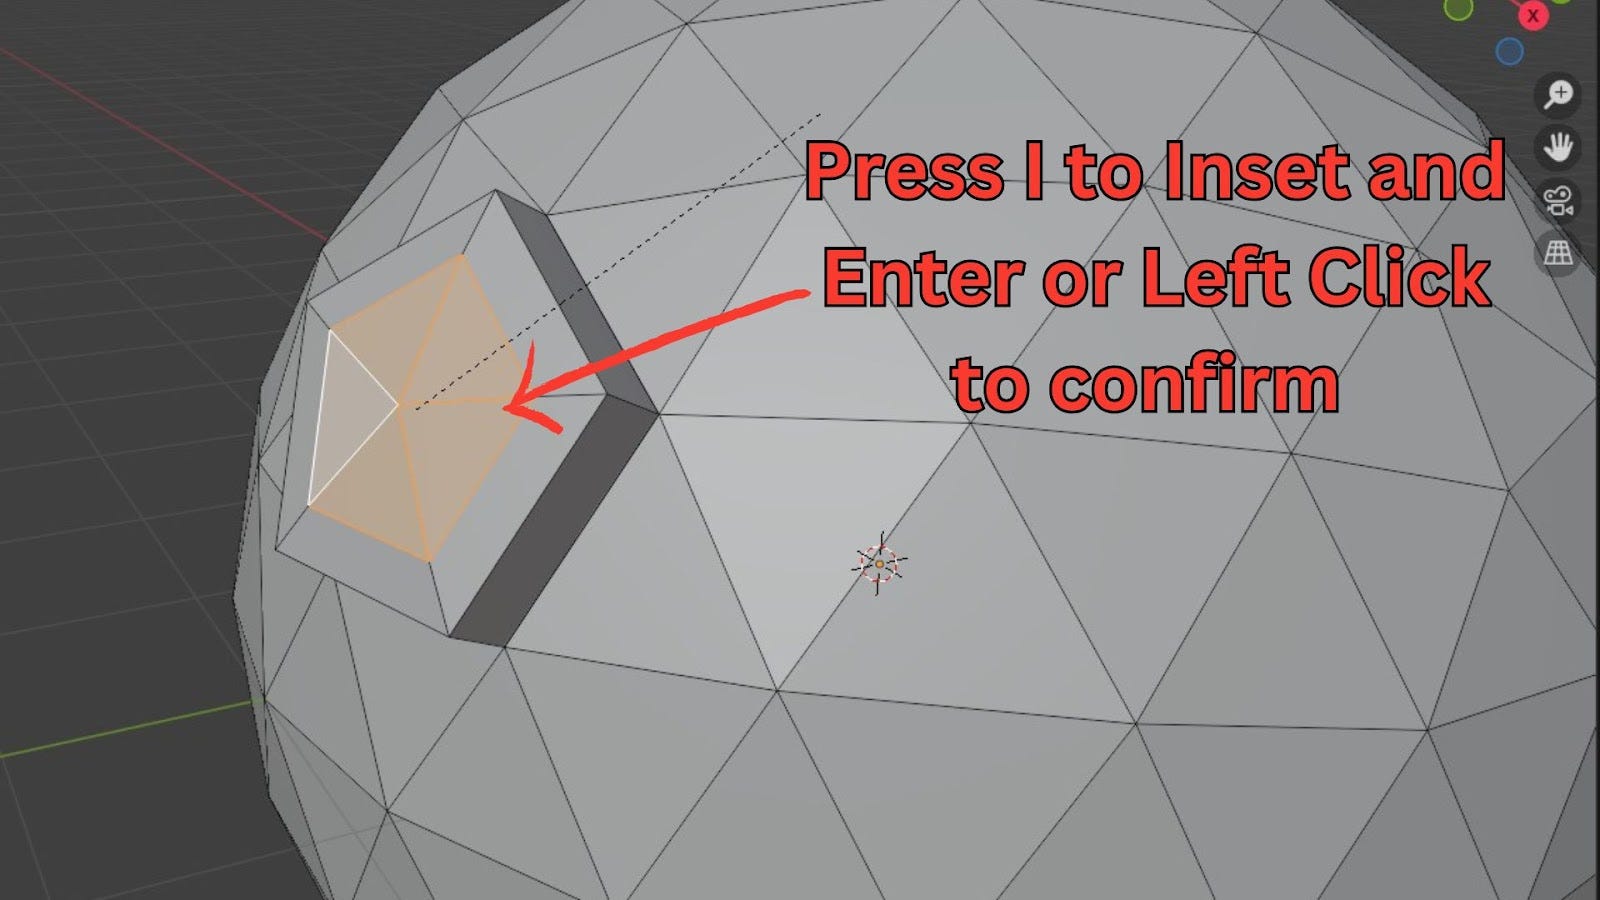
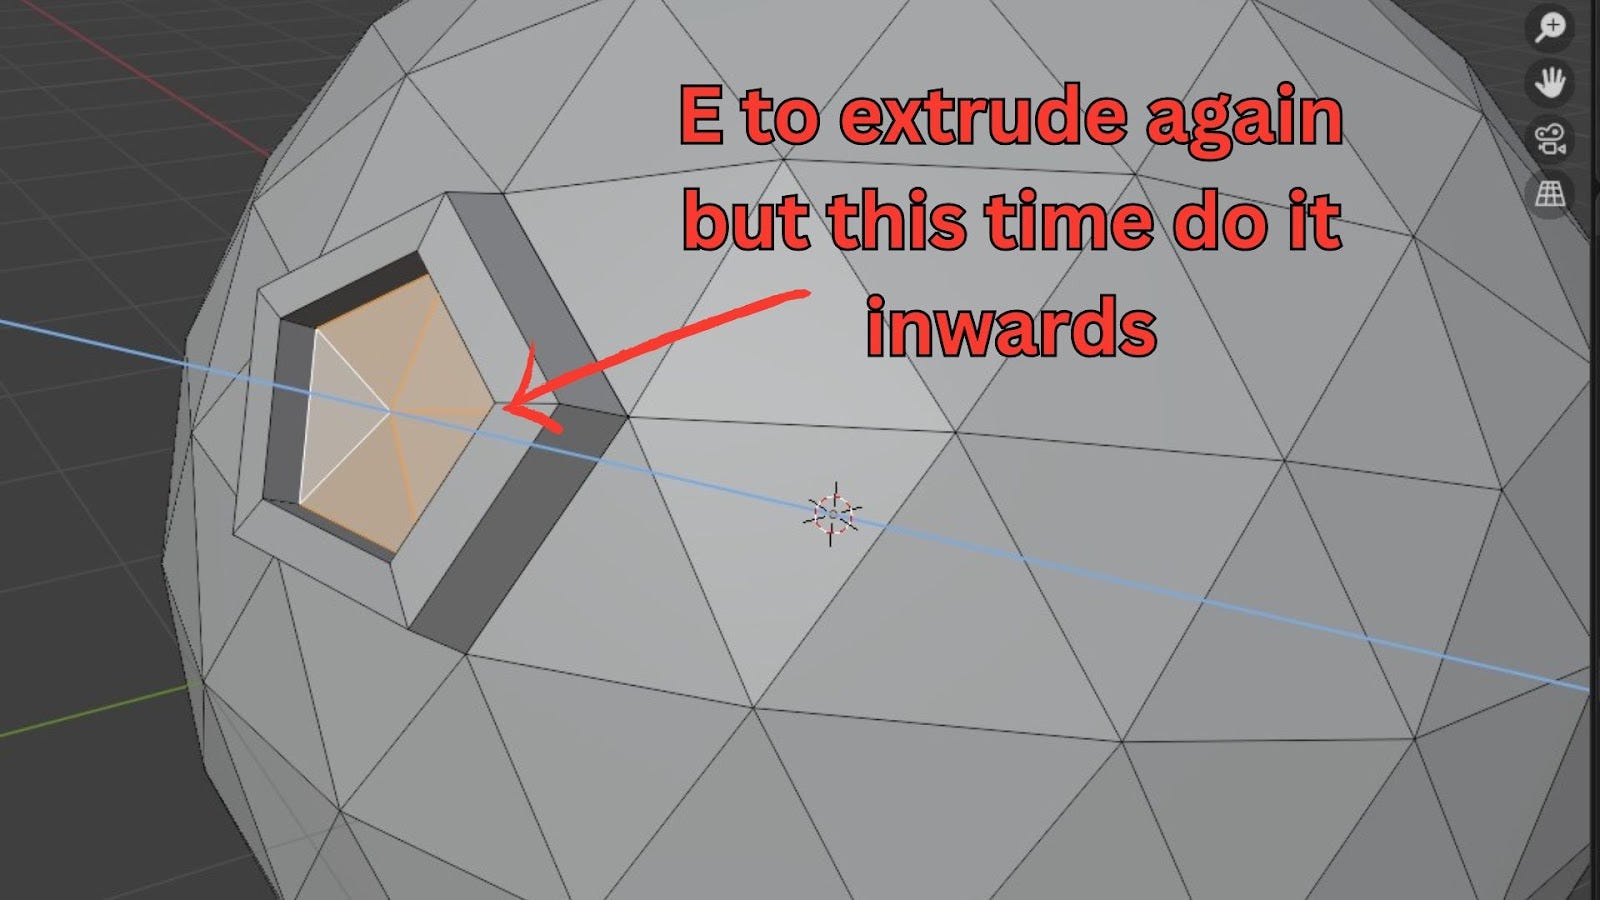
With the same faces still selected, press I. As you move your mouse, the faces will shrink inwards, creating a new set of faces within the original selection. Left-click to confirm.
Now, press E again to Extrude these newly inset faces inwards, creating the depth of the crater.
You've created your first crater!
Troubleshooting: Overlapping Faces (Merge by Distance)
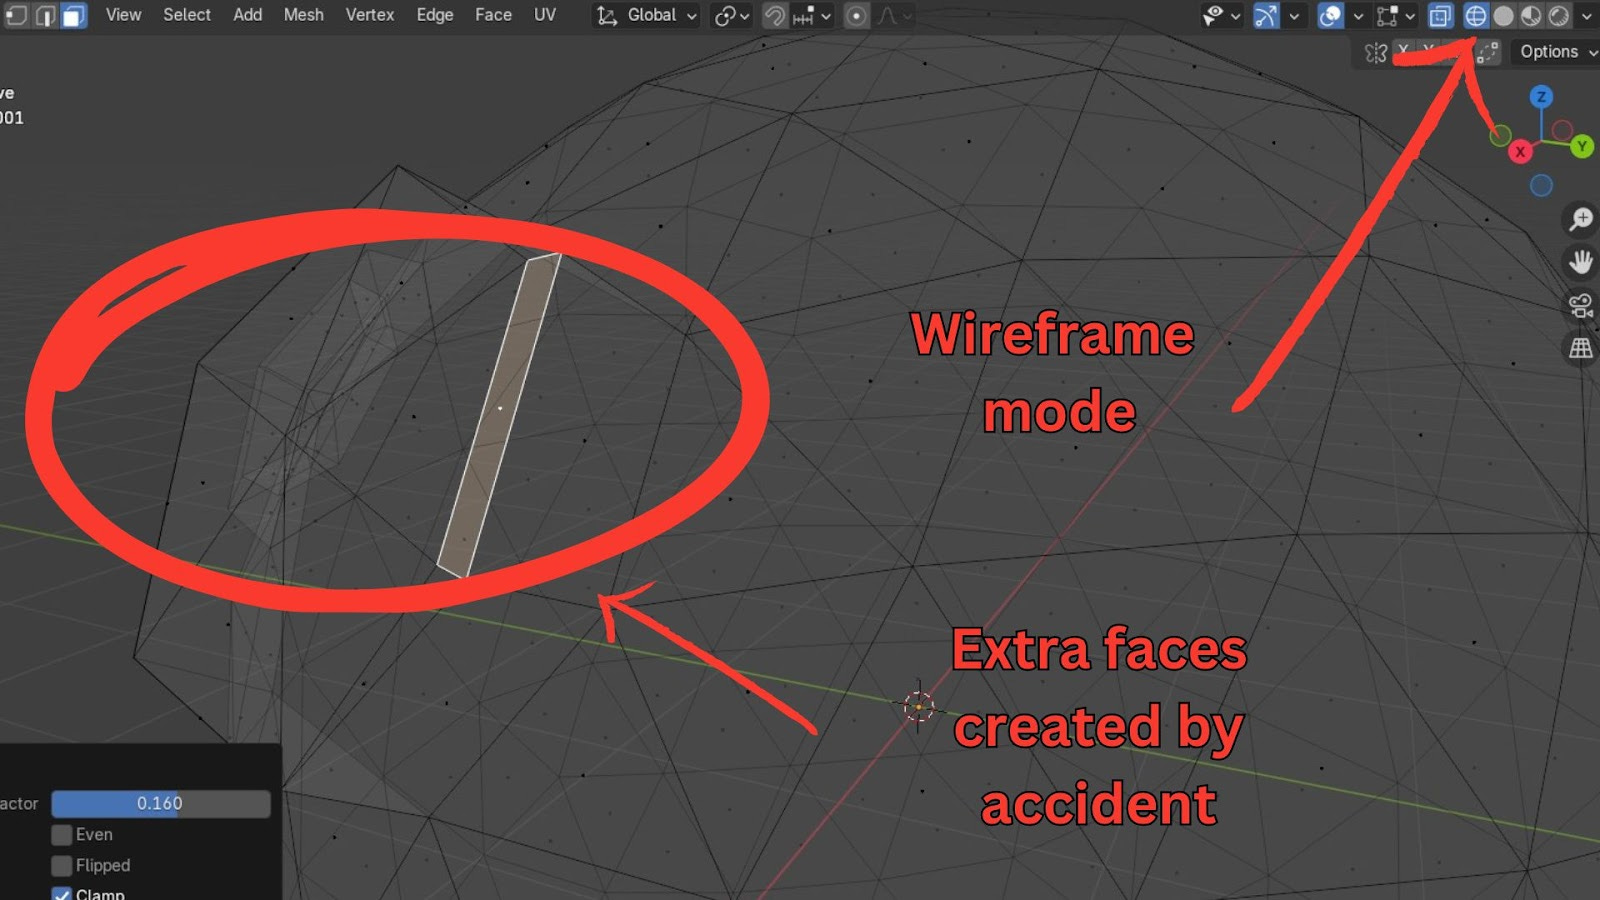
A common beginner mistake is accidentally inserting faces without moving them. This creates overlapping geometry that can cause rendering issues.
If you accidentally press I and then immediately left-click without moving the mouse, it looks like nothing happened. But if you go to Wireframe mode, you'll see new faces created on top of the old ones.
To fix this:
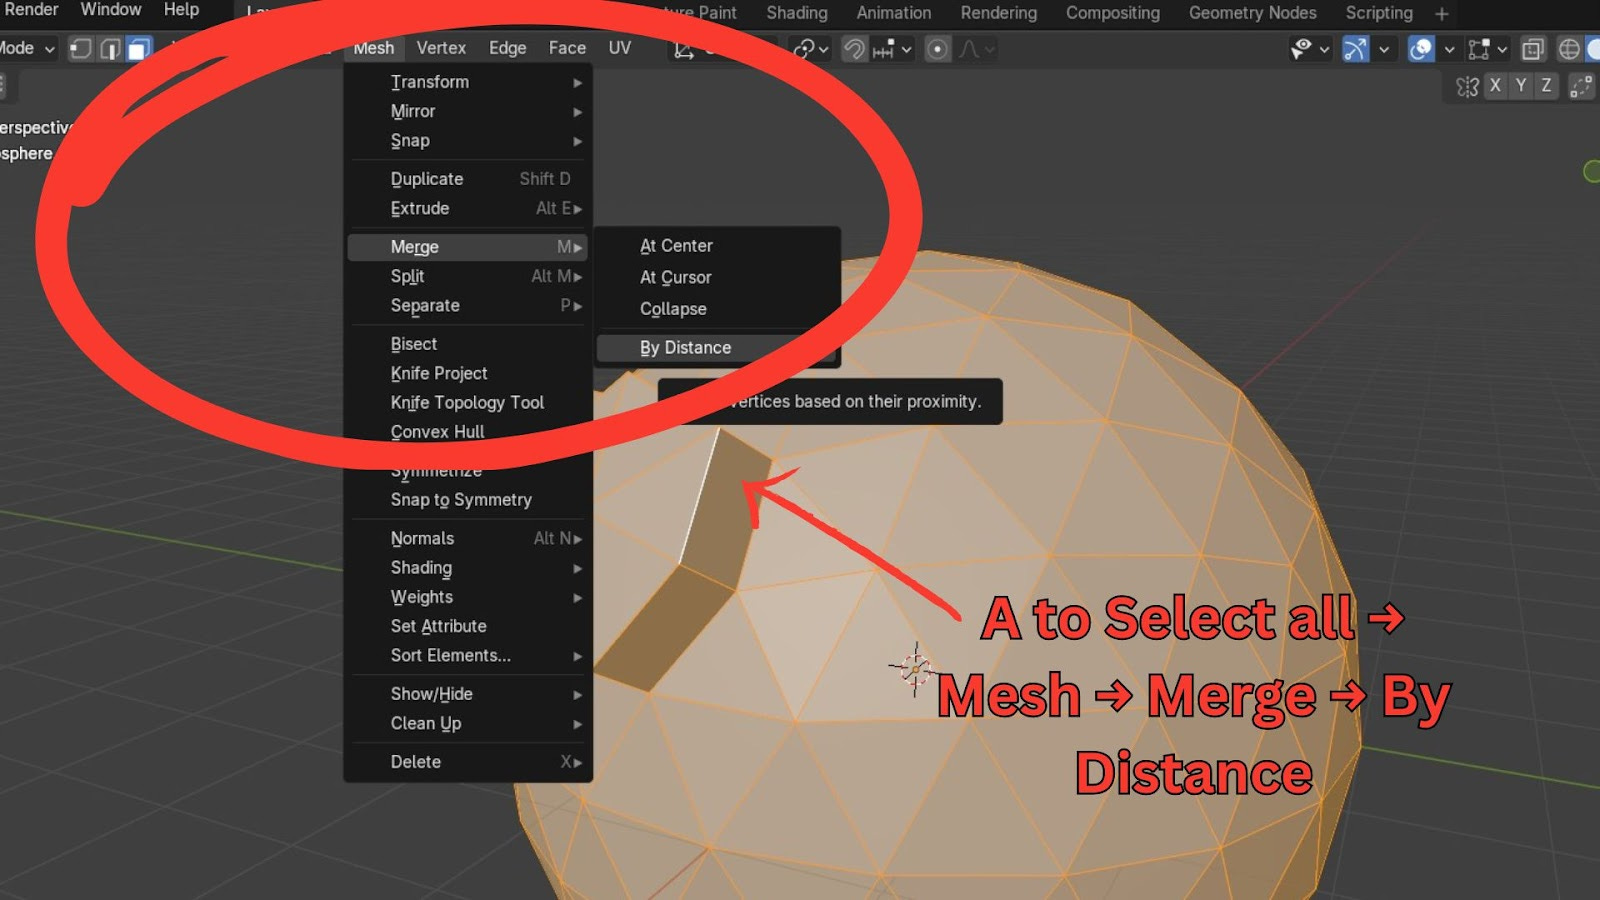
Select all faces (press A).
Go to Mesh > Merge > By Distance (shortcut M > By Distance).
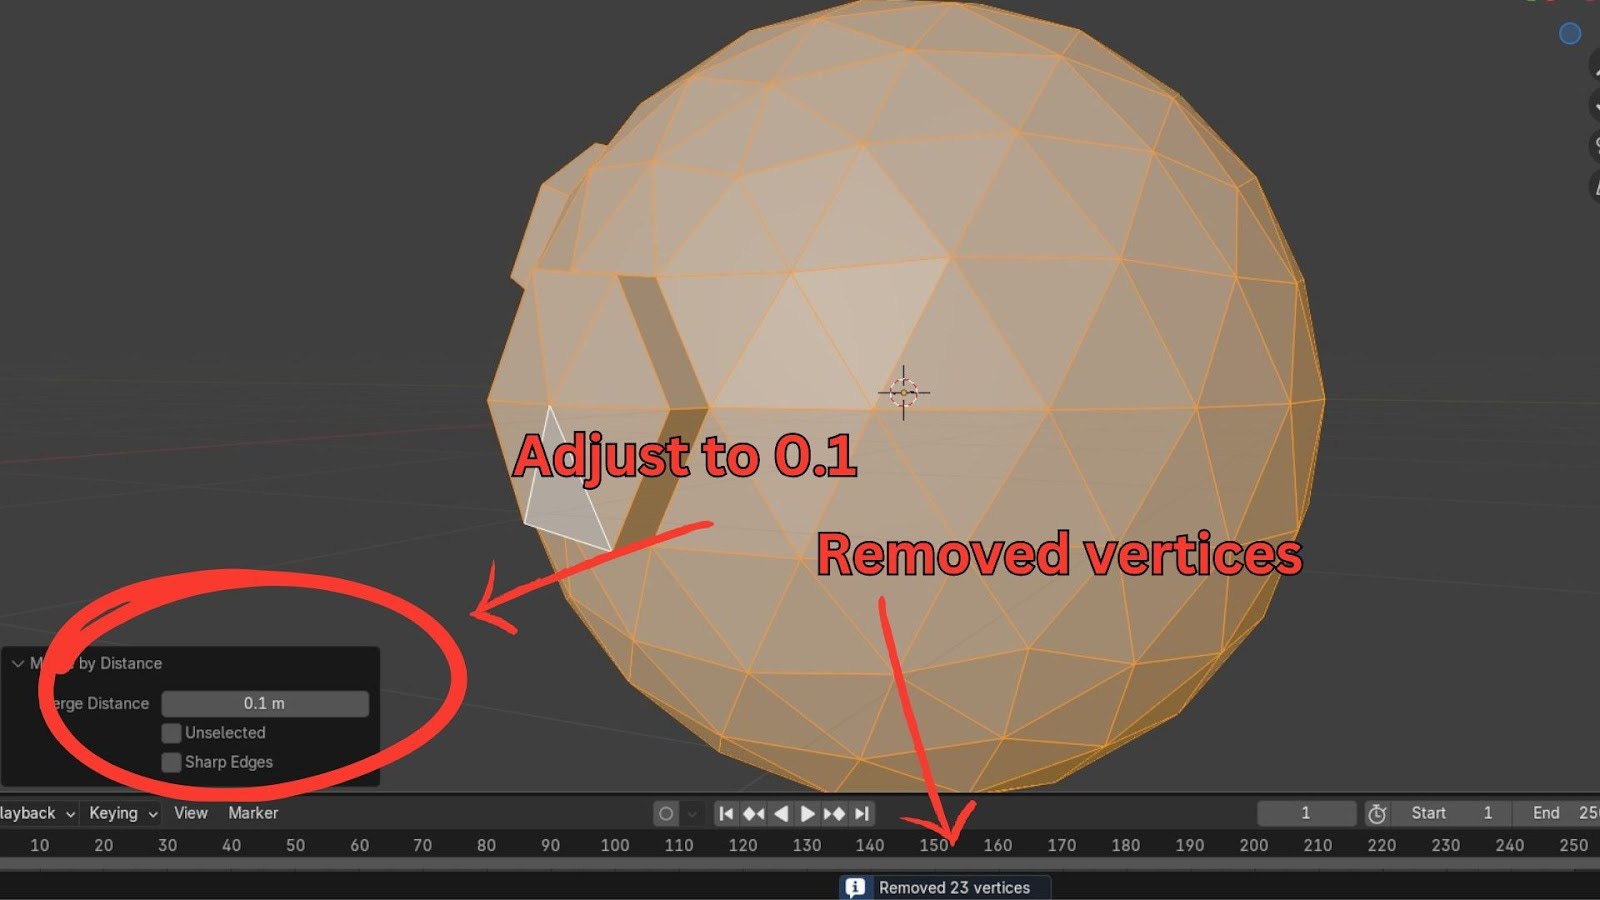
A message at the bottom will tell you how many vertices were removed (e.g., "Removed 5 vertices"). You might need to adjust the Merge Distance in the pop-up panel to a small value like 0.1m for it to work.

Practice Challenge: Random Craters
Now, go around your Icosphere and create various craters using the Extrude and Inset techniques. Experiment with extruding inwards for some craters and outwards for others. Leave a relatively clear patch at the top, which will be our rocket launch site.
Once your crators are arranged, save your work by going to File > Save As. And I will see you in the next part.