

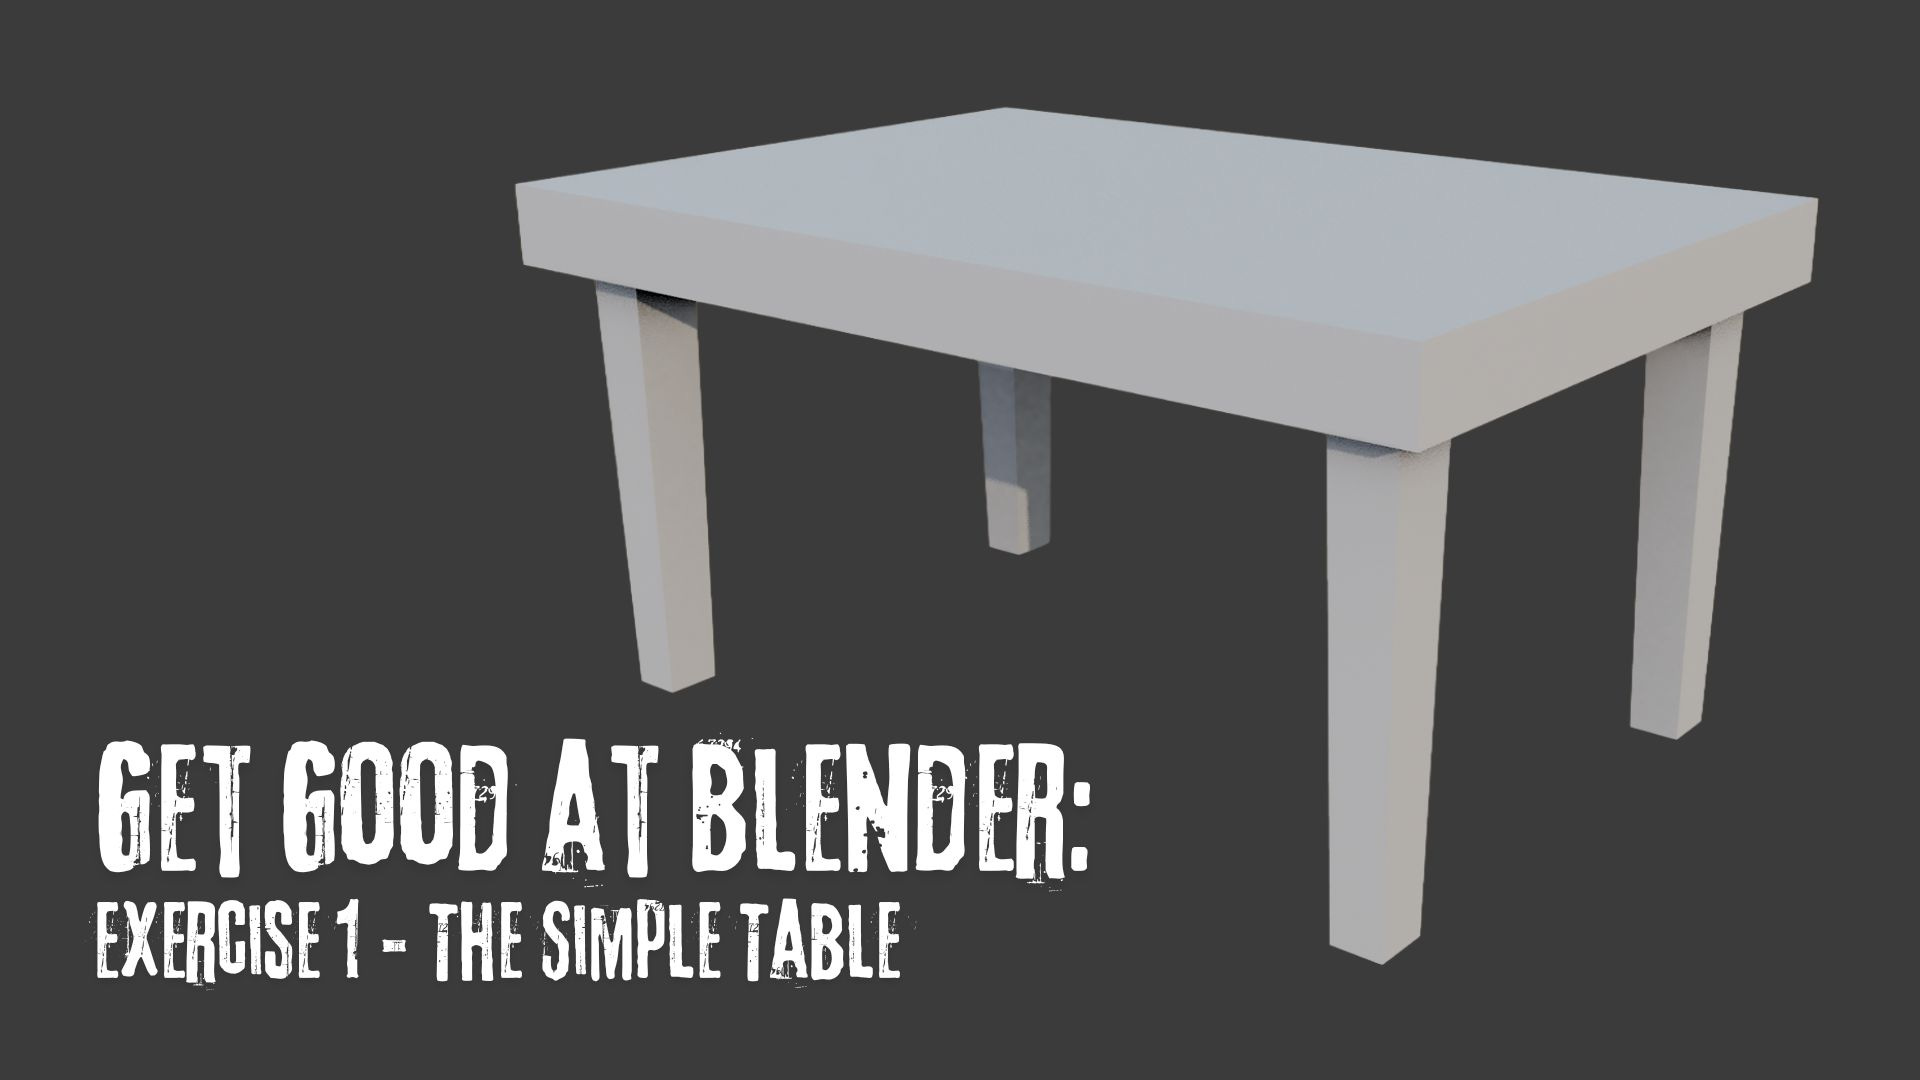
Get Good At Blender: Modelling a Simple Table
Exercise 1

Welcome to this "Get Good at Blender" series, updated for Blender 4.4! This series is designed to help you practice your modelling skills and develop a deeper understanding of creating shapes in Blender. We'll start simple and gradually increase the complexity.
This isn’t for complete beginners and requires a basic understanding of the interface so you are just starting out in blender then try out my free ‘Blender 4: Your Complete Beginner's Guide to 3D’.
👉 https://grantabbitt.gumroad.com/l/fufbi
Whether you're testing the waters or committing to the full course, this free guide is the perfect place to start. No risk. Just your first steps into the world of 3D.
If you want an in-depth, detailed and methodical course, then check out my
Complete Blender Creator Course for only $15
OR Learn Blender with my 4-course Blender Beginner Bundle for only $30.
Exercise 1: The Simple Table
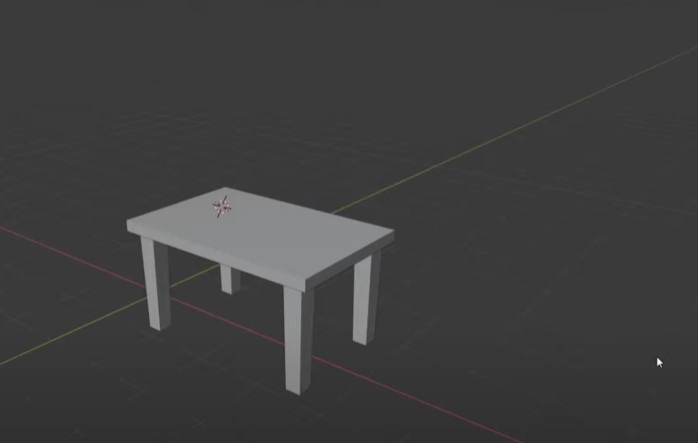
Let's start with your first modelling challenge: a basic table. Have a look at the target shape and try to reproduce it on your own.
How to Model the Table
This table might seem simple, but it introduces an important concept: thinking about your objects as separate elements. Many beginners might try to create this table from a single cube using loop cuts and extrusions, but a simpler approach is to treat the tabletop and legs as individual objects.
Why separate objects? Consider if the parts are separate in real life. Table legs are usually separate from the tabletop, so it makes sense to model them that way. While you might worry about selecting multiple objects to move them, you can always join them later using Ctrl + J. Overlapping geometry isn't always a significant issue, especially for non-deforming objects.
Here’s a quick walkthrough on how to model it:
Add the Tabletop:
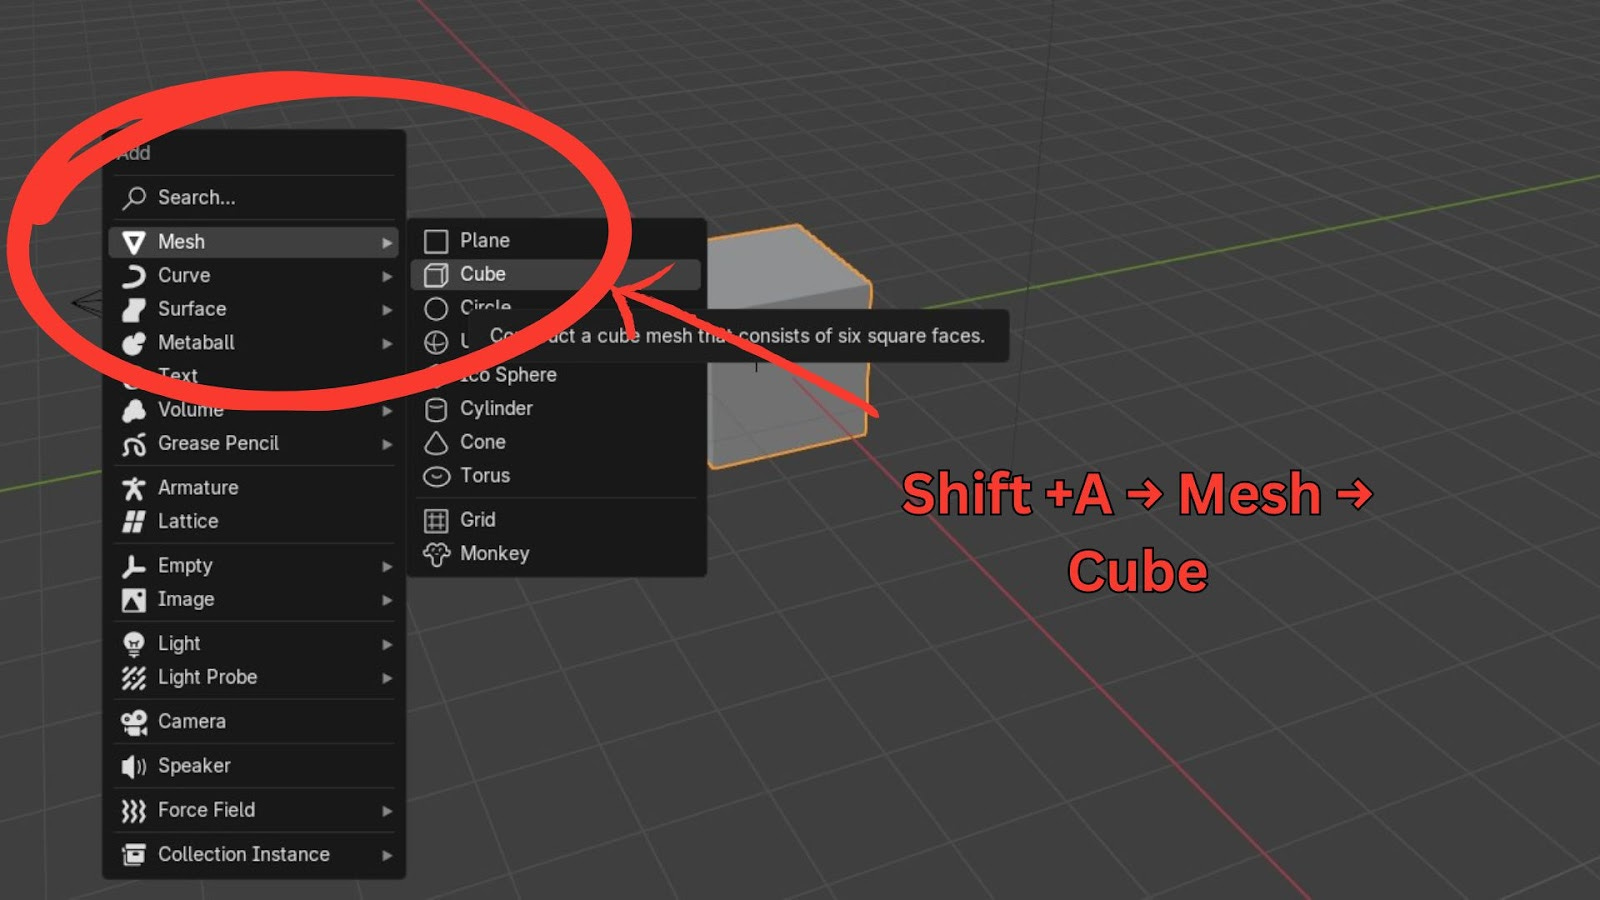
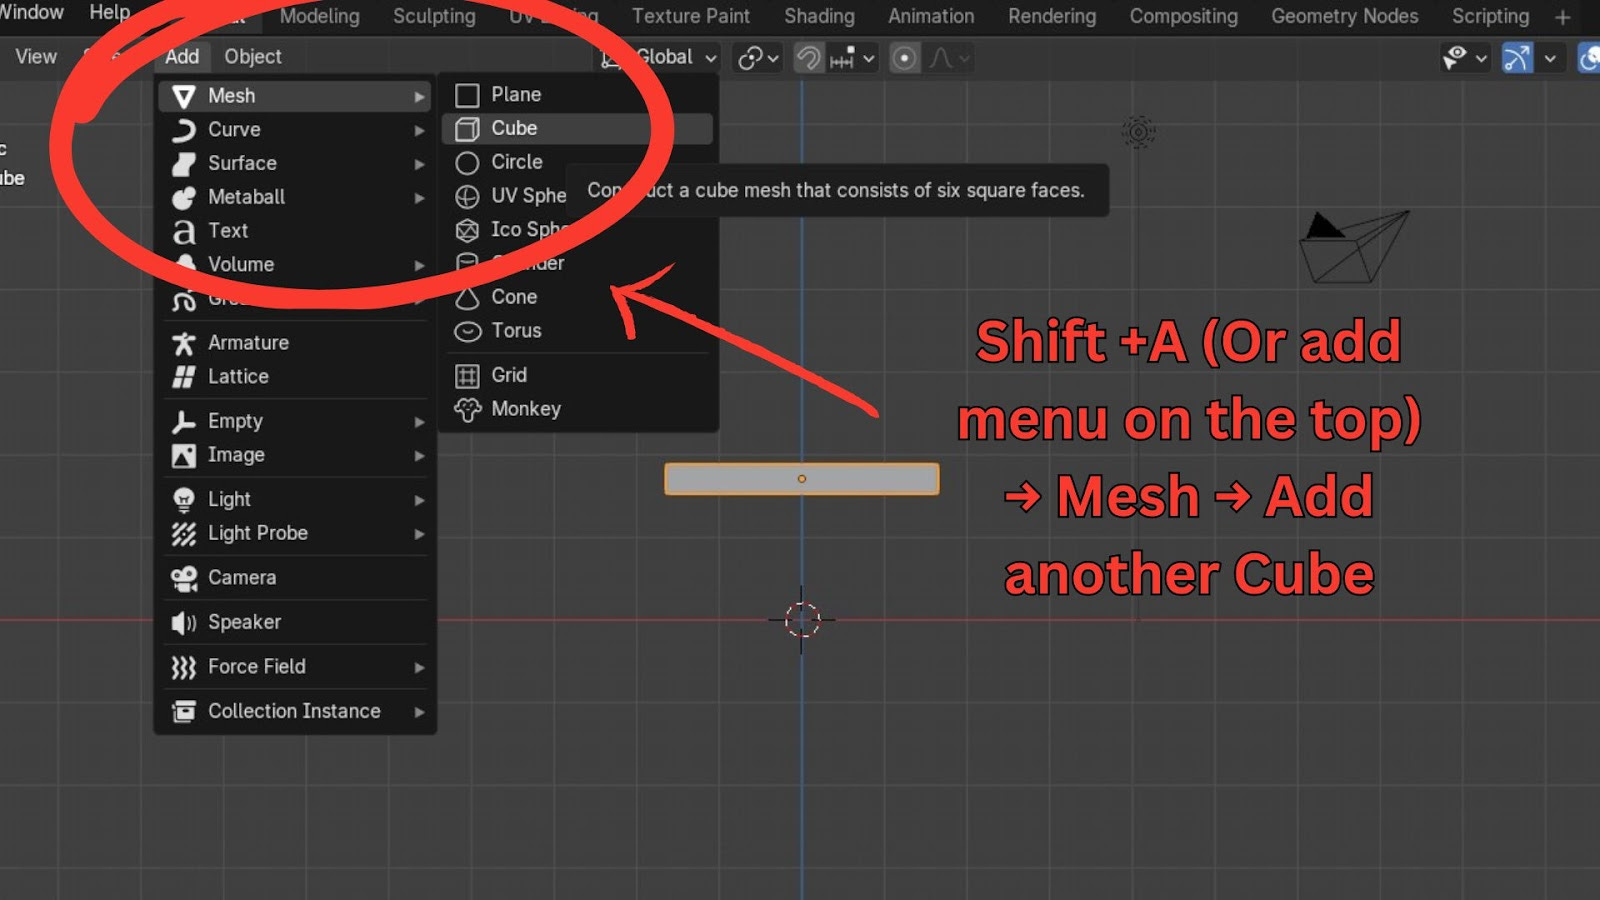
Add a Cube: Press Shift + A > Mesh > Cube.
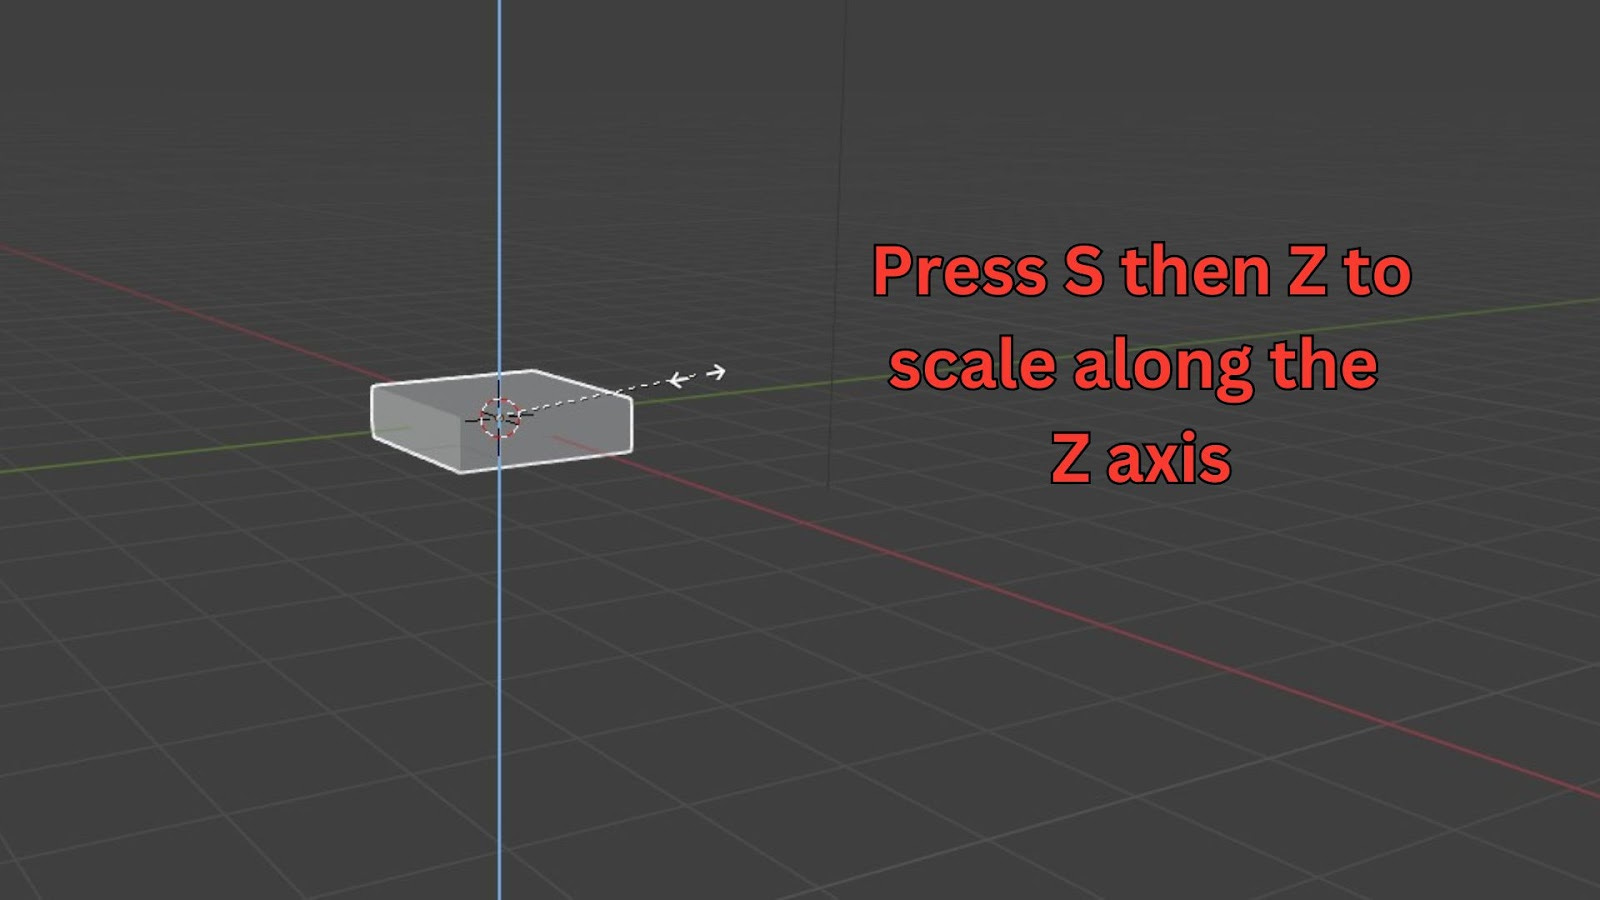
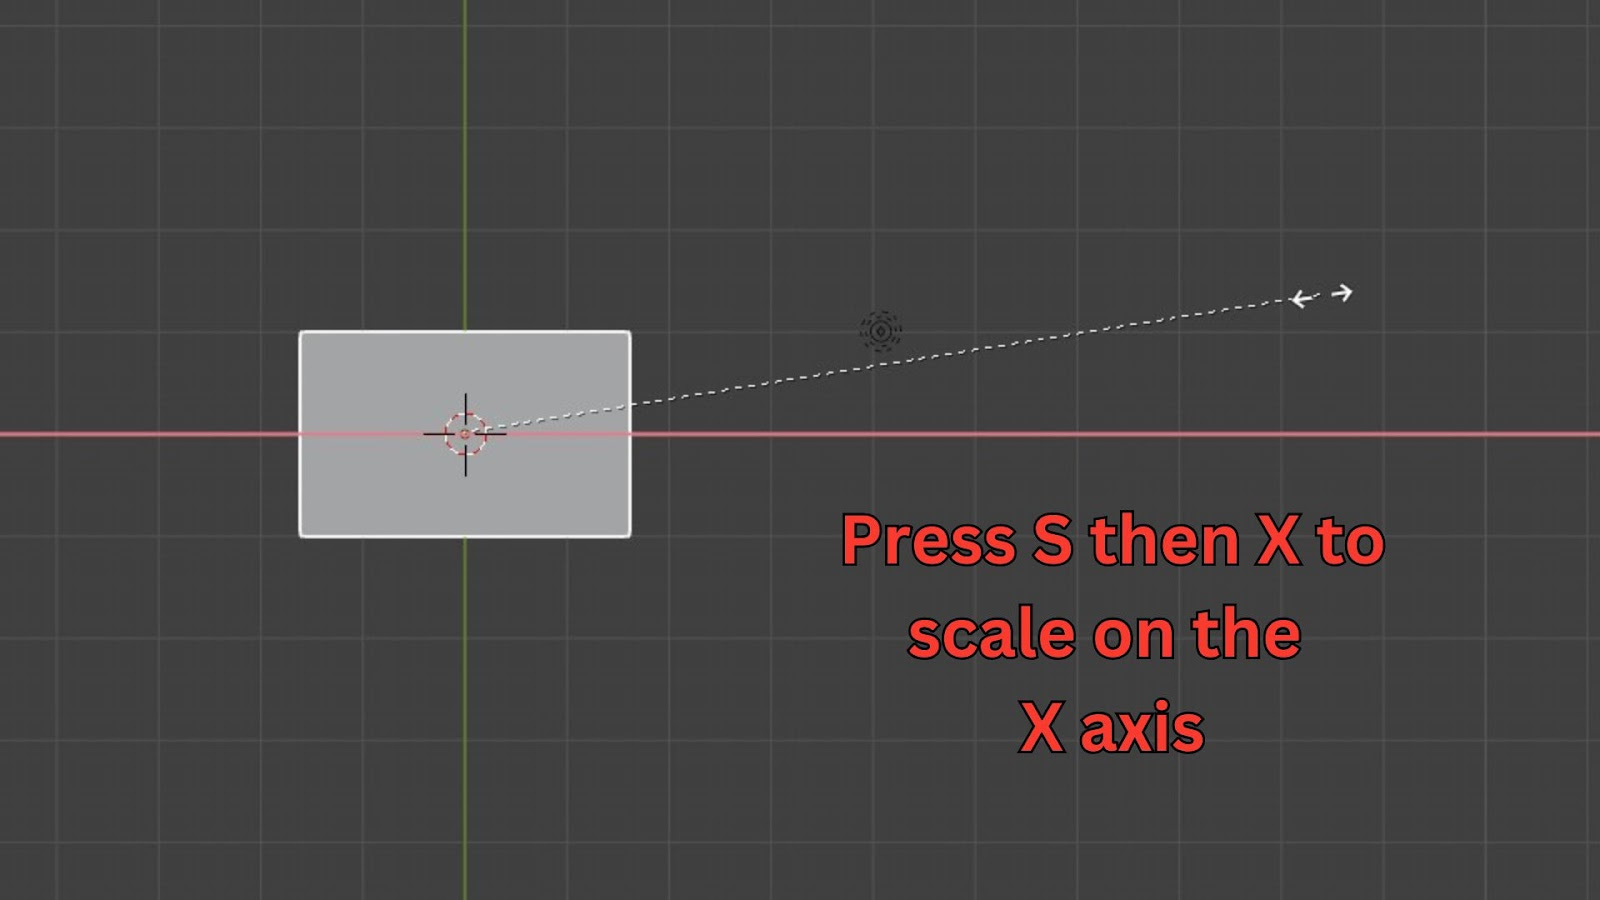
Scale it along the Z-axis (S then Z) to flatten it into a tabletop.
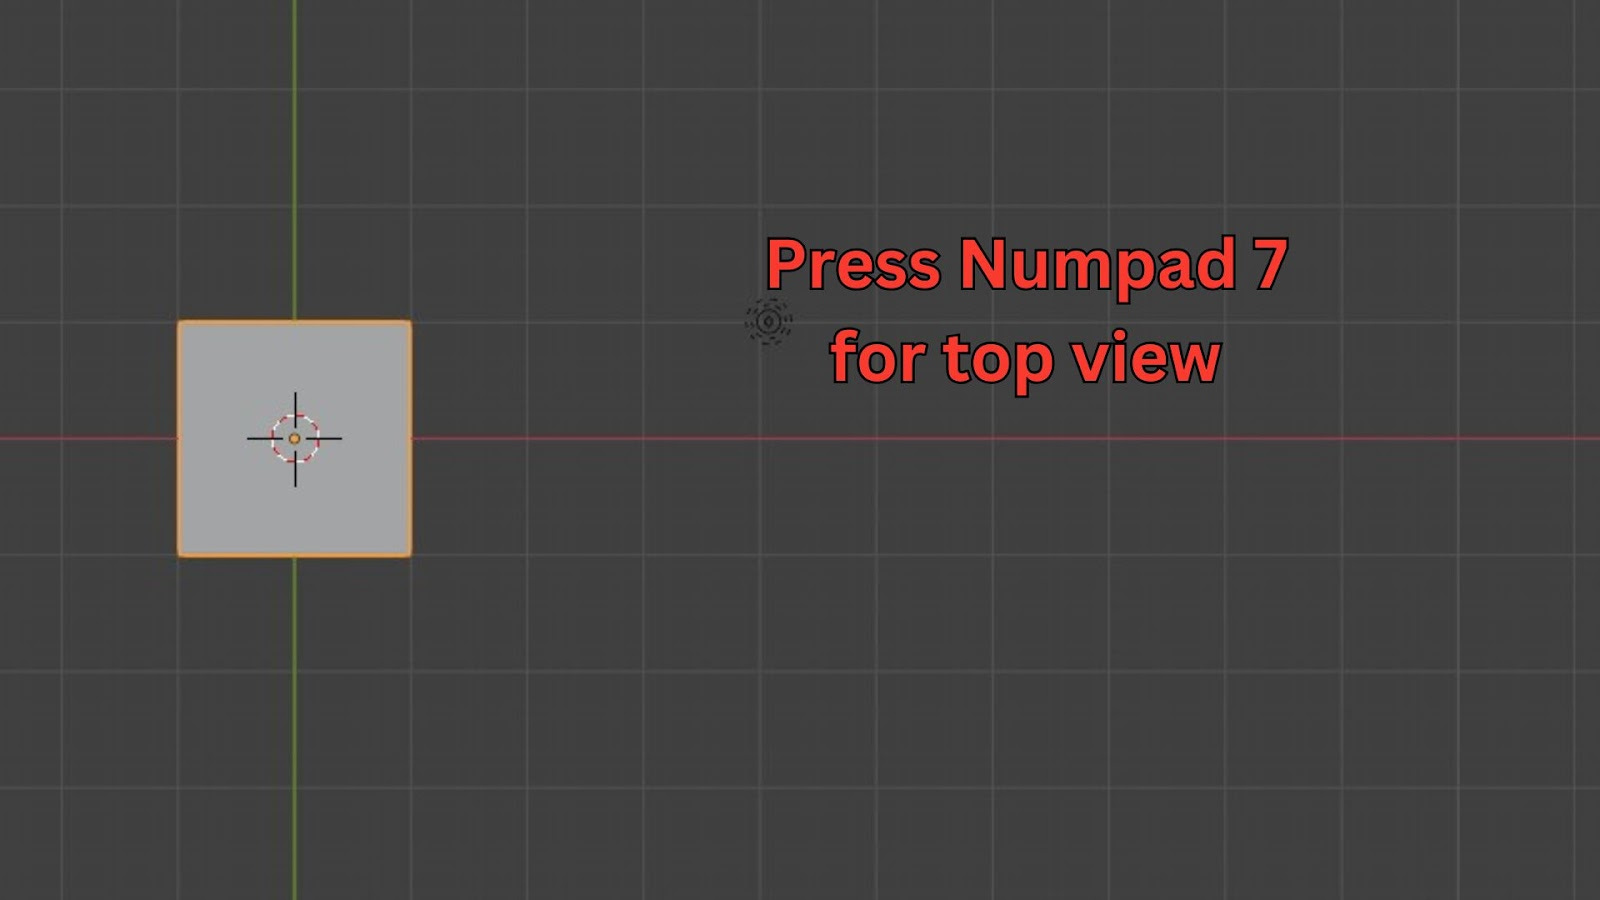
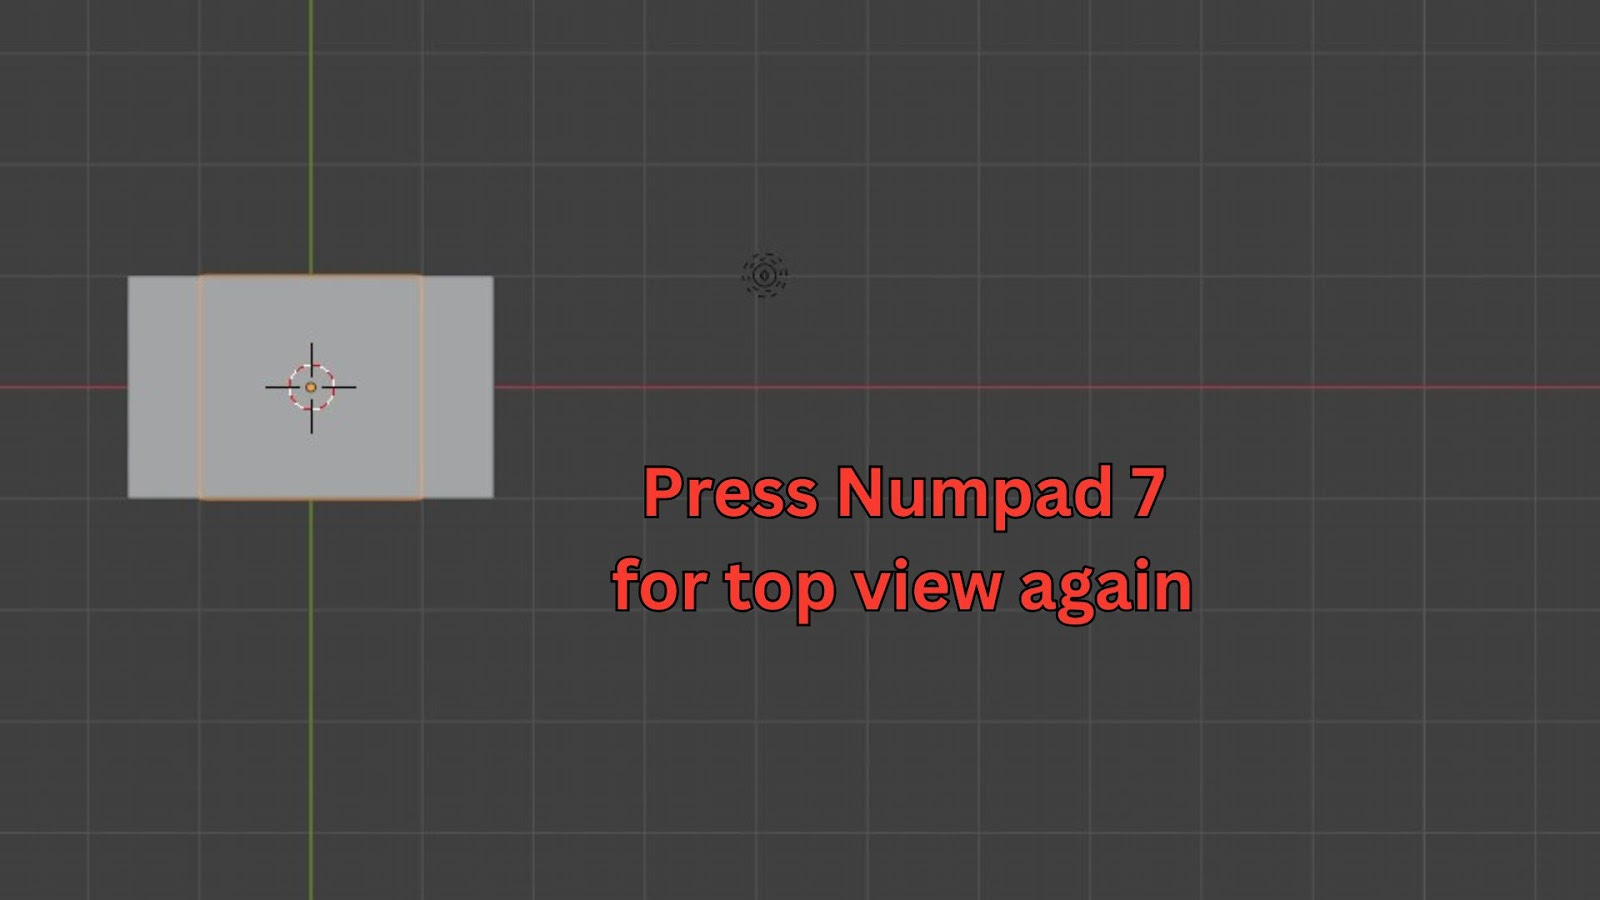
Go to a top view (Numpad 7 or the Z-axis gizmo in the top-right corner).
Scale it along the X-axis (S then X) to the desired width.
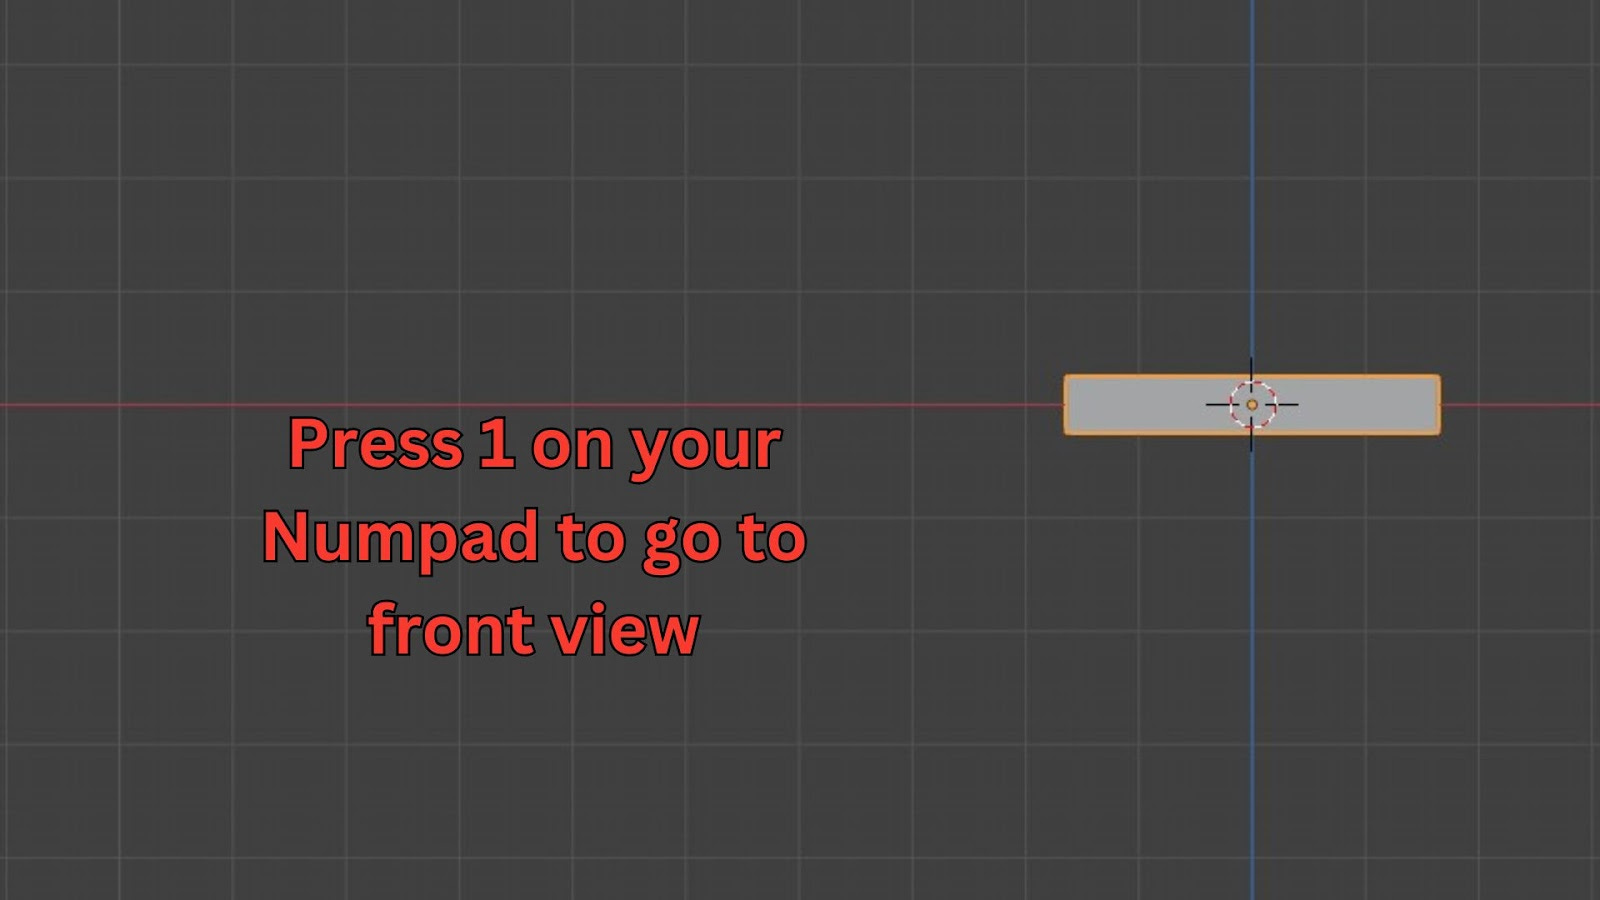
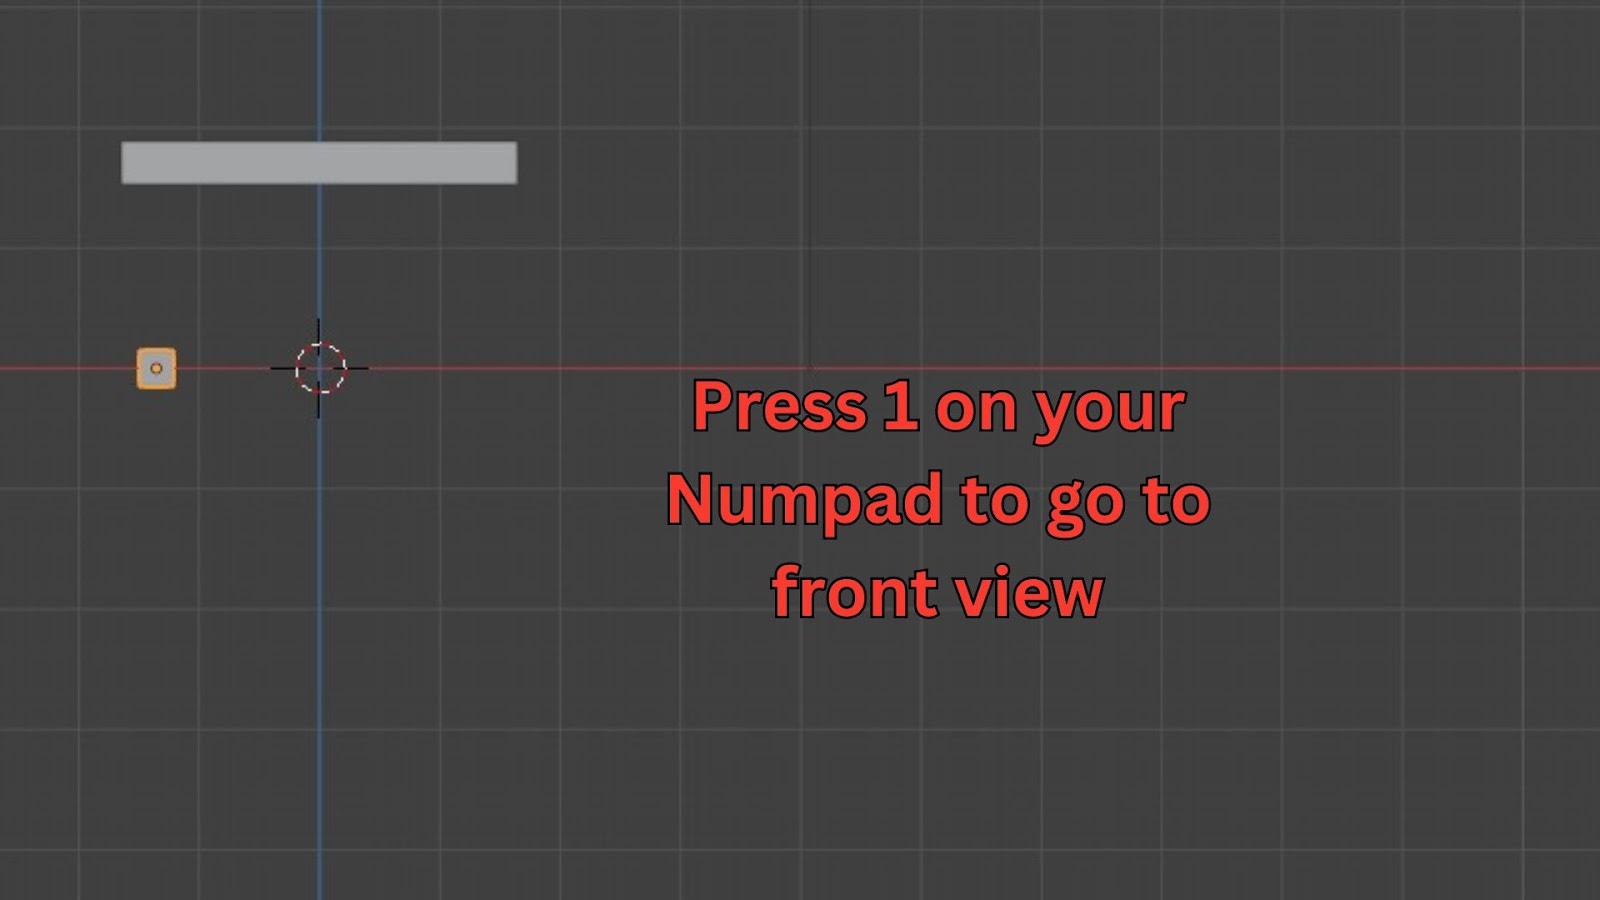
Go to a front view (Numpad 1 or the Y-axis gizmo).
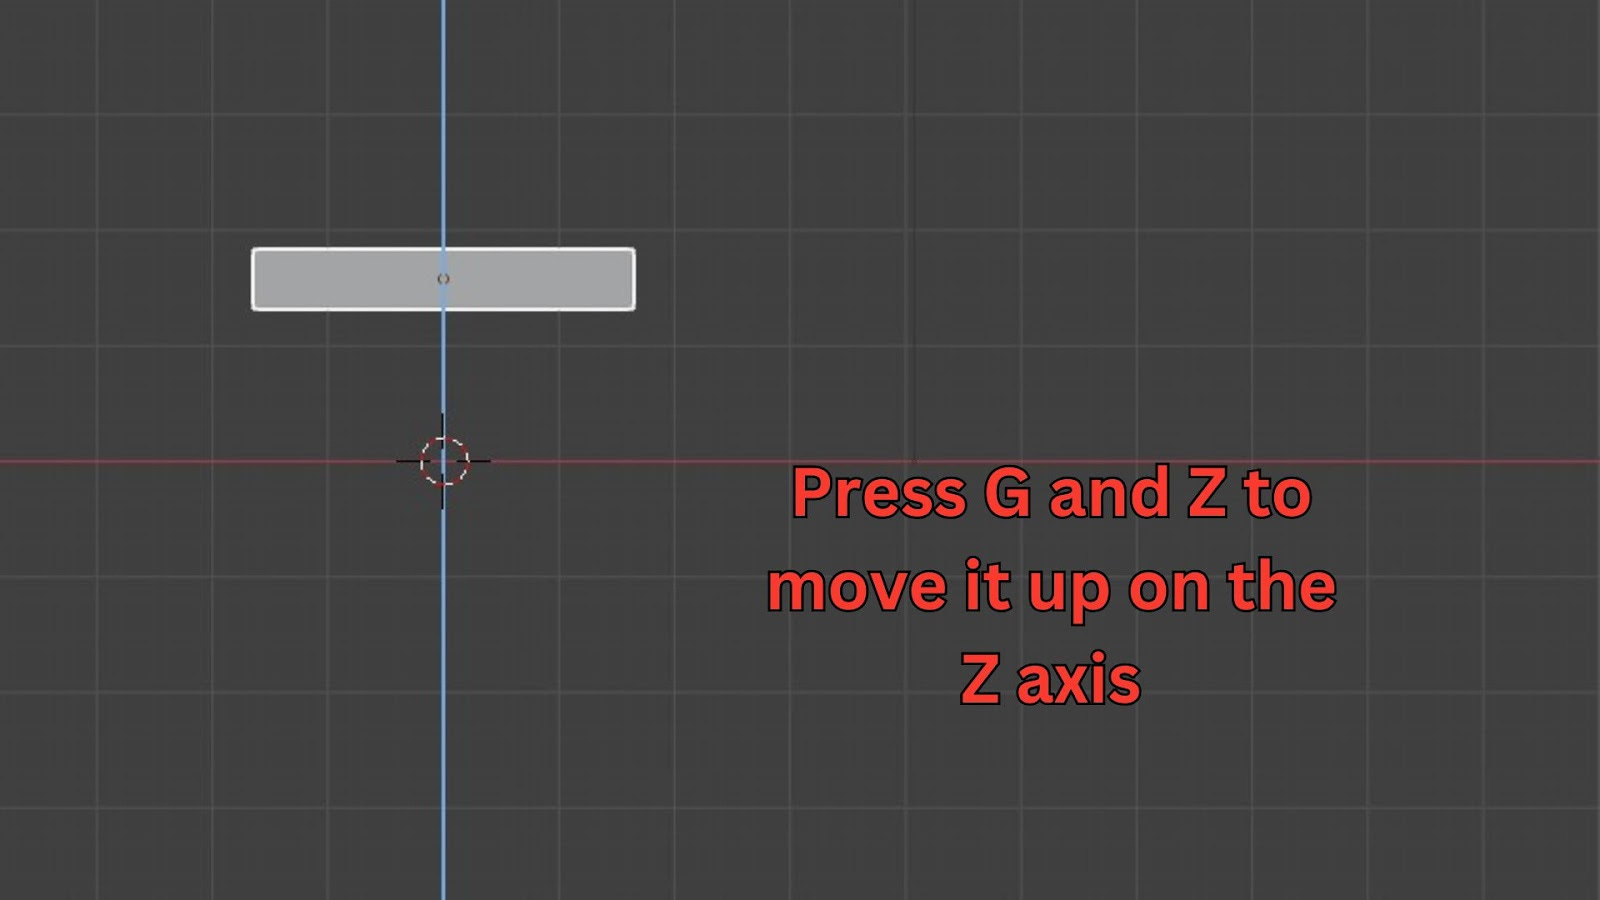
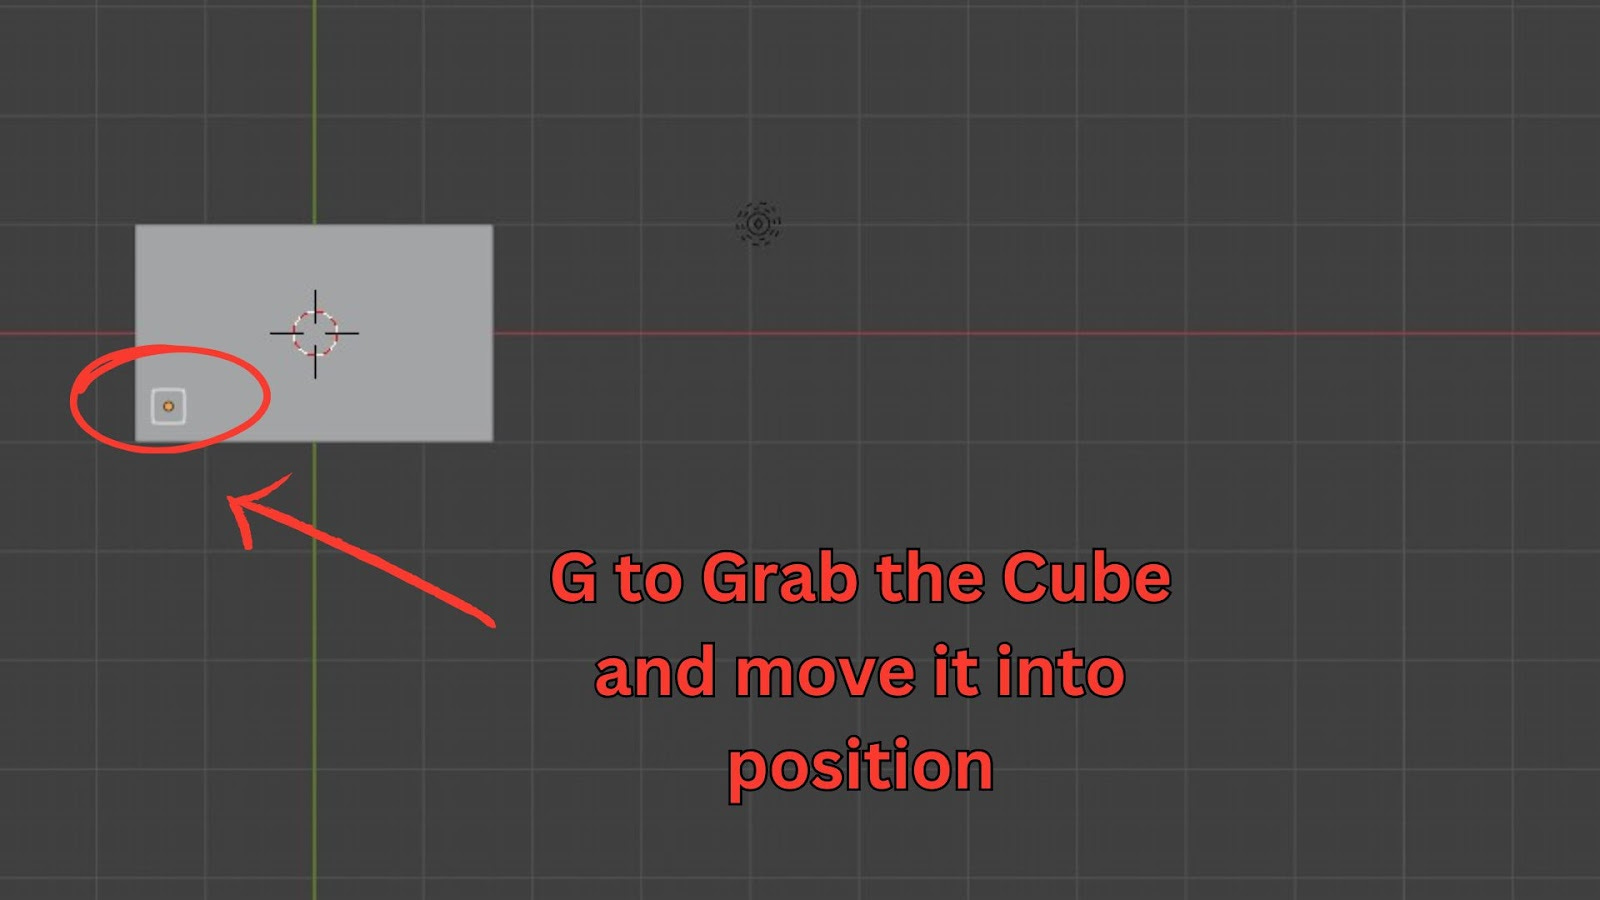
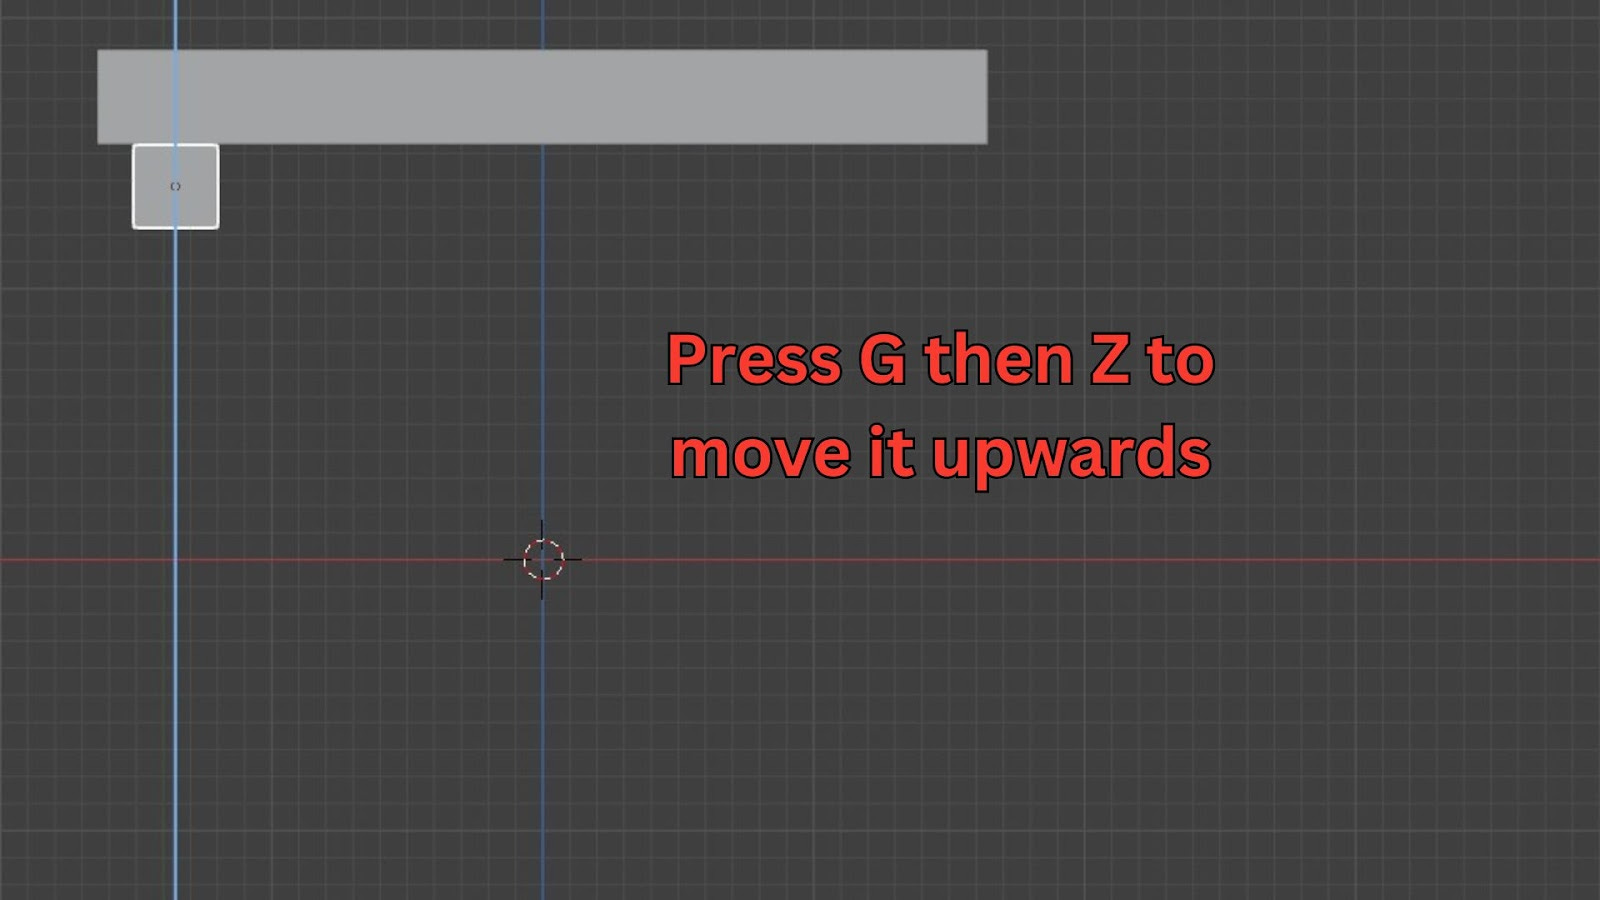
Move it along the Z-axis (G then Z) to lift it above the grid.
Adjust the Z-scale again if needed.
Create the First Leg:
Add another Cube: Shift + A > Mesh > Cube.
Go to top view (Numpad 7).
Scale the cube down significantly (S) and move it to where one leg should be.
Go to front view (Numpad 1).
Move the leg along the Z-axis (G then Z) so its top is aligned with the bottom of the tabletop.
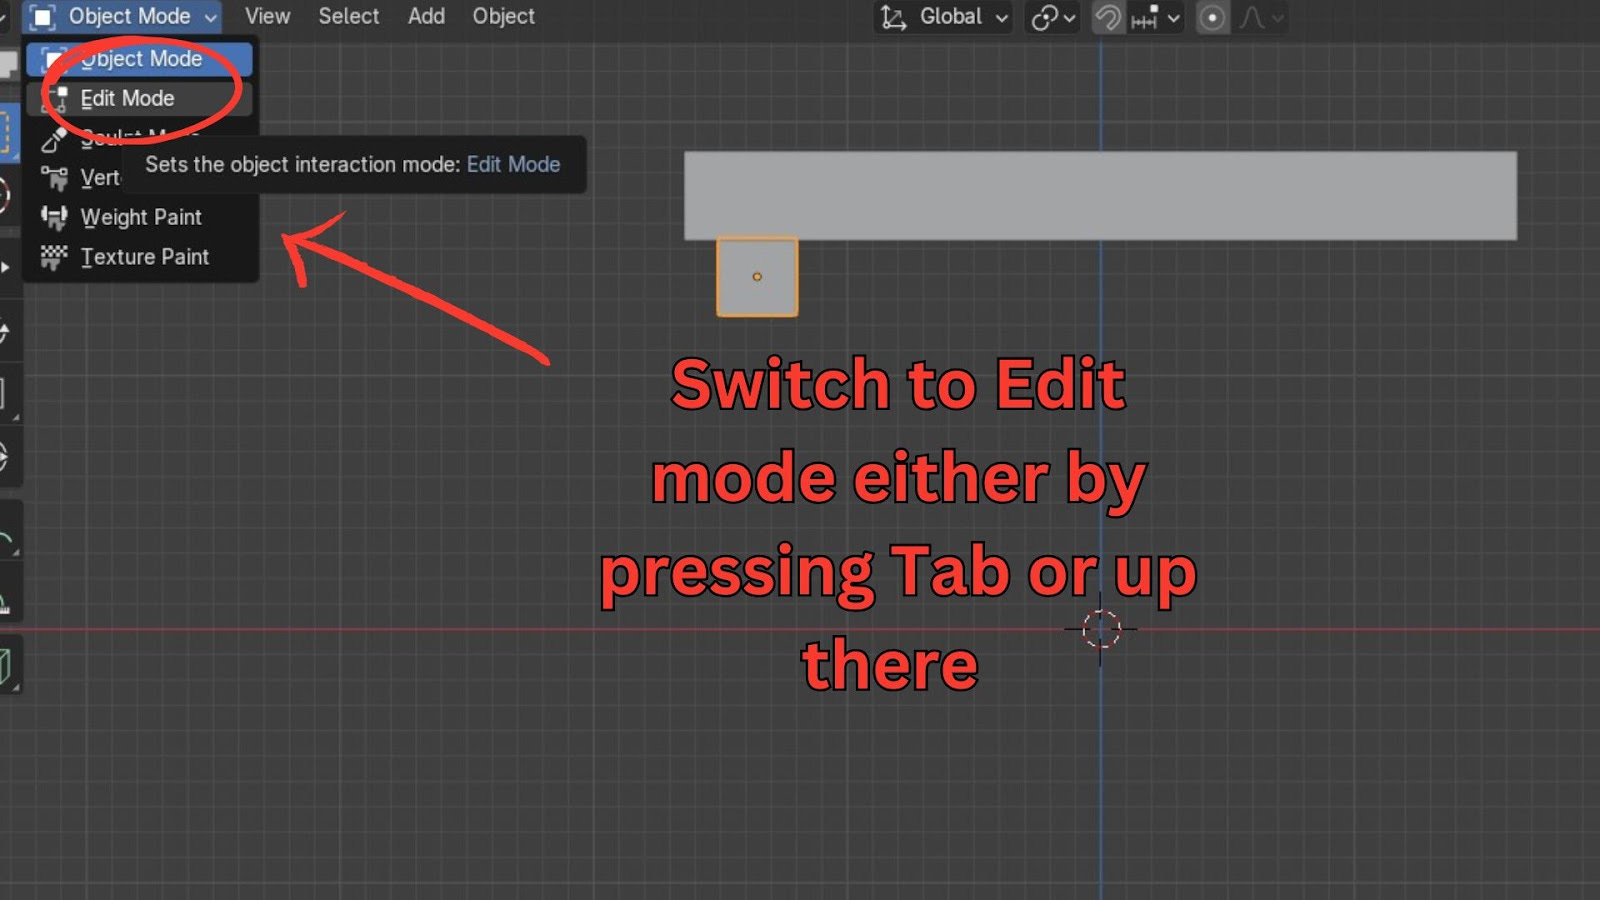
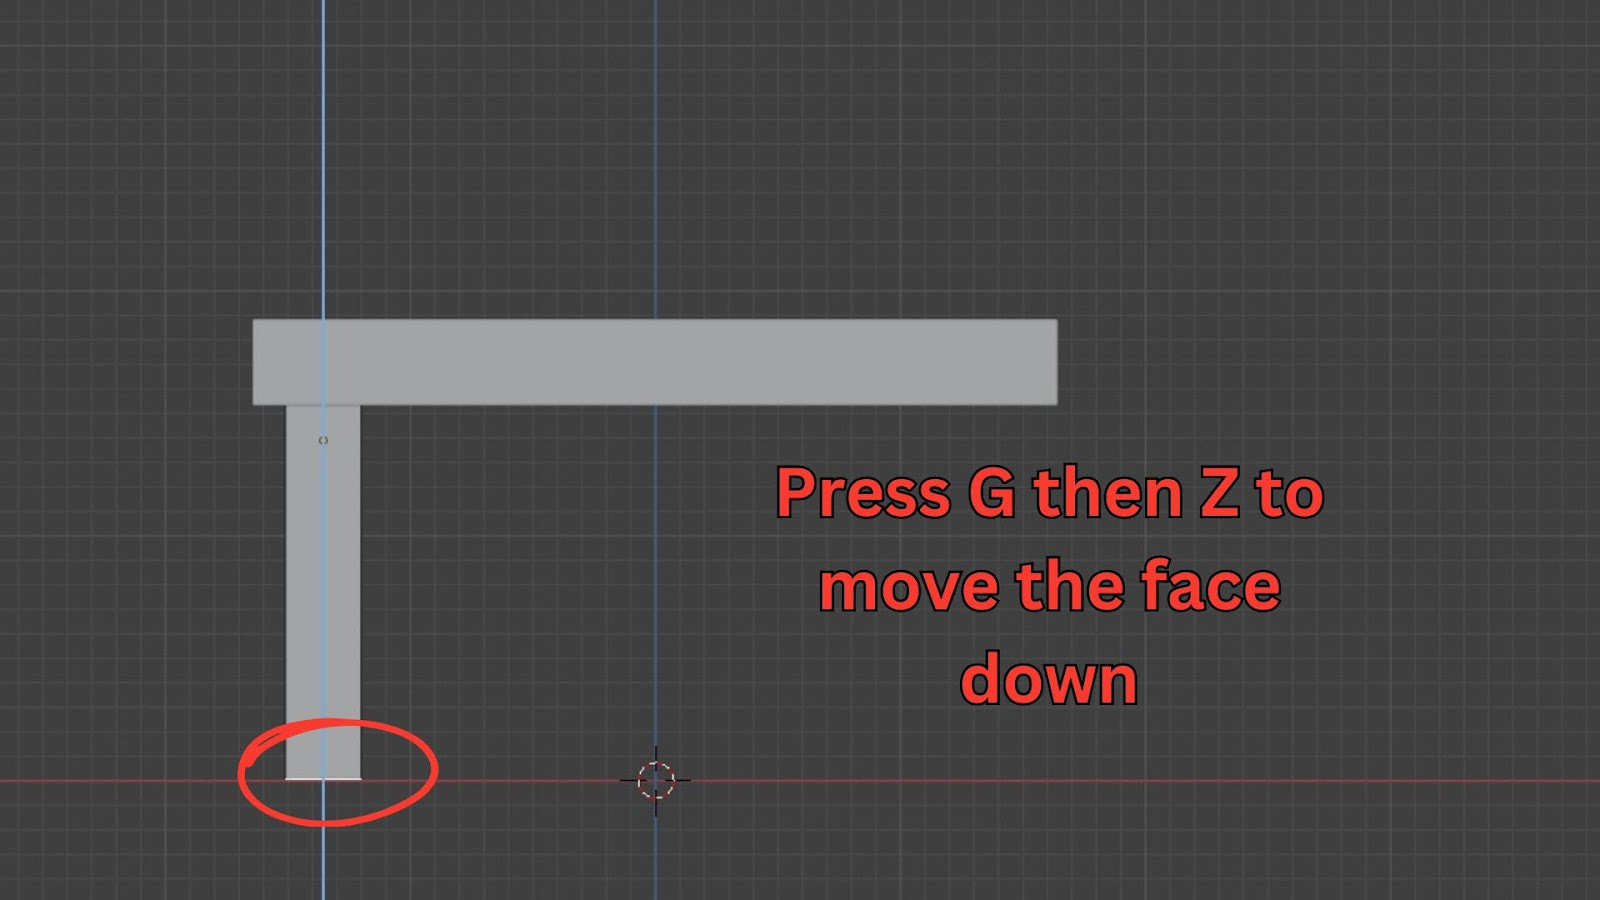
Now, enter Edit Mode for the leg (Tab).
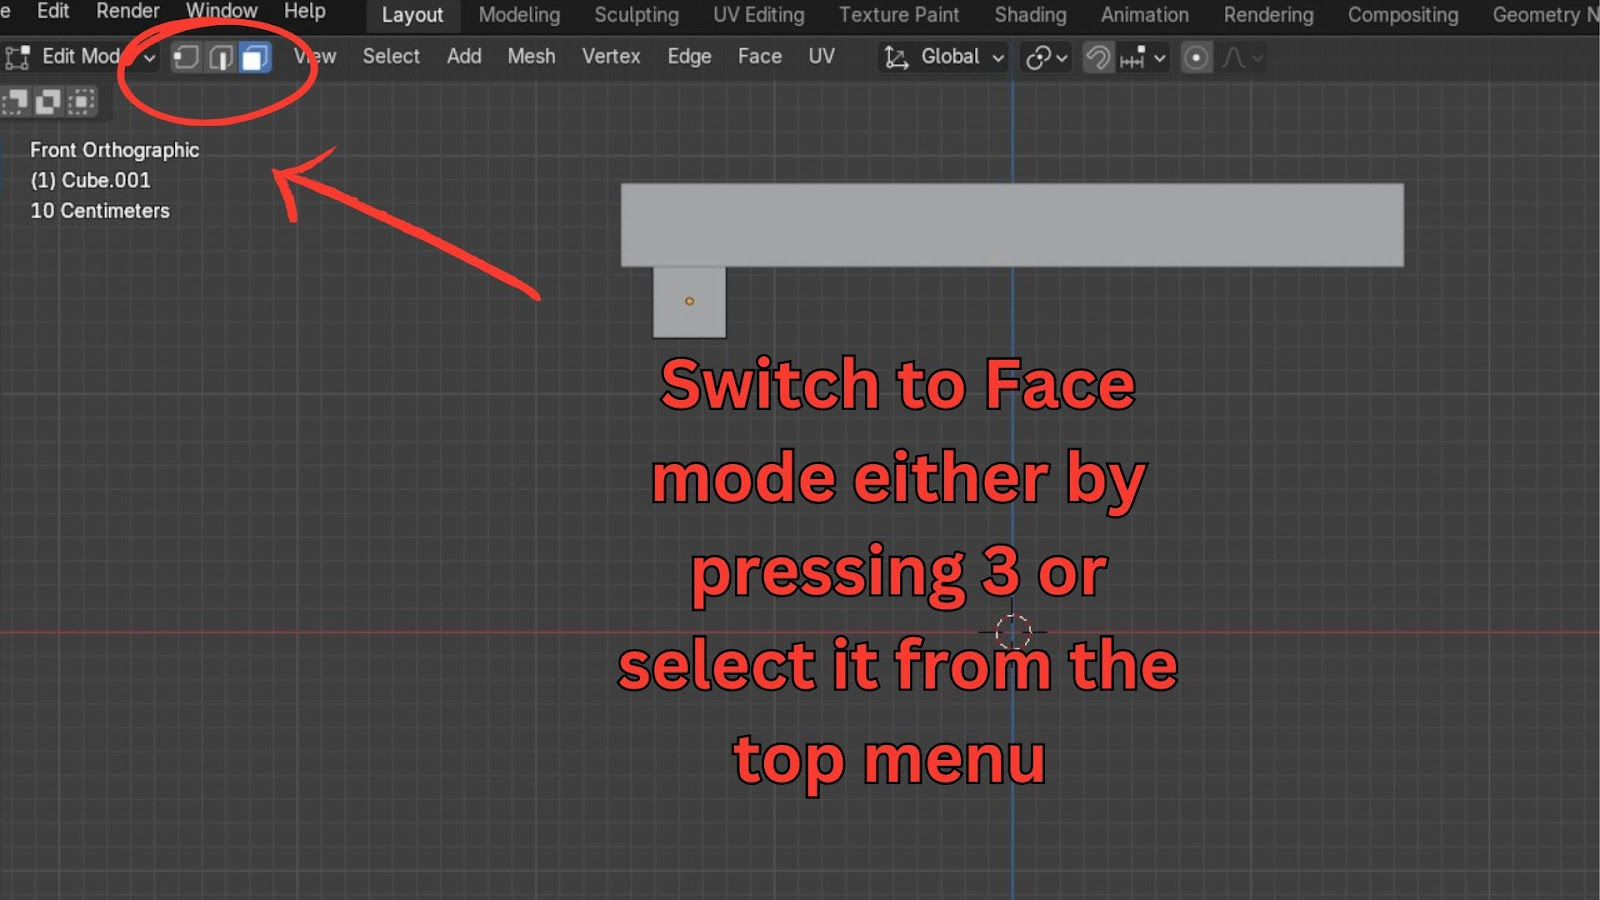
Switch to Face Select mode (3 on your keyboard or select it from the top menu).
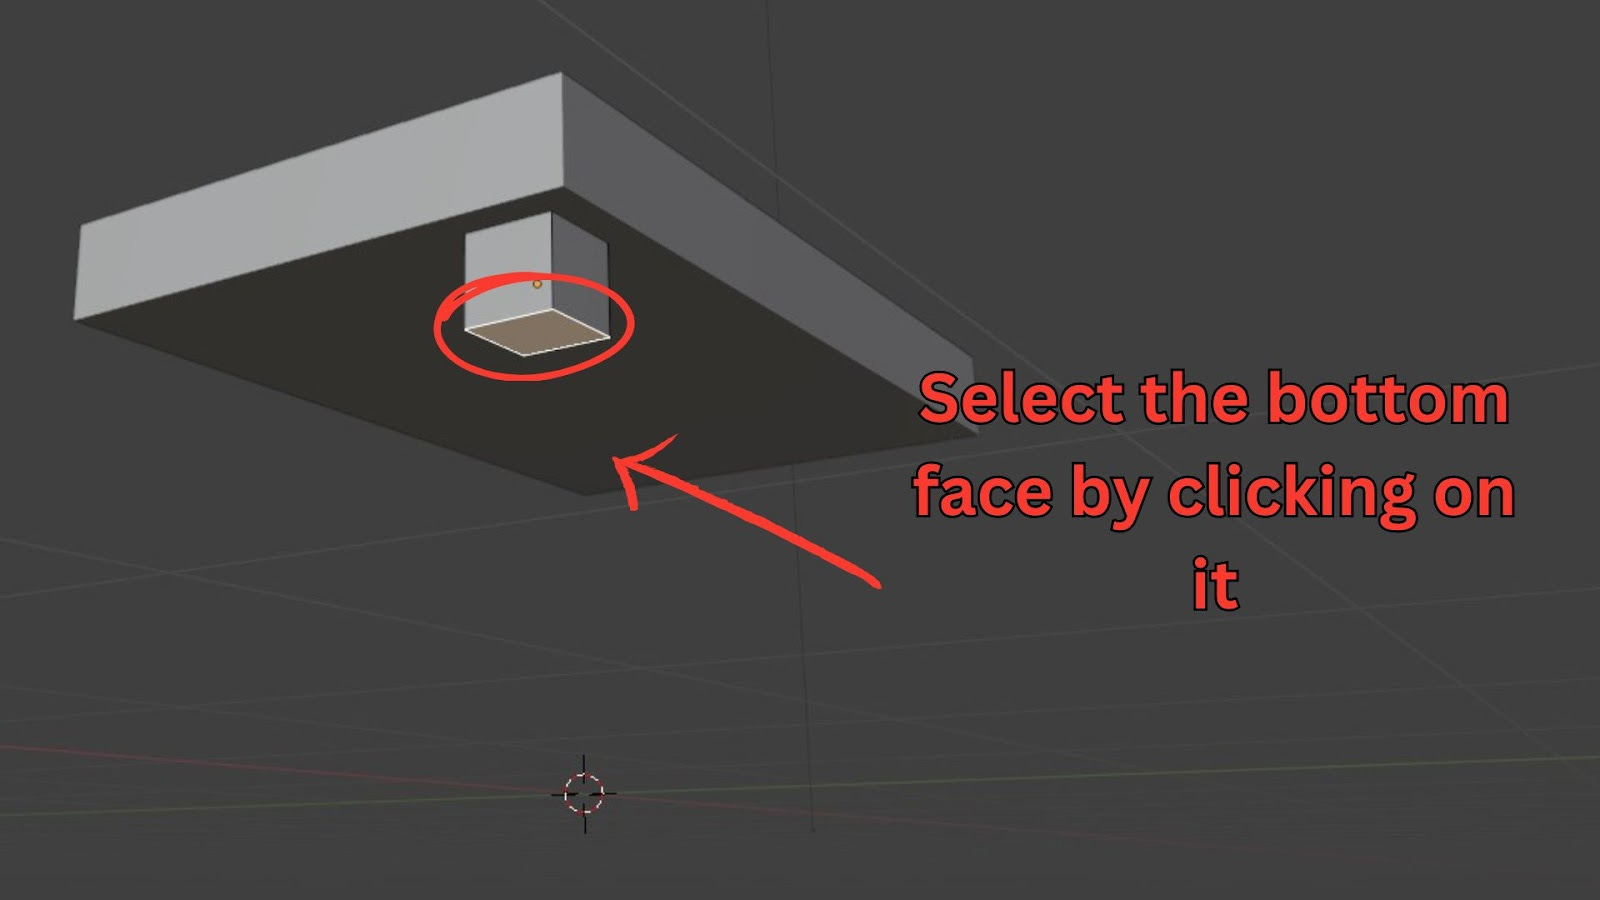
Select the bottom face of the leg.
Grab it and move it down along the Z-axis (G then Z) to extend the leg downwards.
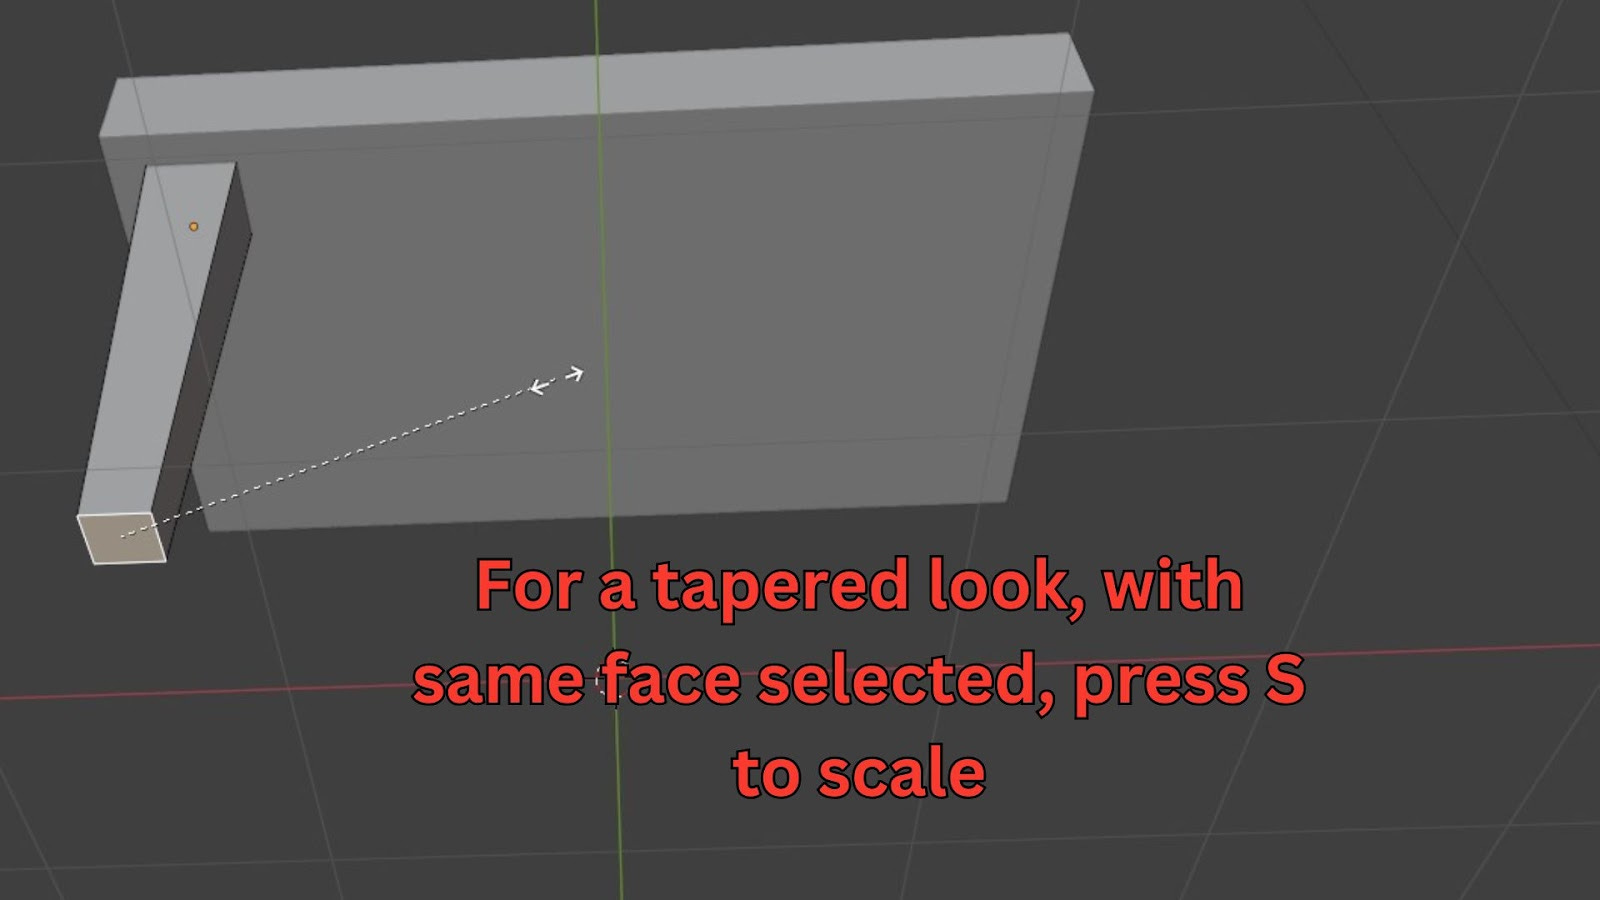
(Optional - Tapering the Leg):
If you want a tapered leg (wider at the top, narrower at the bottom), with the bottom face still selected, scale it inwards (S). This will create a taper. It's a good idea to do this before duplicating the leg.
Remember: When scaling multiple objects, if they are separate, you might need to change your Pivot Point to Individual Origins (more on this later).
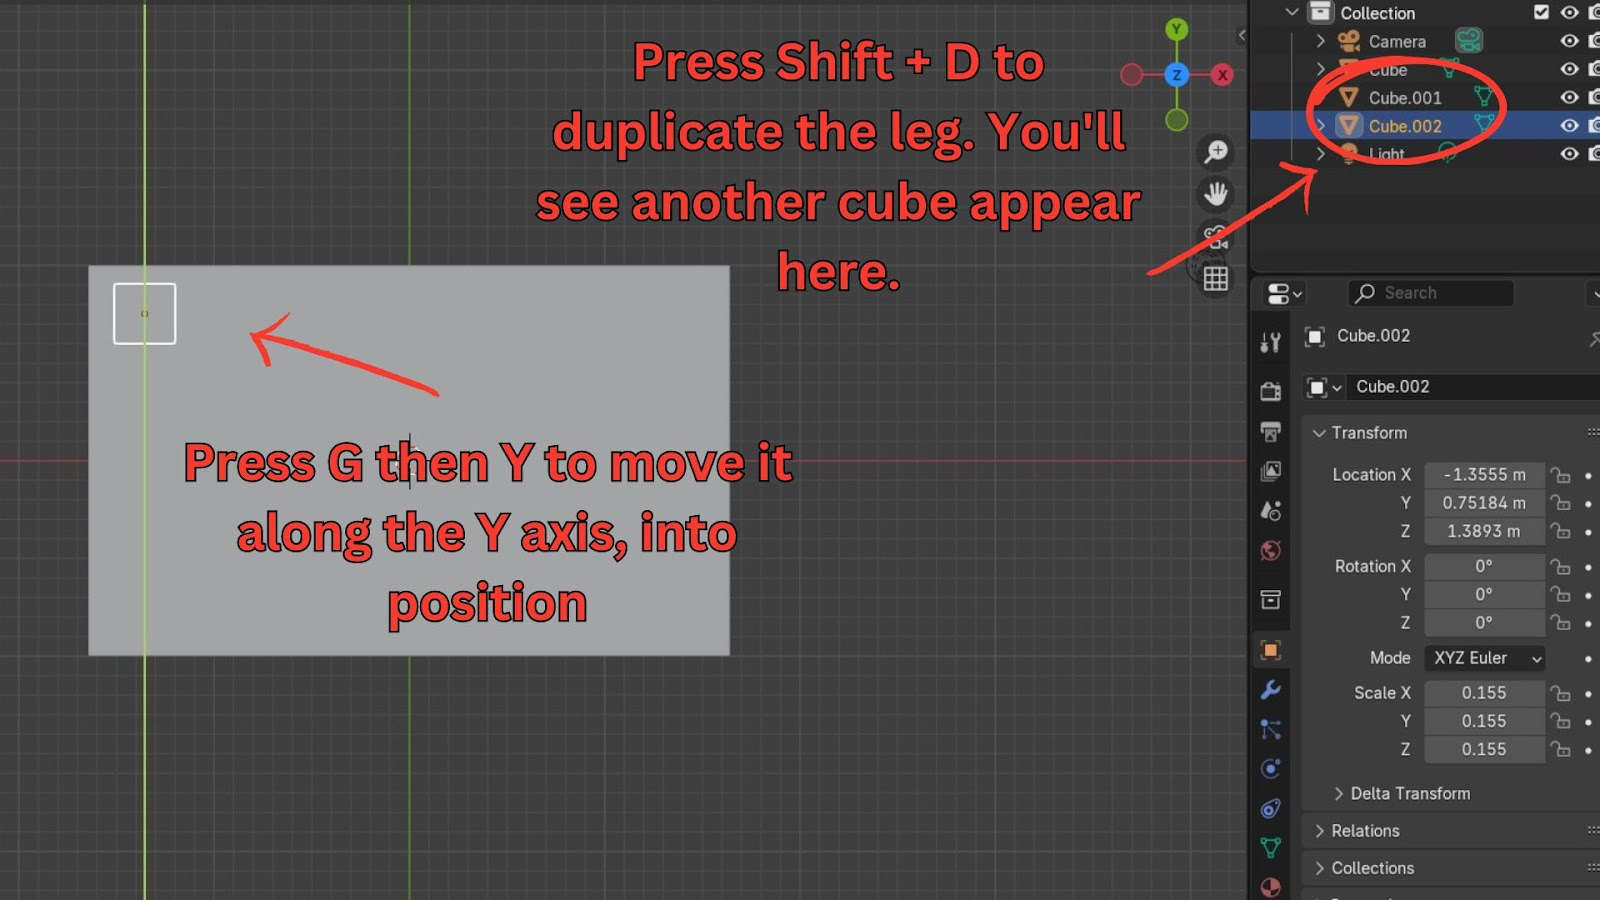
Duplicate the Legs:
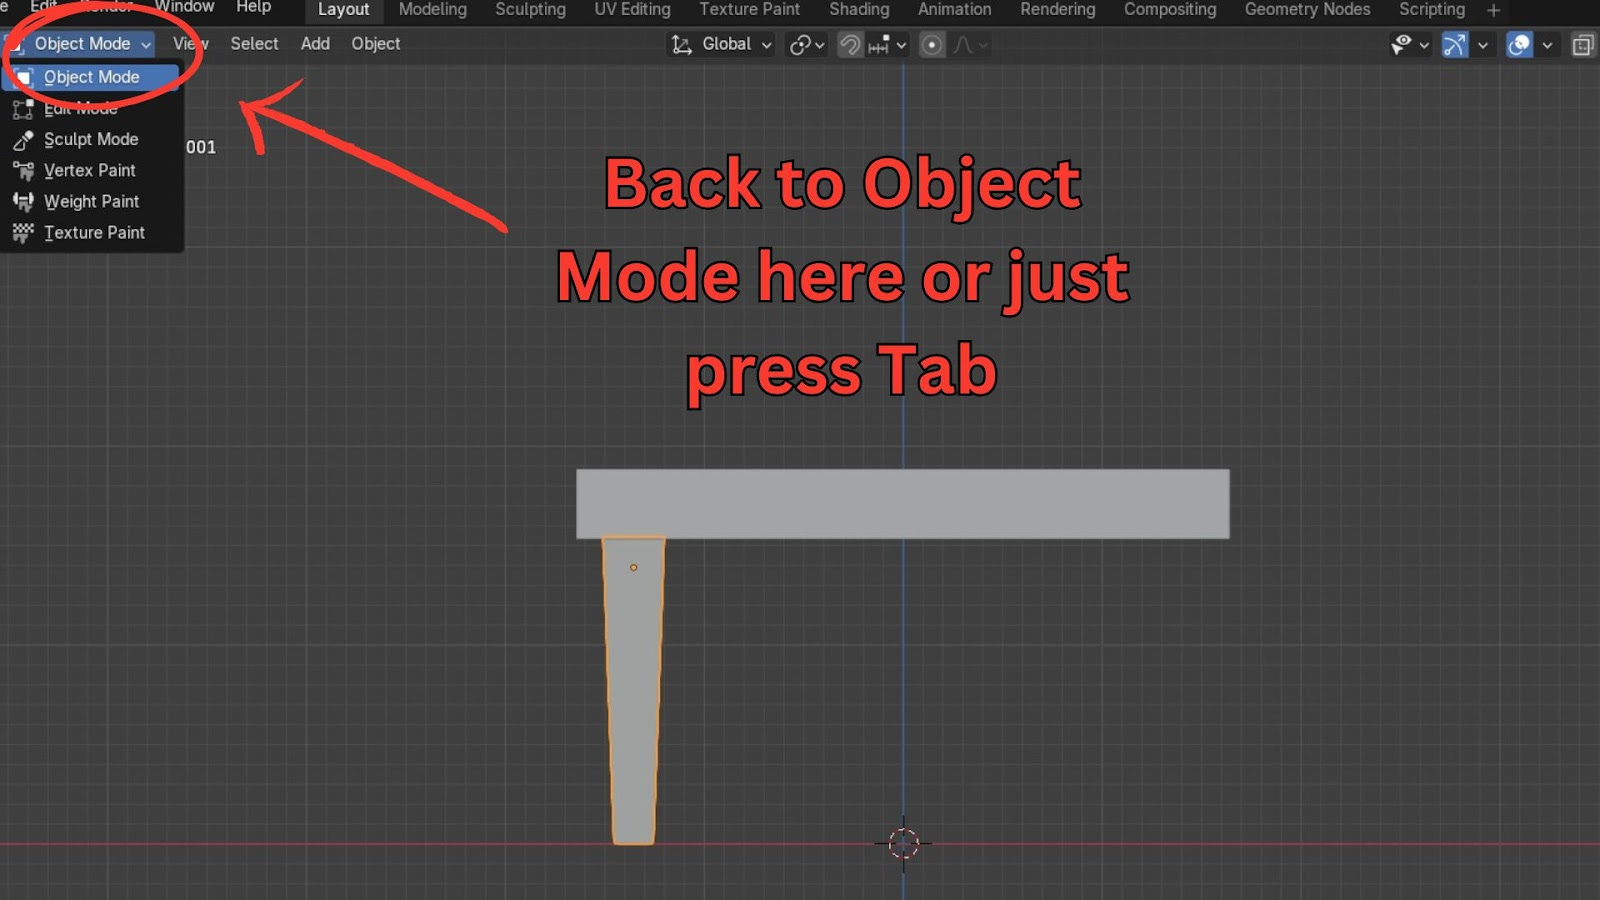
Exit Edit Mode back to Object Mode (Tab).
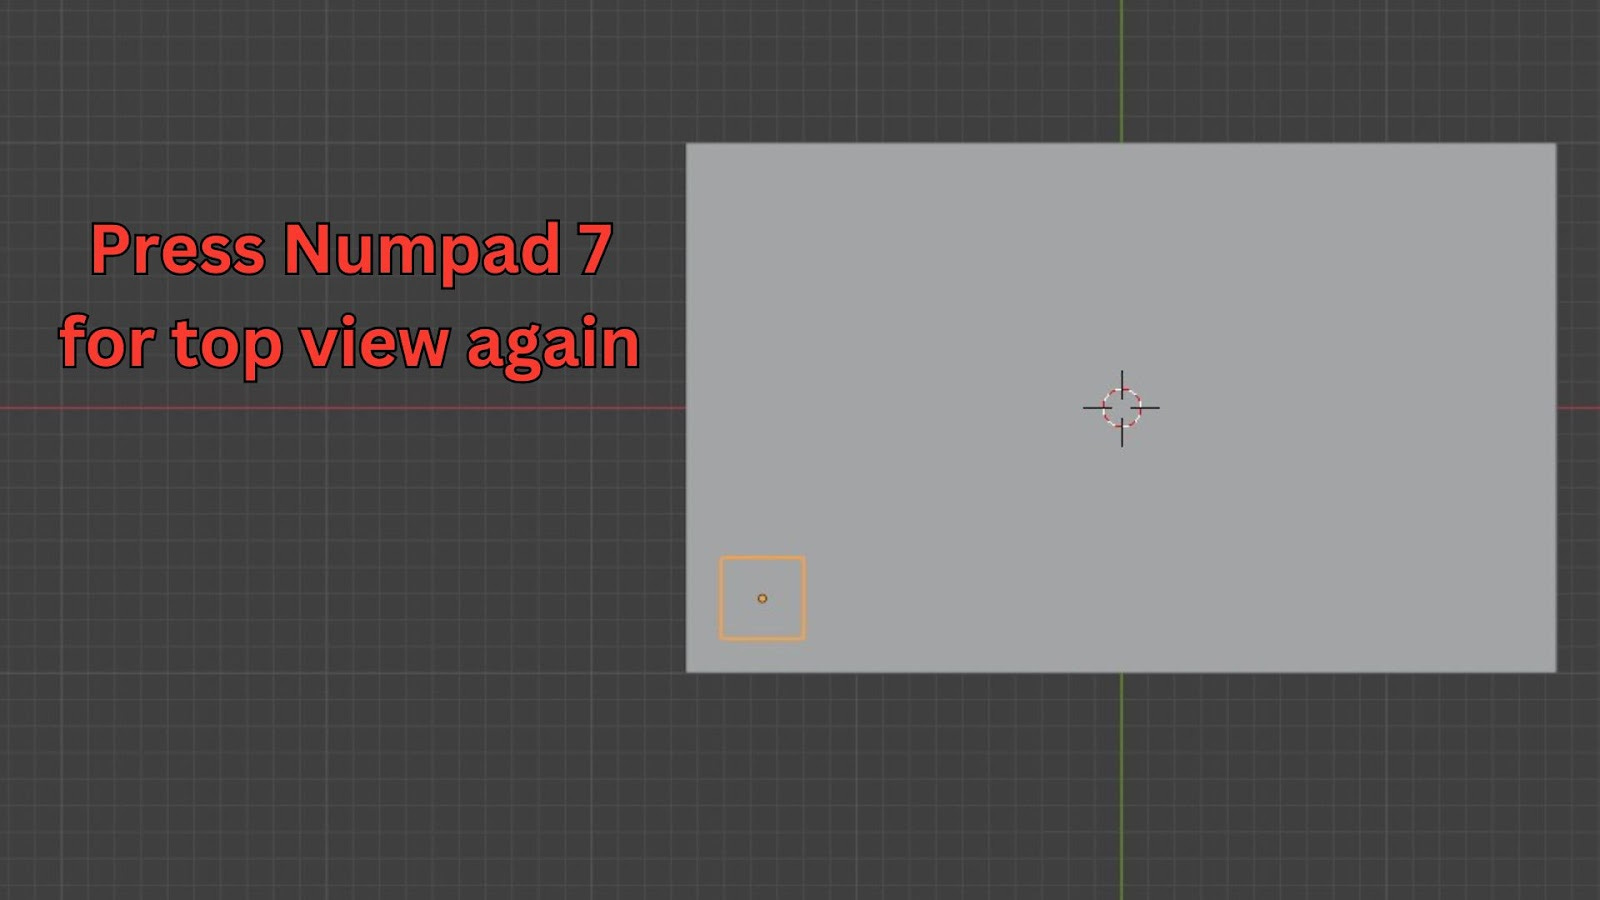
Go to top view (Numpad 7).
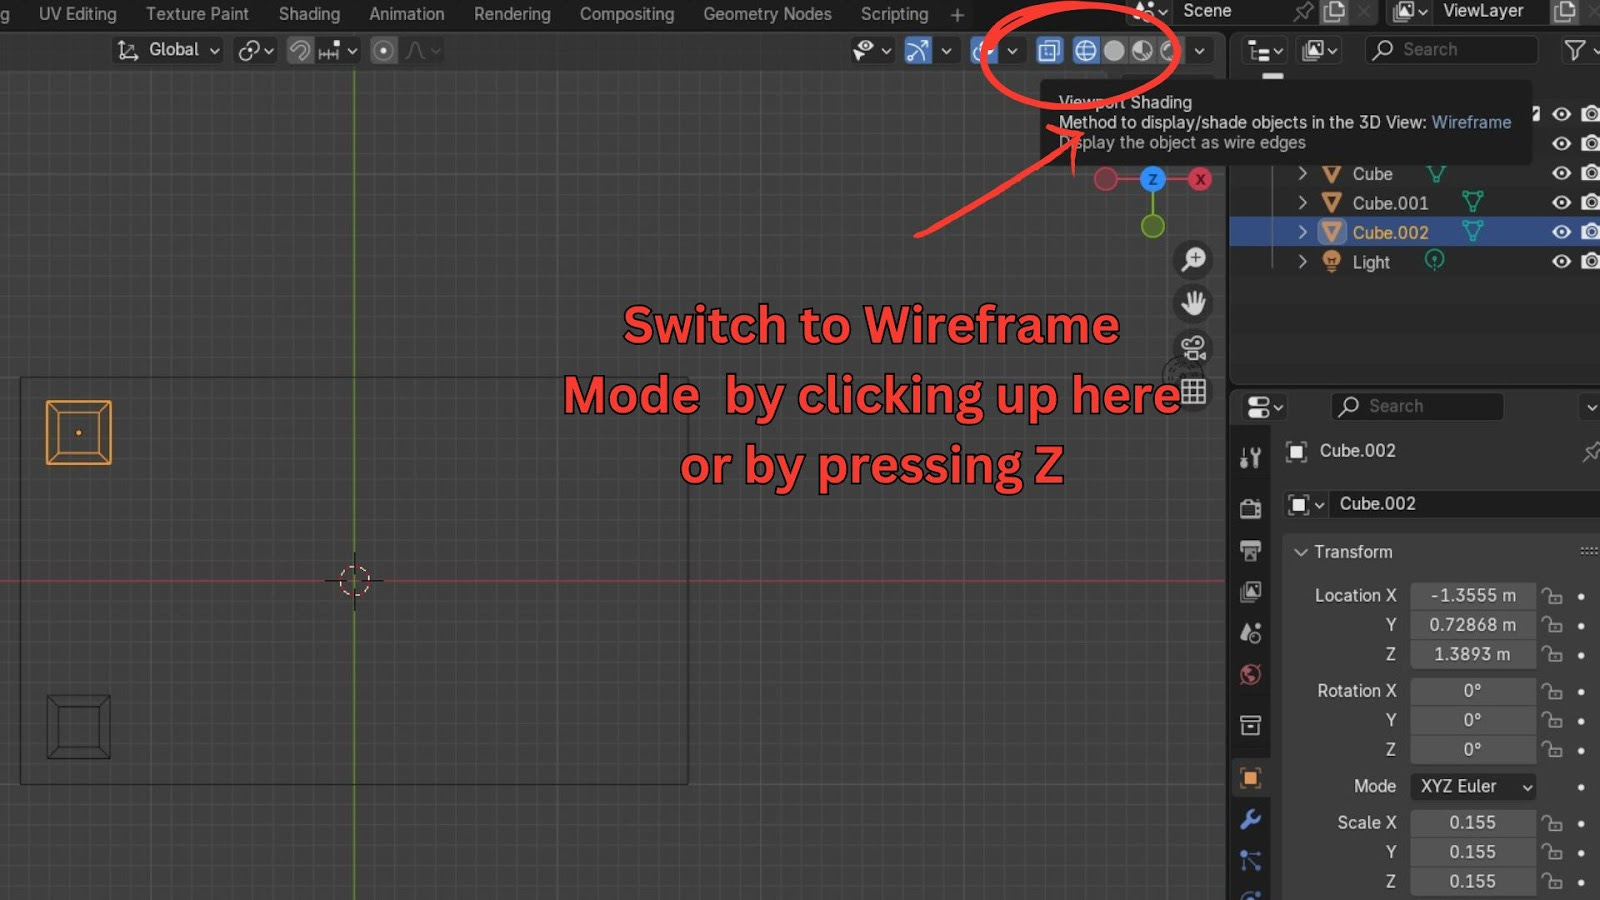
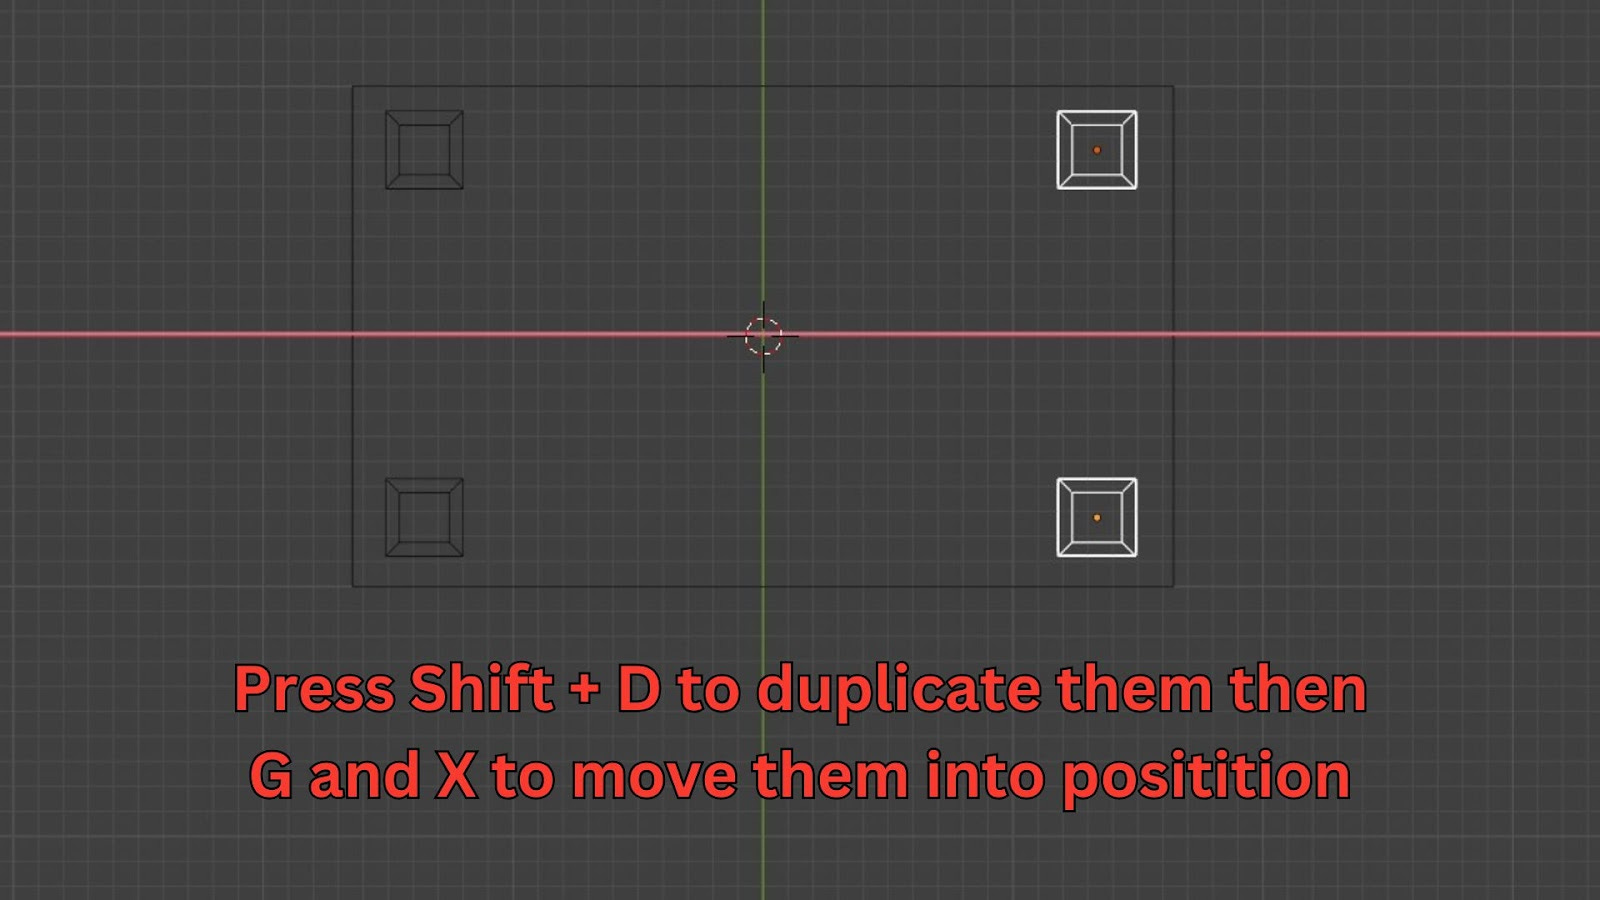
With the first leg selected, duplicate it (Shift + D) and move it along the Y-axis (Y) to place the second leg.
To better see the placement, you can switch to Wireframe Mode (Z) and then select "Wireframe").
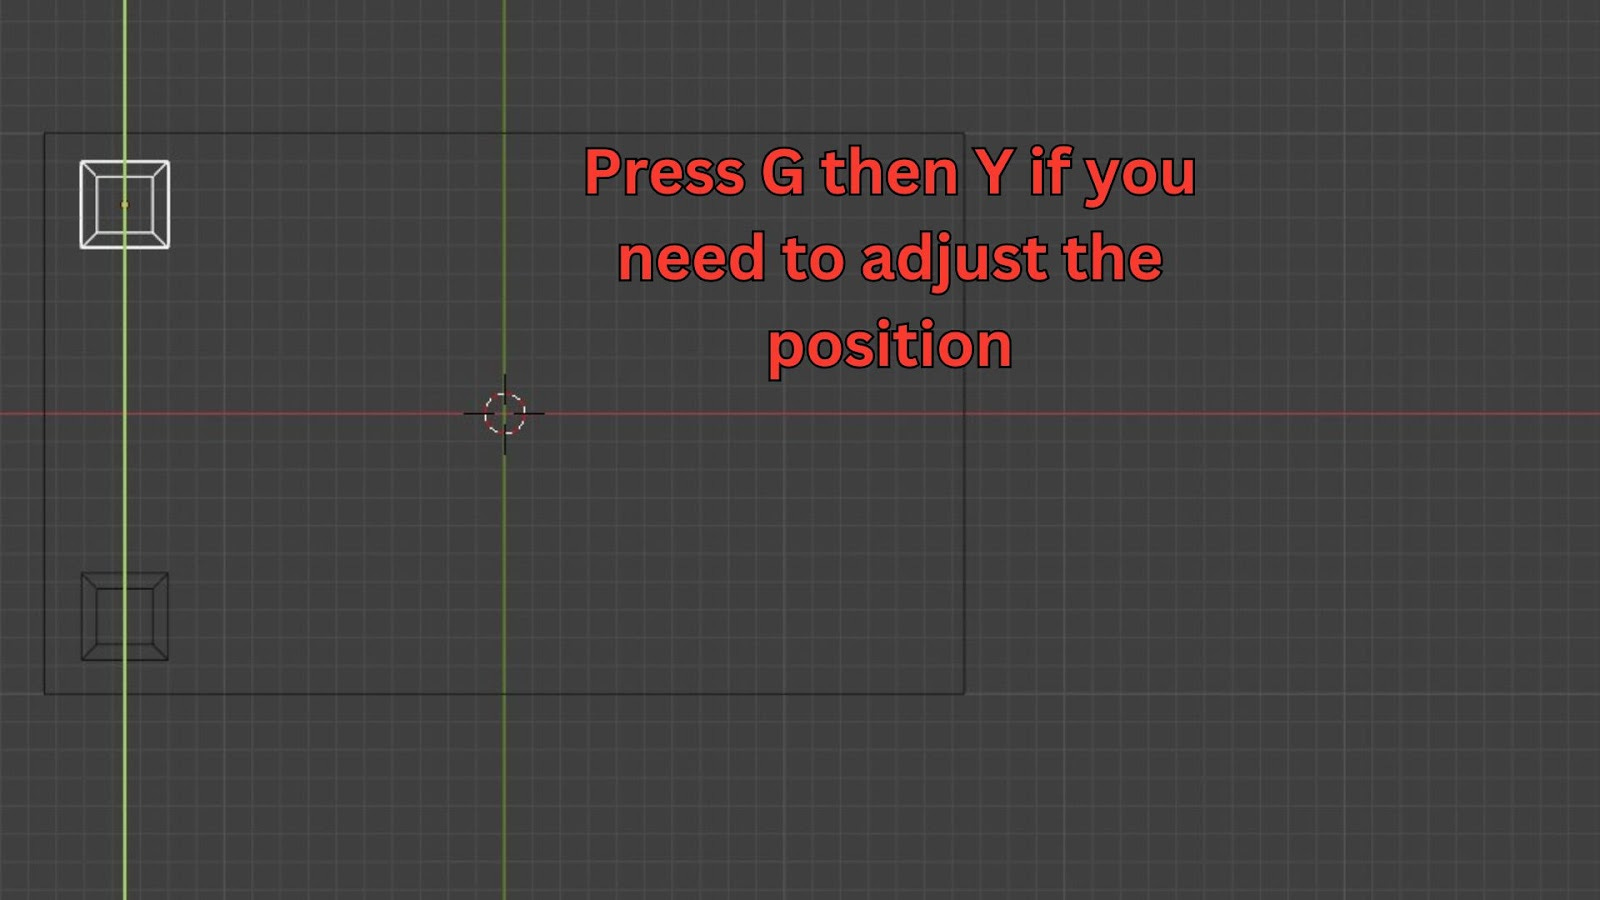
Adjust its position with G, then Y.
Now, select both legs (hold Shift and Left-Click on each).
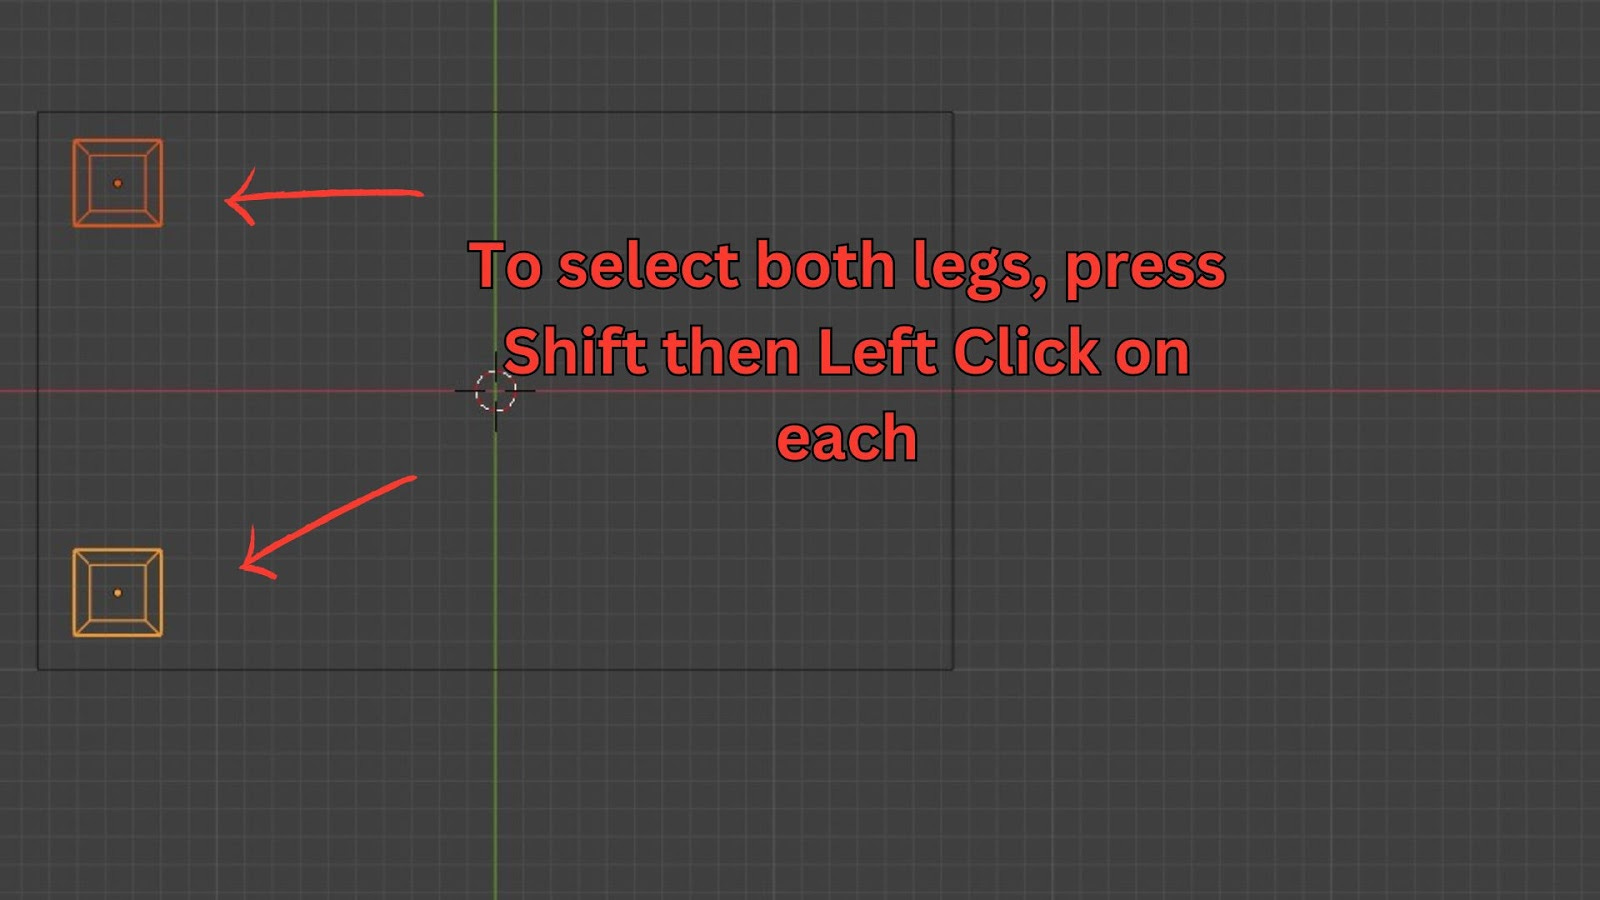
Duplicate both (Shift + D) and move them along the X-axis (X) to position the other two legs.
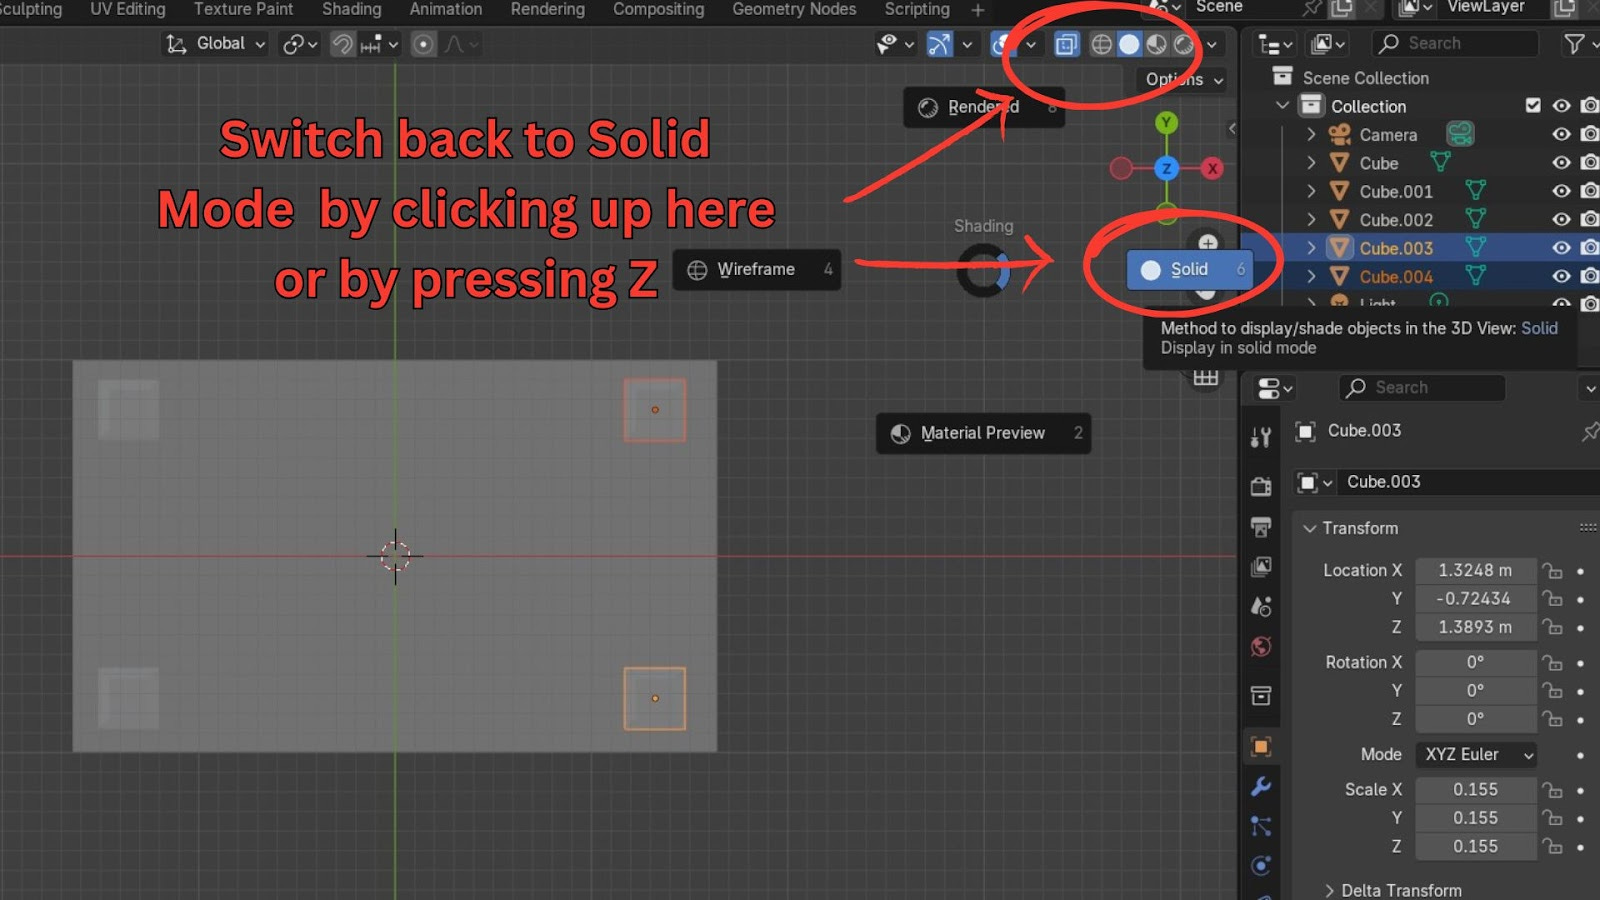
Switch back to Solid Mode (Z then select "Solid").
Refine Leg Taper (If needed for all legs simultaneously):
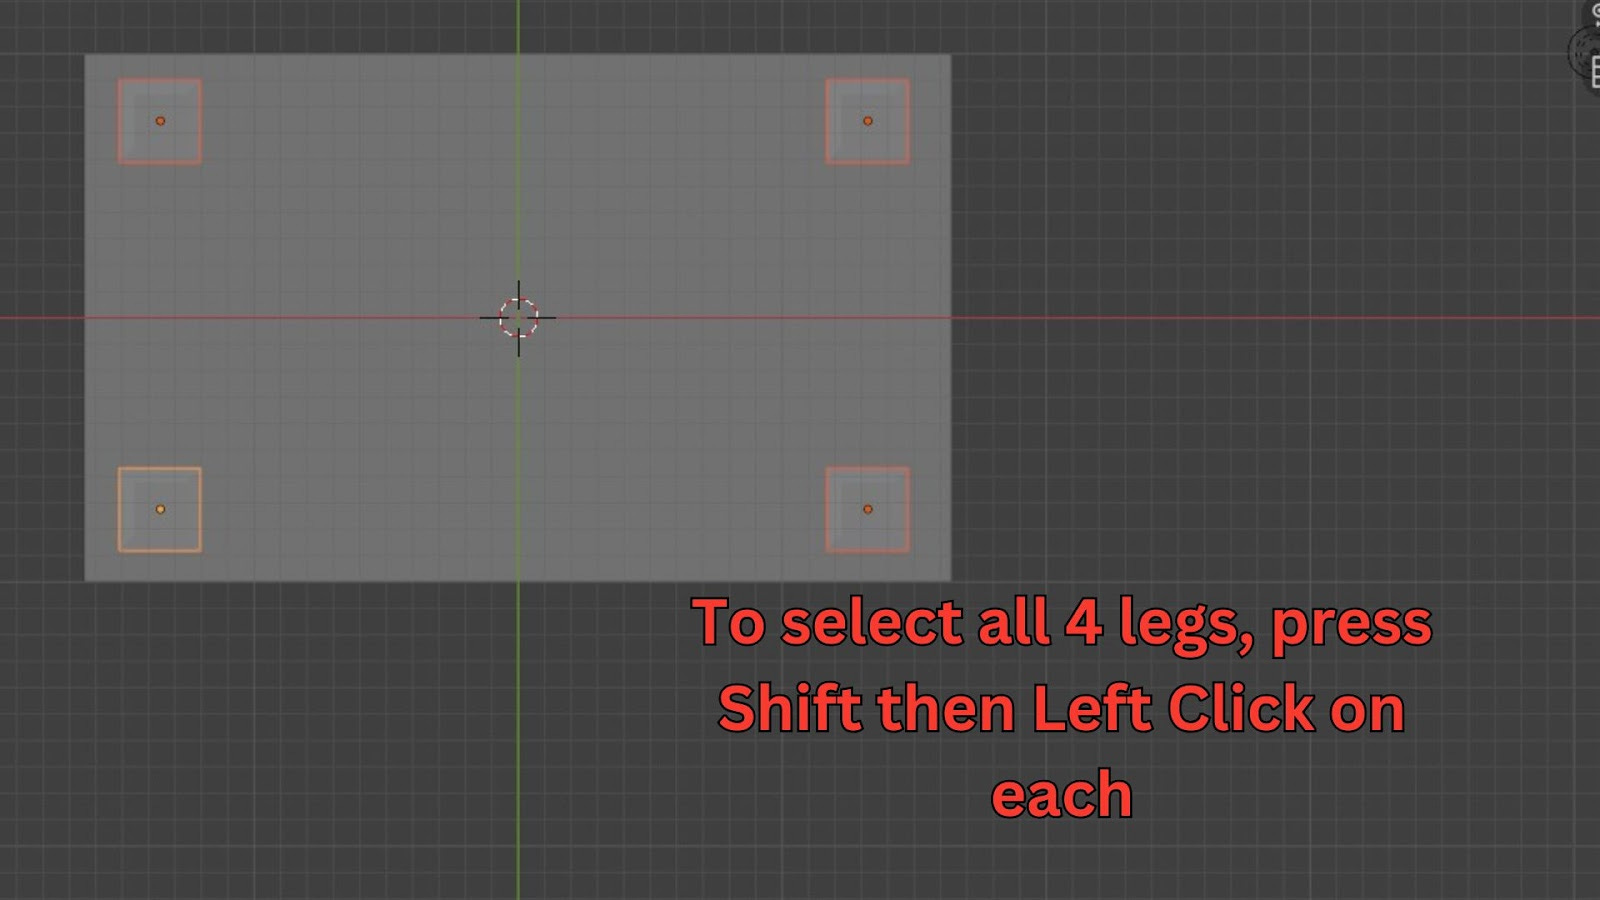
Select all four legs (you can Shift + Left-Click them in Object Mode).
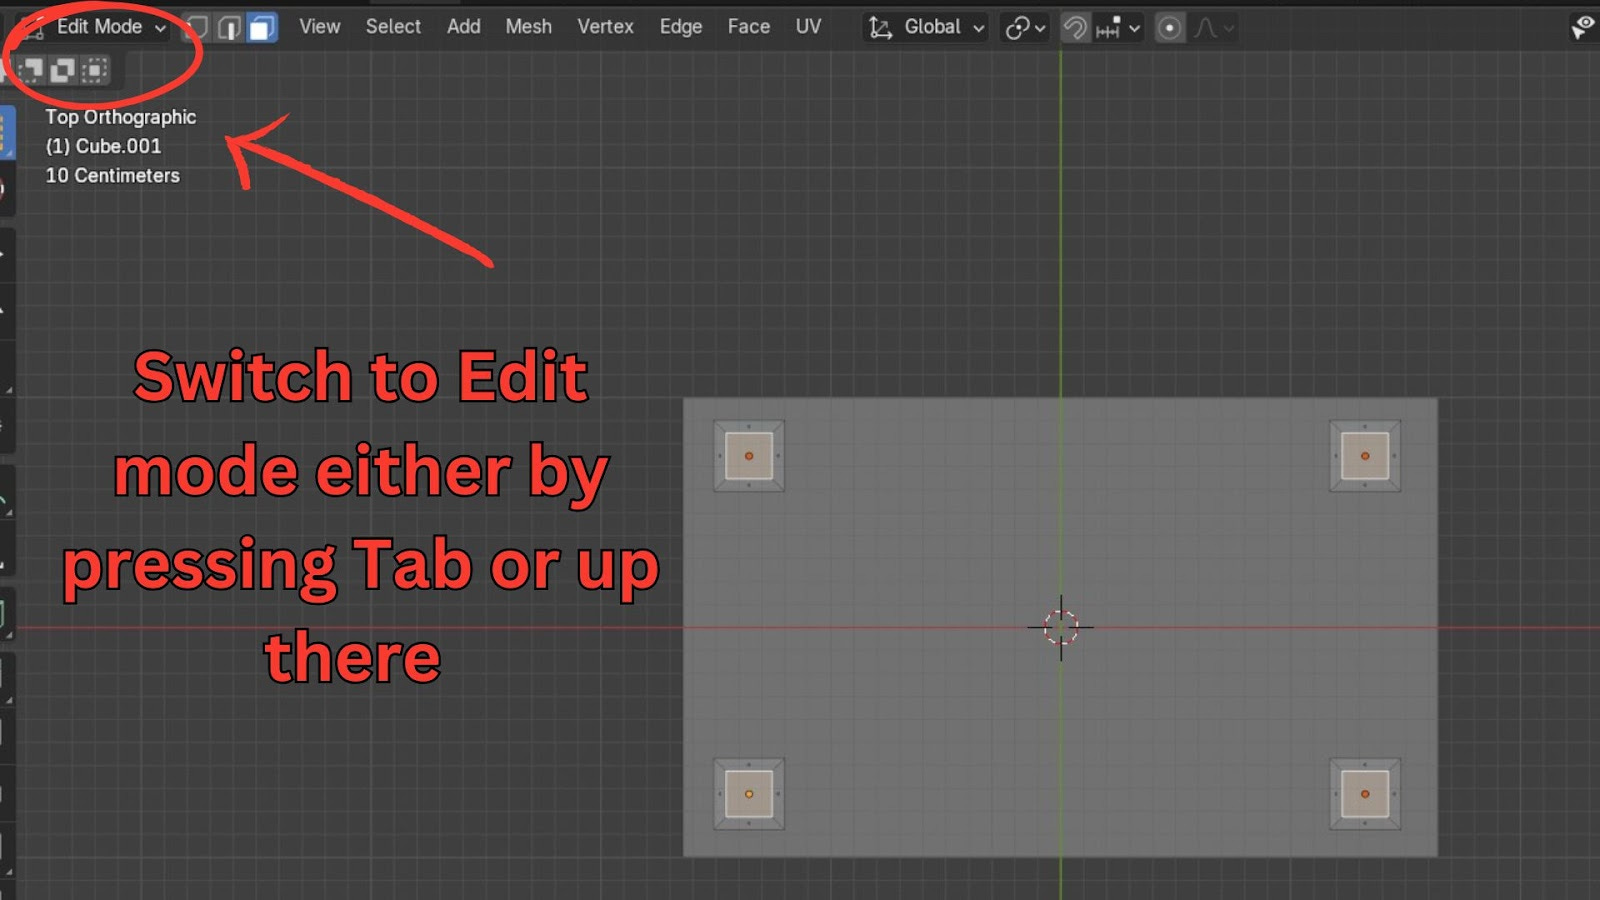
Enter Edit Mode (Tab).
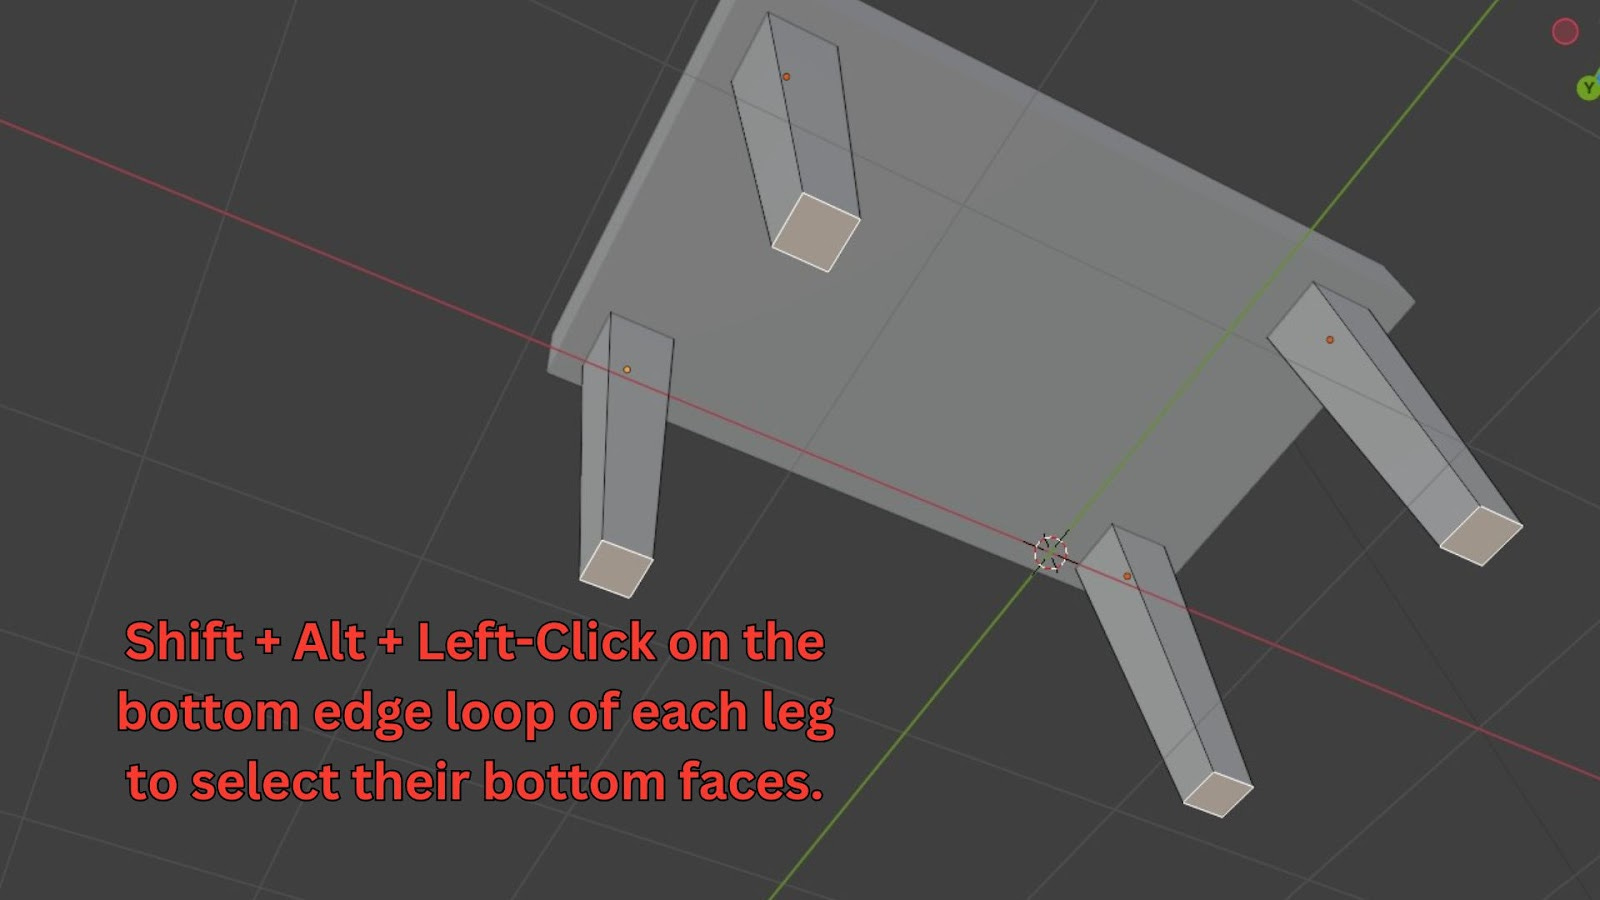
Since you likely scaled the last selected face when you were in edit mode earlier, the bottom faces of the legs should already be selected. If not, go to Face Select mode (3) and Shift + Alt + Left-Click on the bottom edge loop of each leg to select their bottom faces. (If ‘Emulate 3 mouse button is enabled, then it's simply a double left click.)
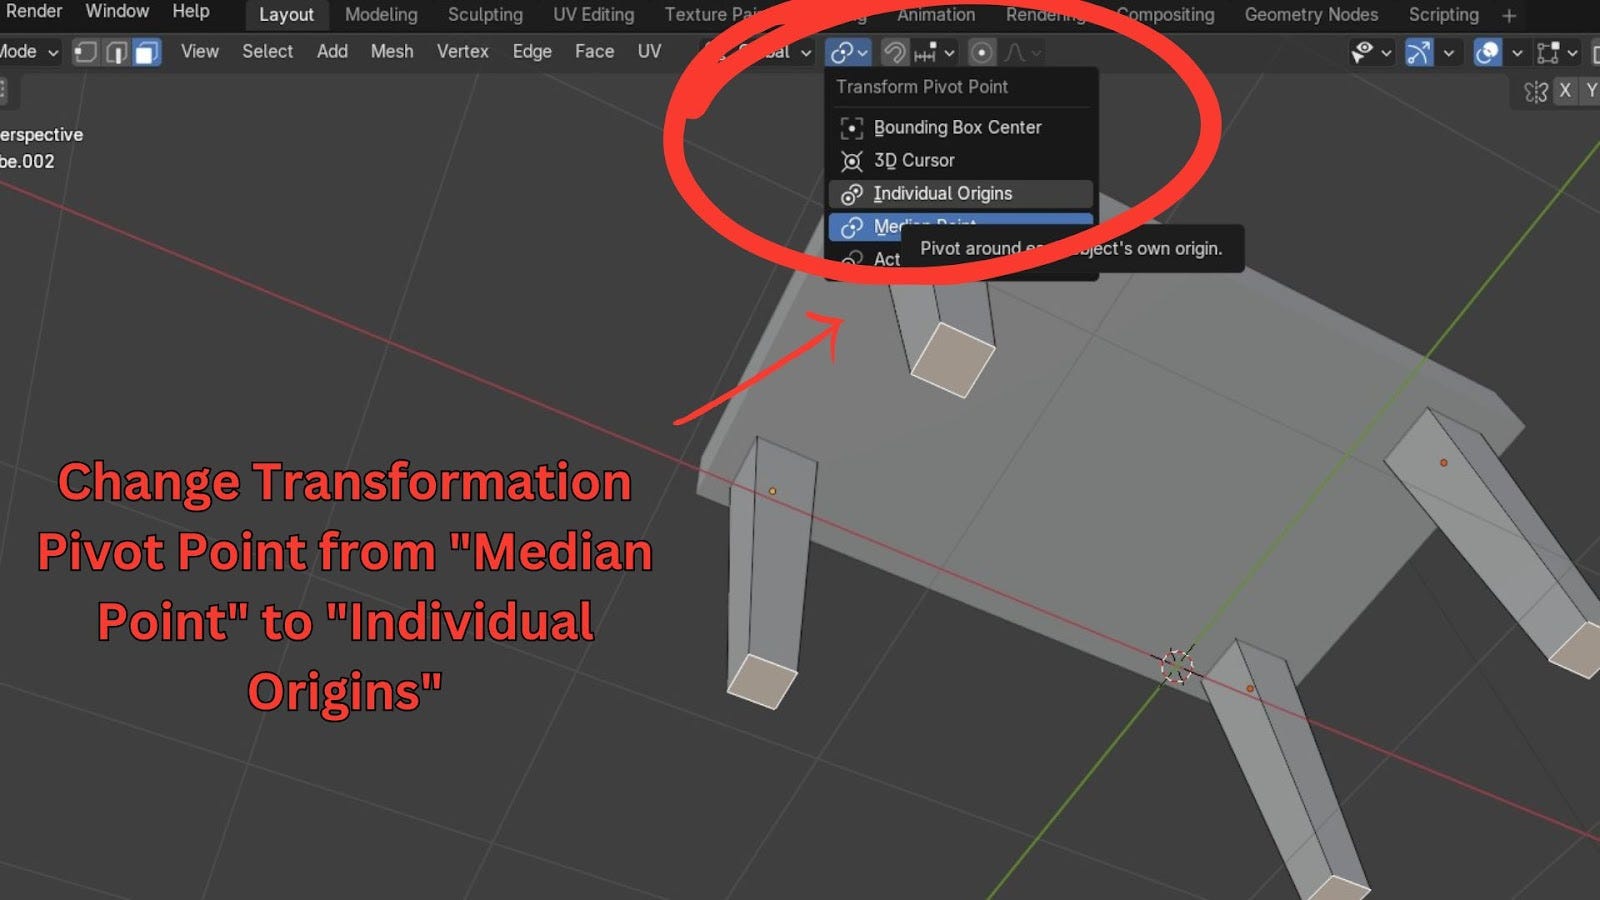
Attempt to scale them inwards (S). You'll notice they all scale towards a central point.

To fix this, change your Transformation Pivot Point from "Median Point" (the default) to "Individual Origins". You'll find this option in the top bar of the 3D Viewport (usually next to the transform manipulators like move, rotate, scale).
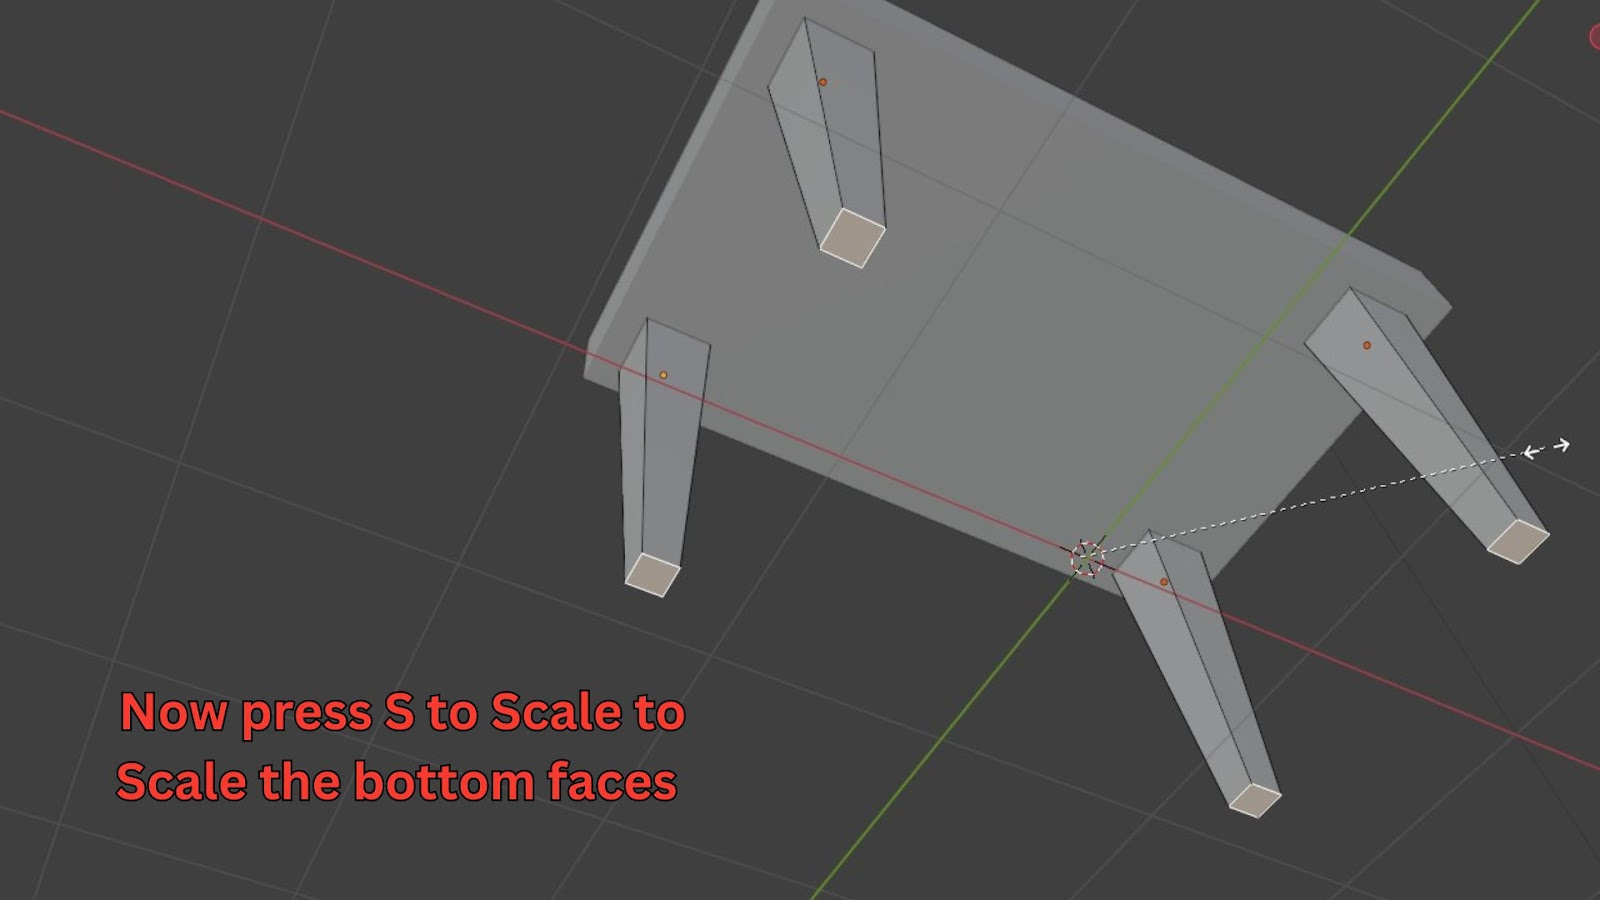
Now, when you scale (S), each leg's bottom will scale relative to its own center, creating the desired taper.
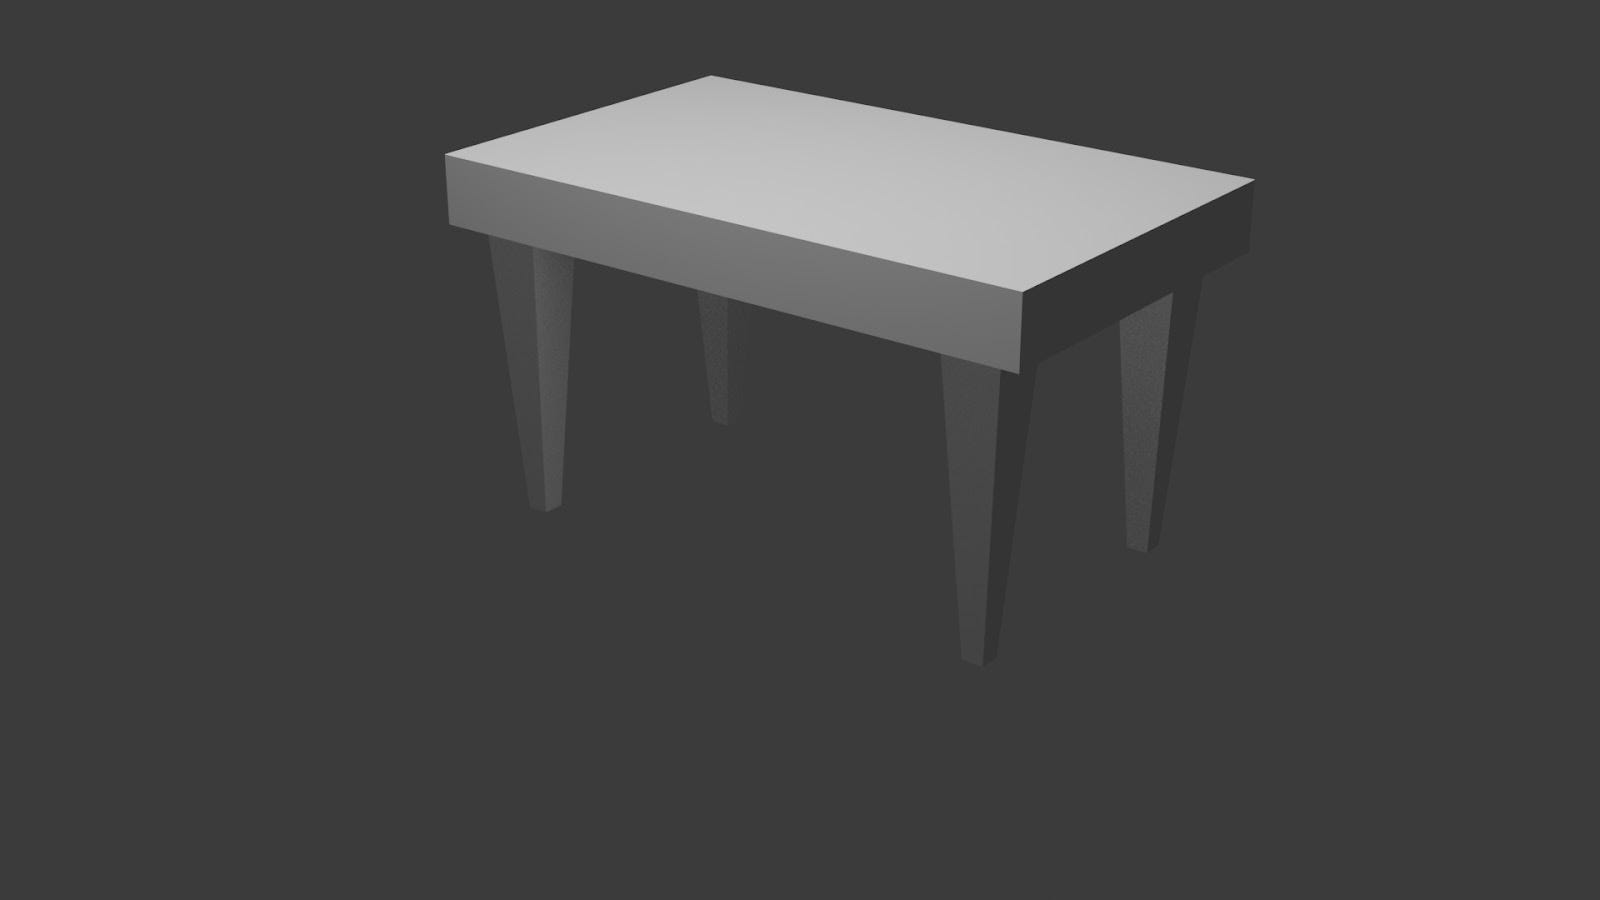
If you followed this tutorial, you should have a table similar to mine:
Don’t forget to save your work, and I will see you in the next tutorial, where I will show you how to add chairs to the scene.