

Part 8 - Building The Rocket Exhausts
Blender 4: Your Complete Beginner's Guide to 3D


💥 Grab your free Booklets Parts 1- 8 now on Gumroad:
👉 https://grantabbitt.gumroad.com/l/fufbi
Whether you're testing the waters or committing to the full course, this free guide is the perfect place to start. No risk. Just your first steps into the world of 3D.
If you want an in-depth, detailed and methodical course, then check out my
Complete Blender Creator Course for only $15
OR Learn Blender with my 4-course Blender Beginner Bundle for only $30.
For those who like this written style, try out the Blender Secrets booklet.
If you think my tutorials are helpful to you, you can also just click on the button below to support my work:
Rocket Exhausts
Create the Exhaust Opening:
Exit X-Ray Mode (Alt + Z).
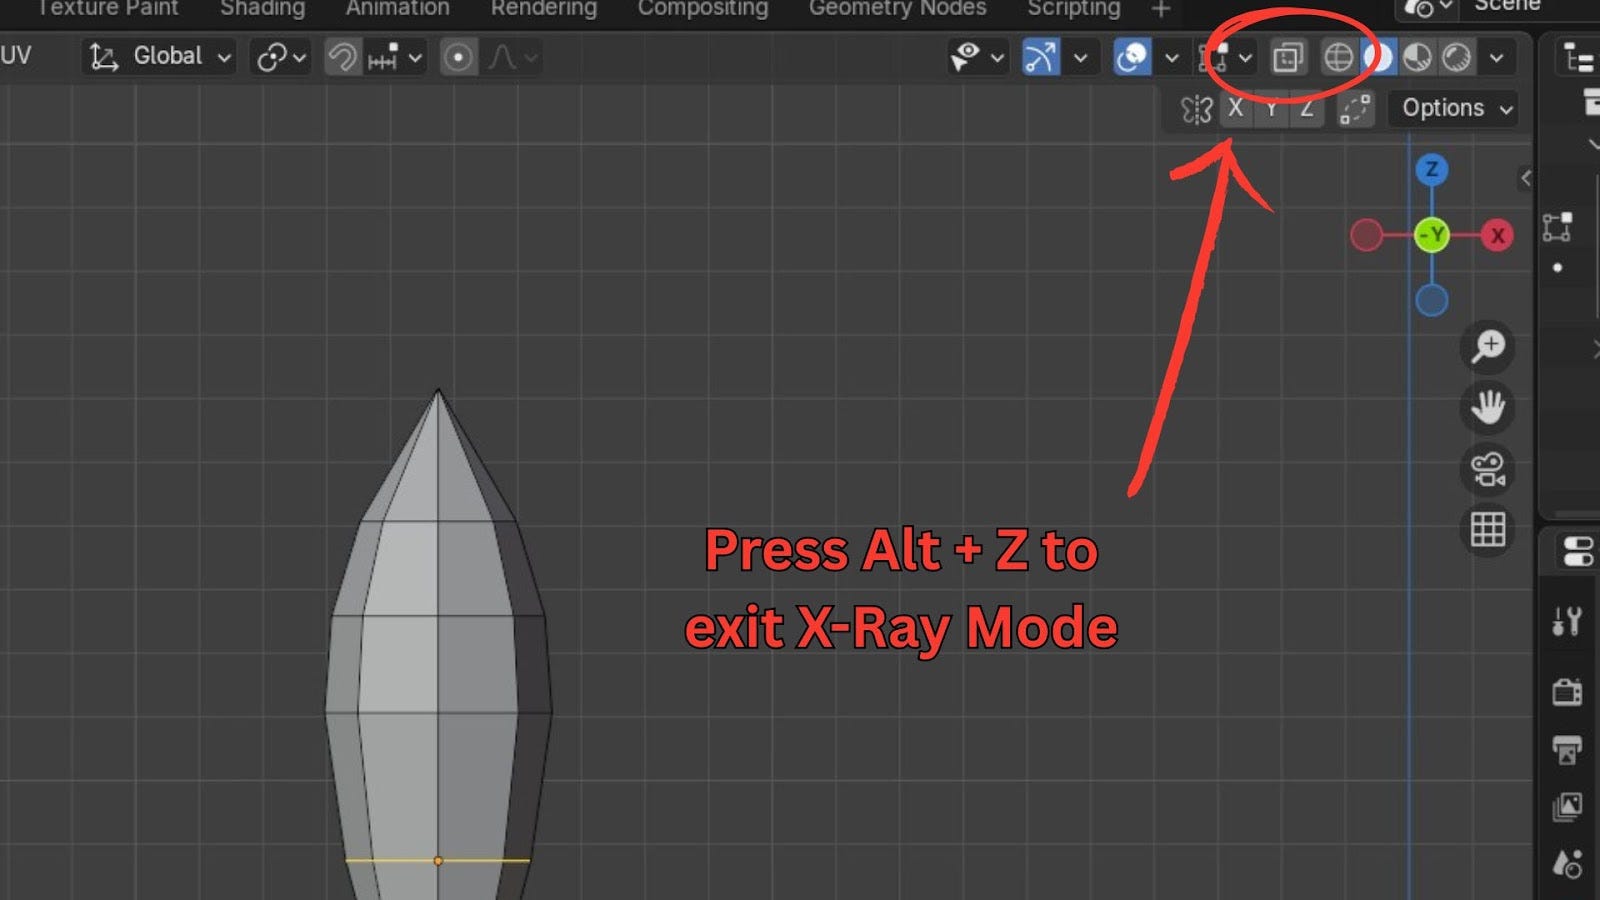
Go to Face Select Mode (3).
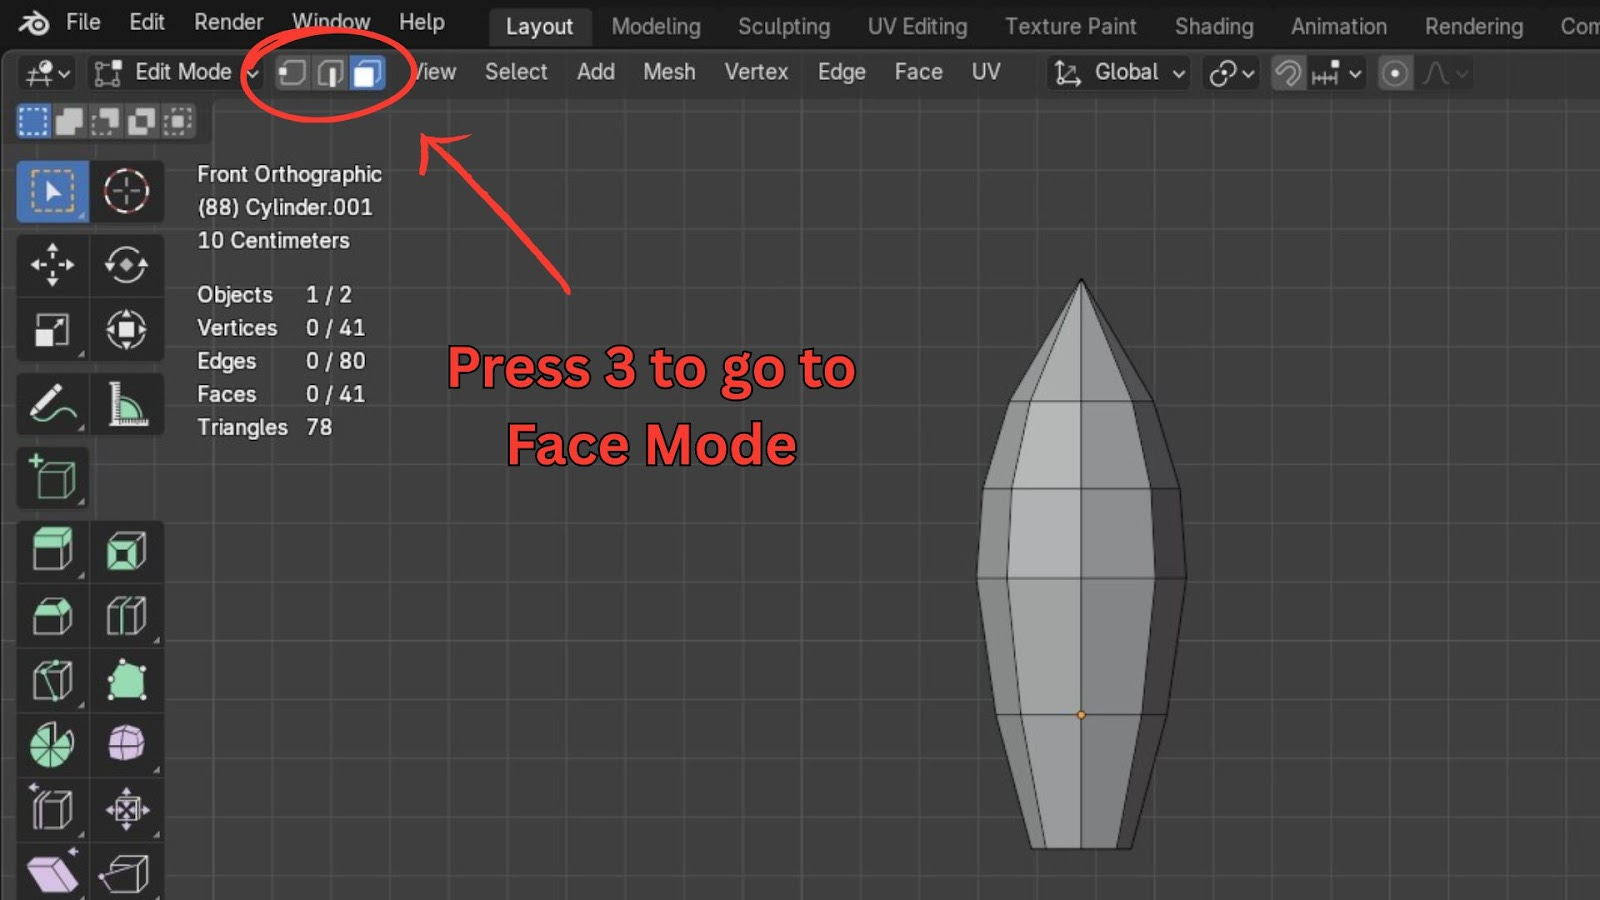
Select the bottom face of the rocket.

Press I to inset the face, bringing it inwards.
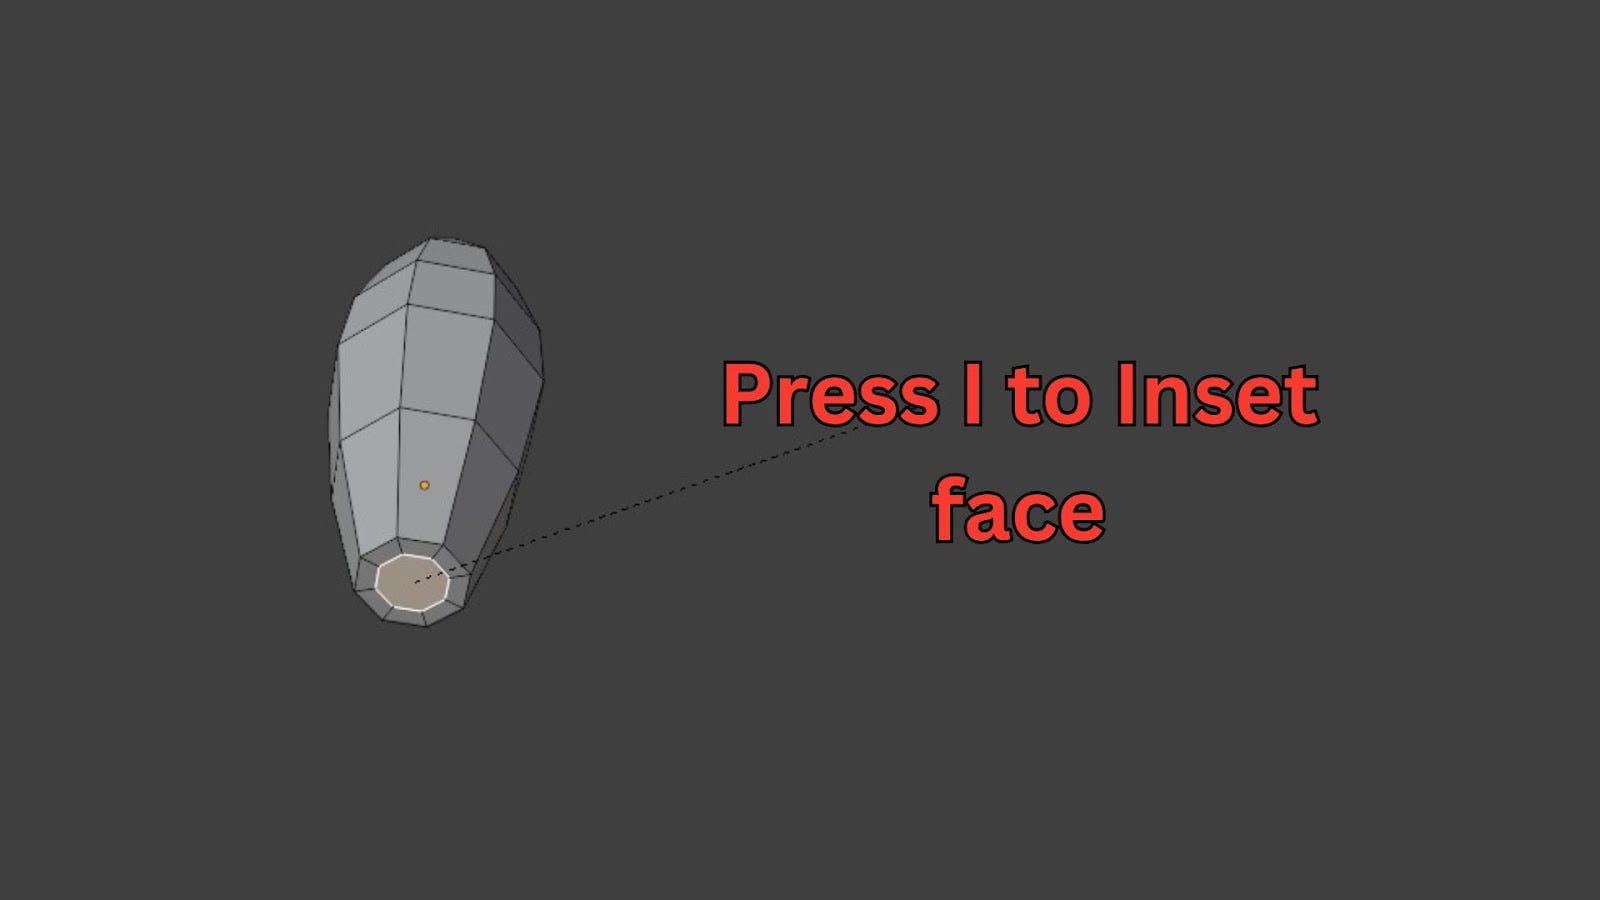
Press E to extrude it inwards slightly, creating a hollow exhaust area.

Add Individual Thrusters:
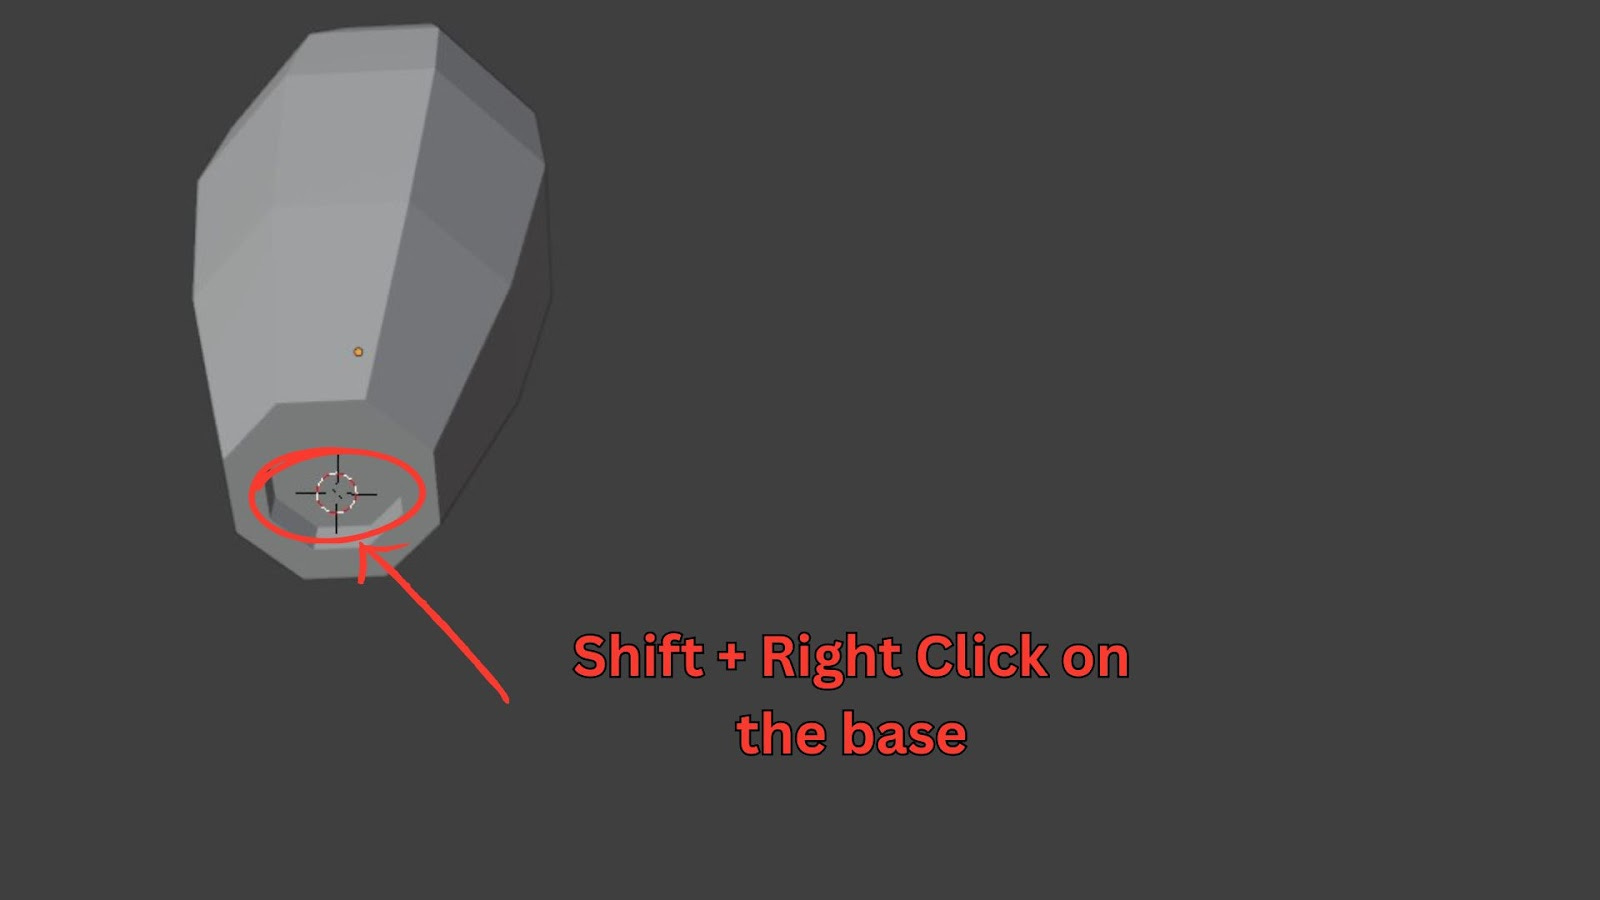
Before adding new objects, go to Object Mode (Tab).

Shift + Right-click to position your 3D cursor at the centre of the rocket's base.
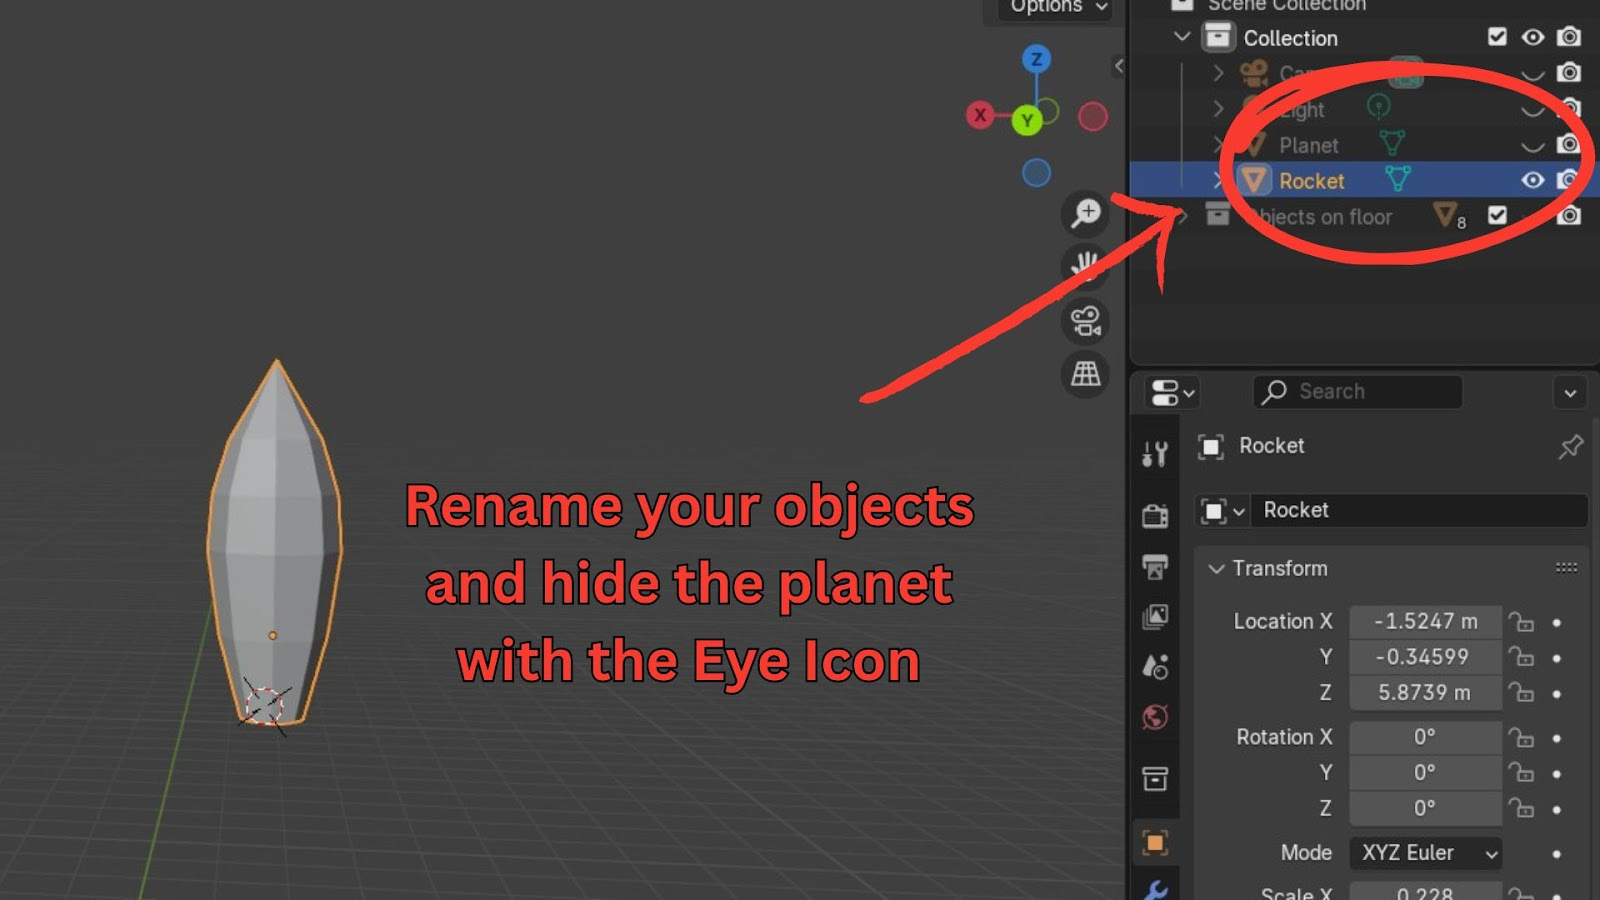
Hide the Planet for easier viewing: Select the planet, double-click its name in the Outliner (top right) and rename it "Planet," then click the eye icon to hide it. Rename your rocket to "Rocket" as well.
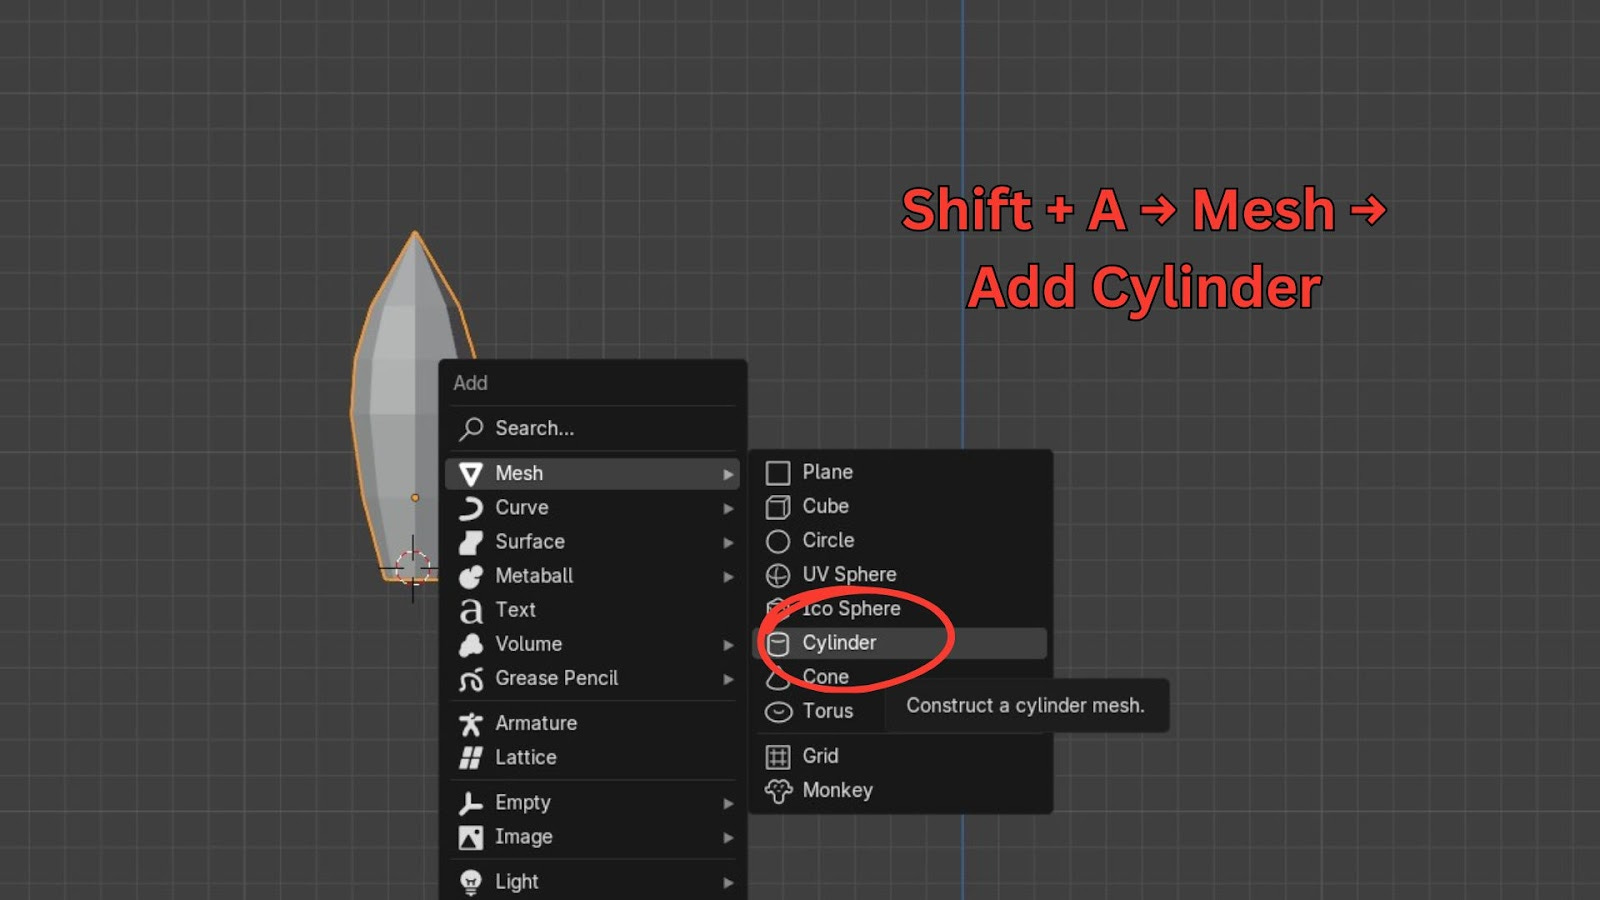
Press Shift + A, go to Mesh, and add a Cylinder.
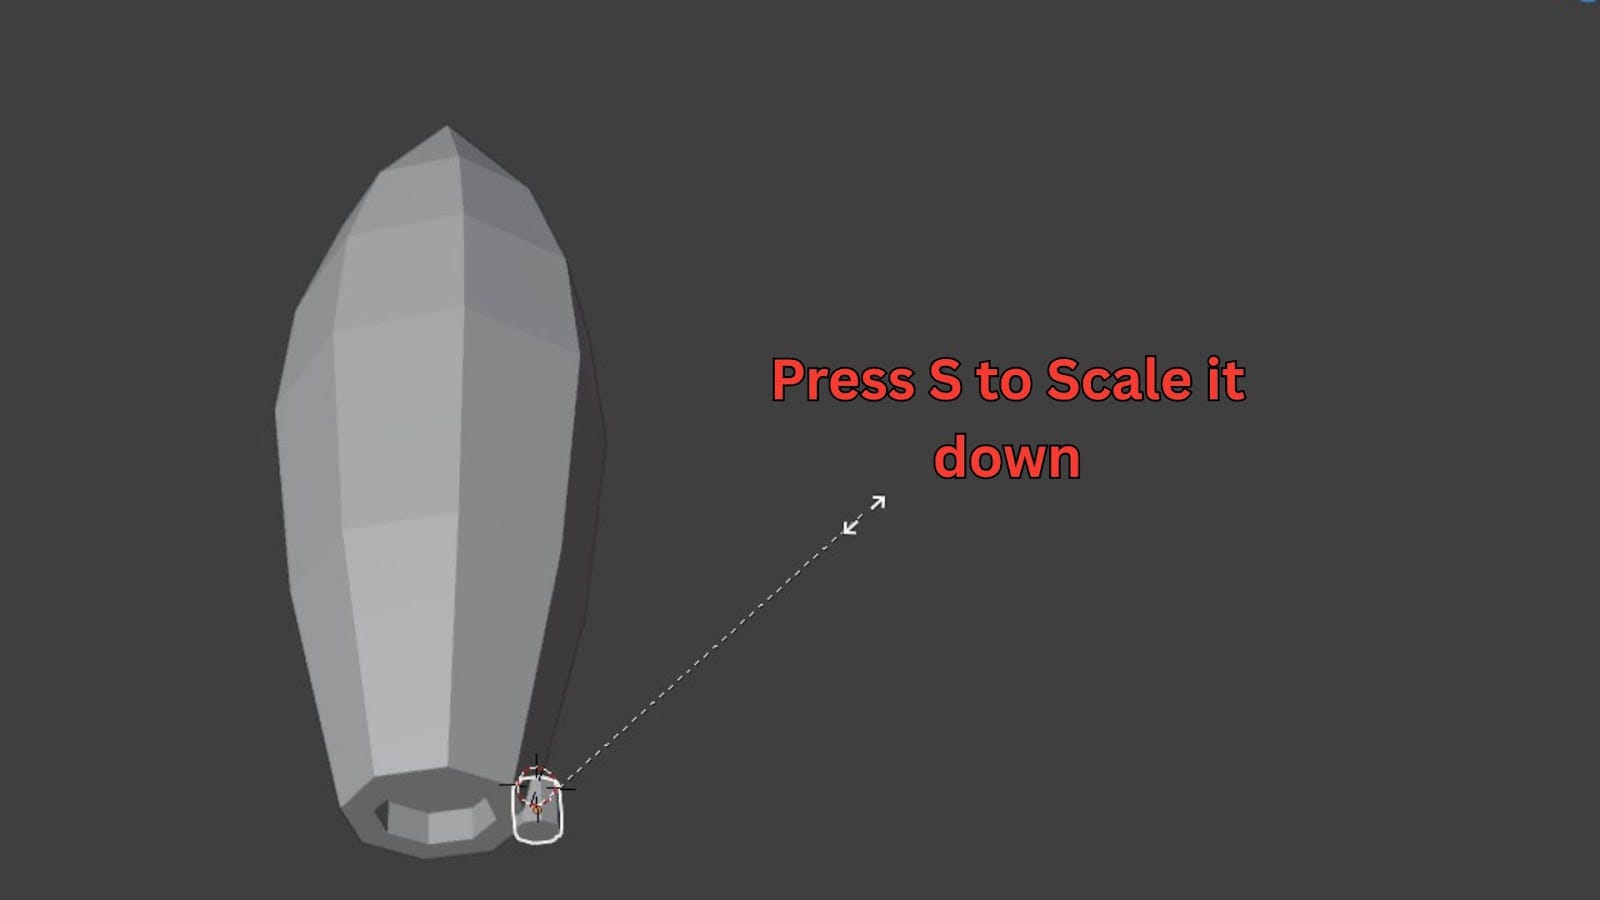
Scale it down (S) significantly to create a small thruster.
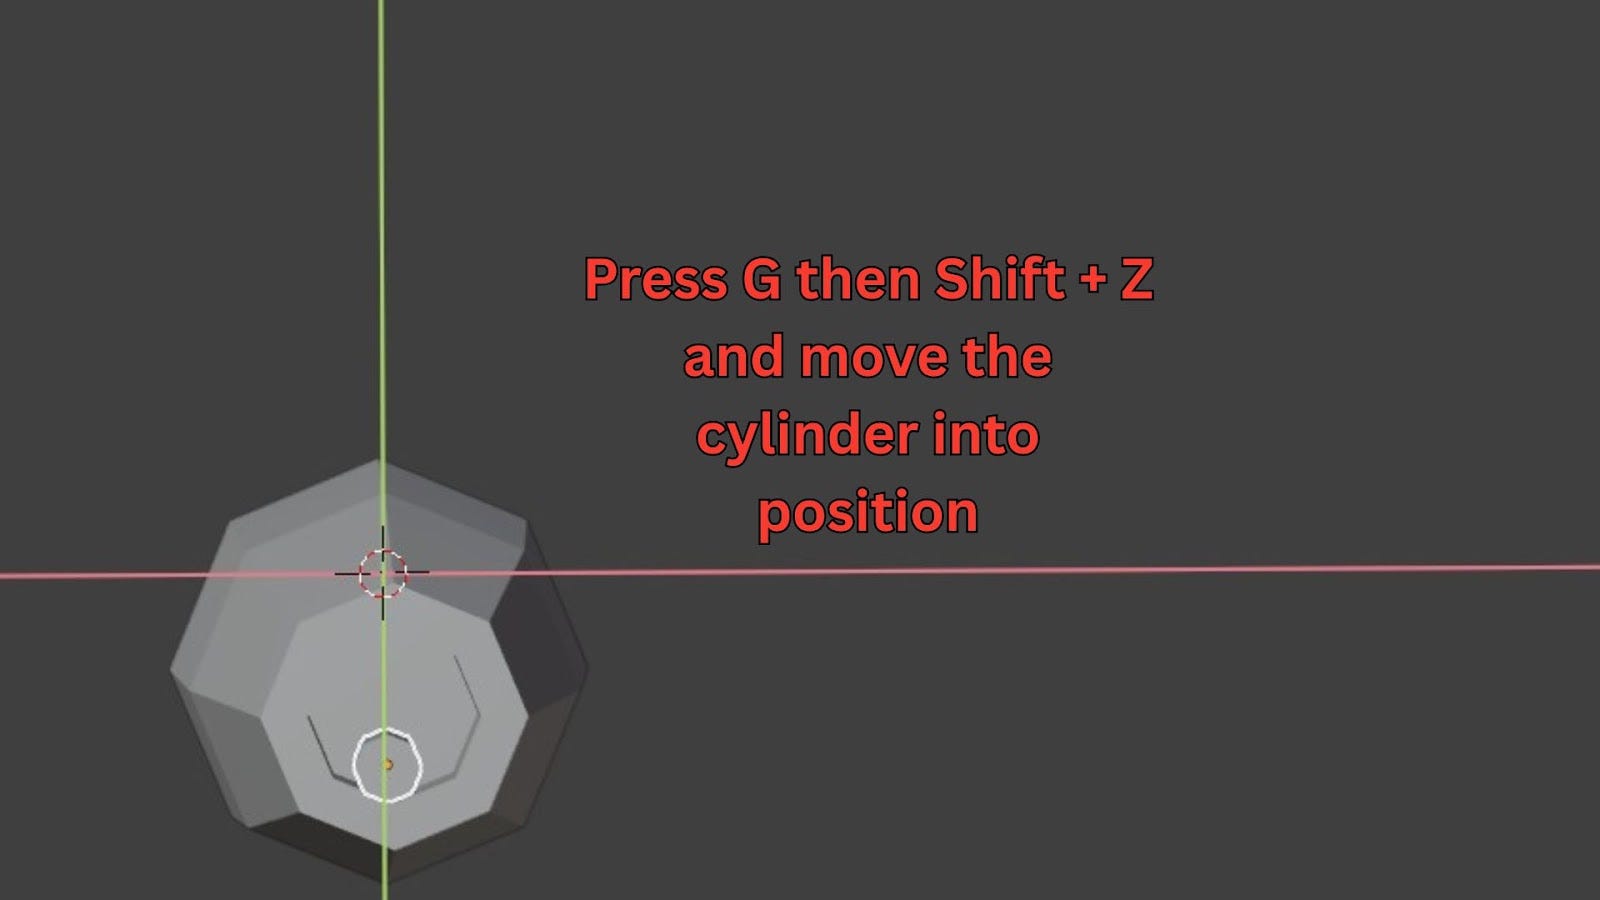
Move it into position at the bottom of the rocket using G. Use Shift + Z after G to constrain movement to the X and Y axes.
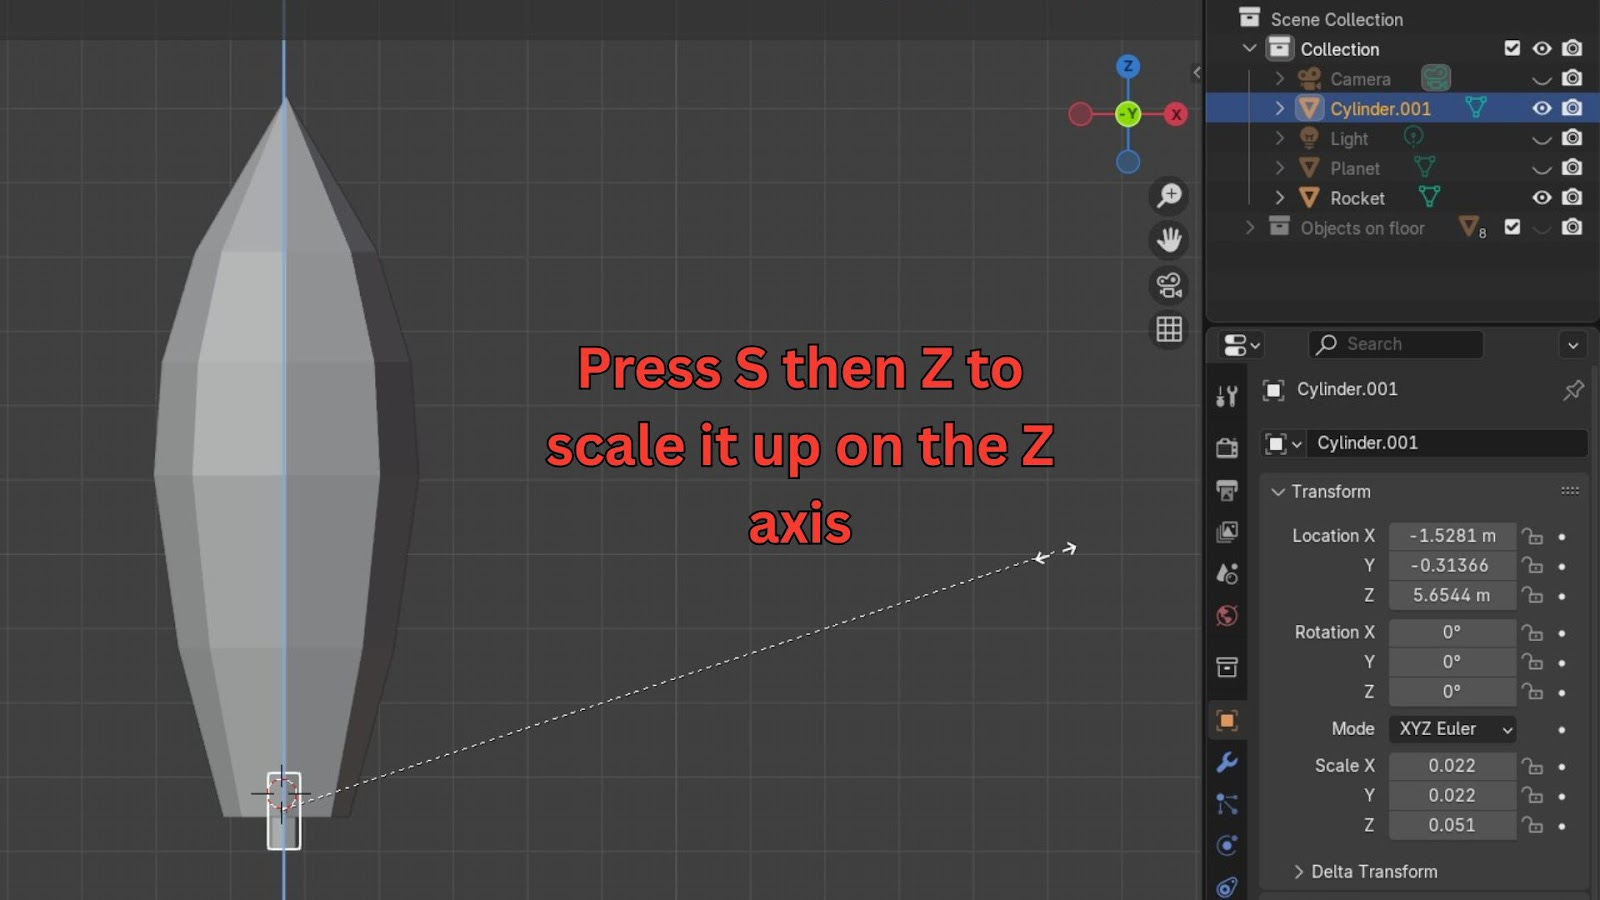
Scale it slightly in the Z-axis (S then Z) to make it a bit longer.
Duplicate Thrusters (Linked Duplicates):
We'll use linked duplicates so that if you edit one, all copies update.
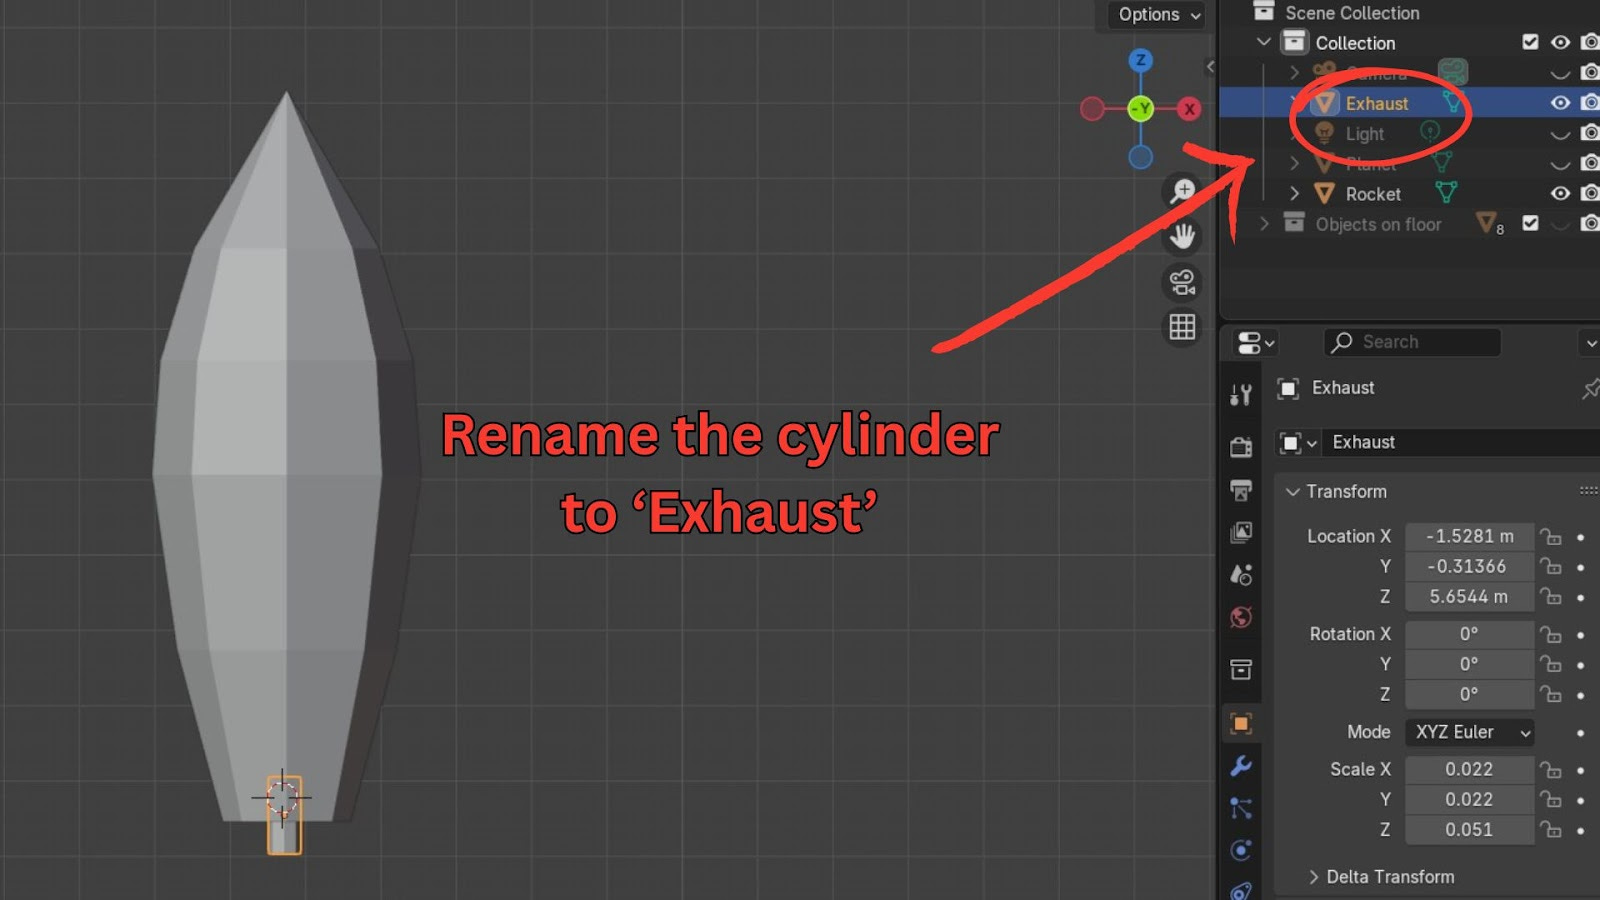
Select the single thruster you just made and rename it "Exhaust" in the Outliner.
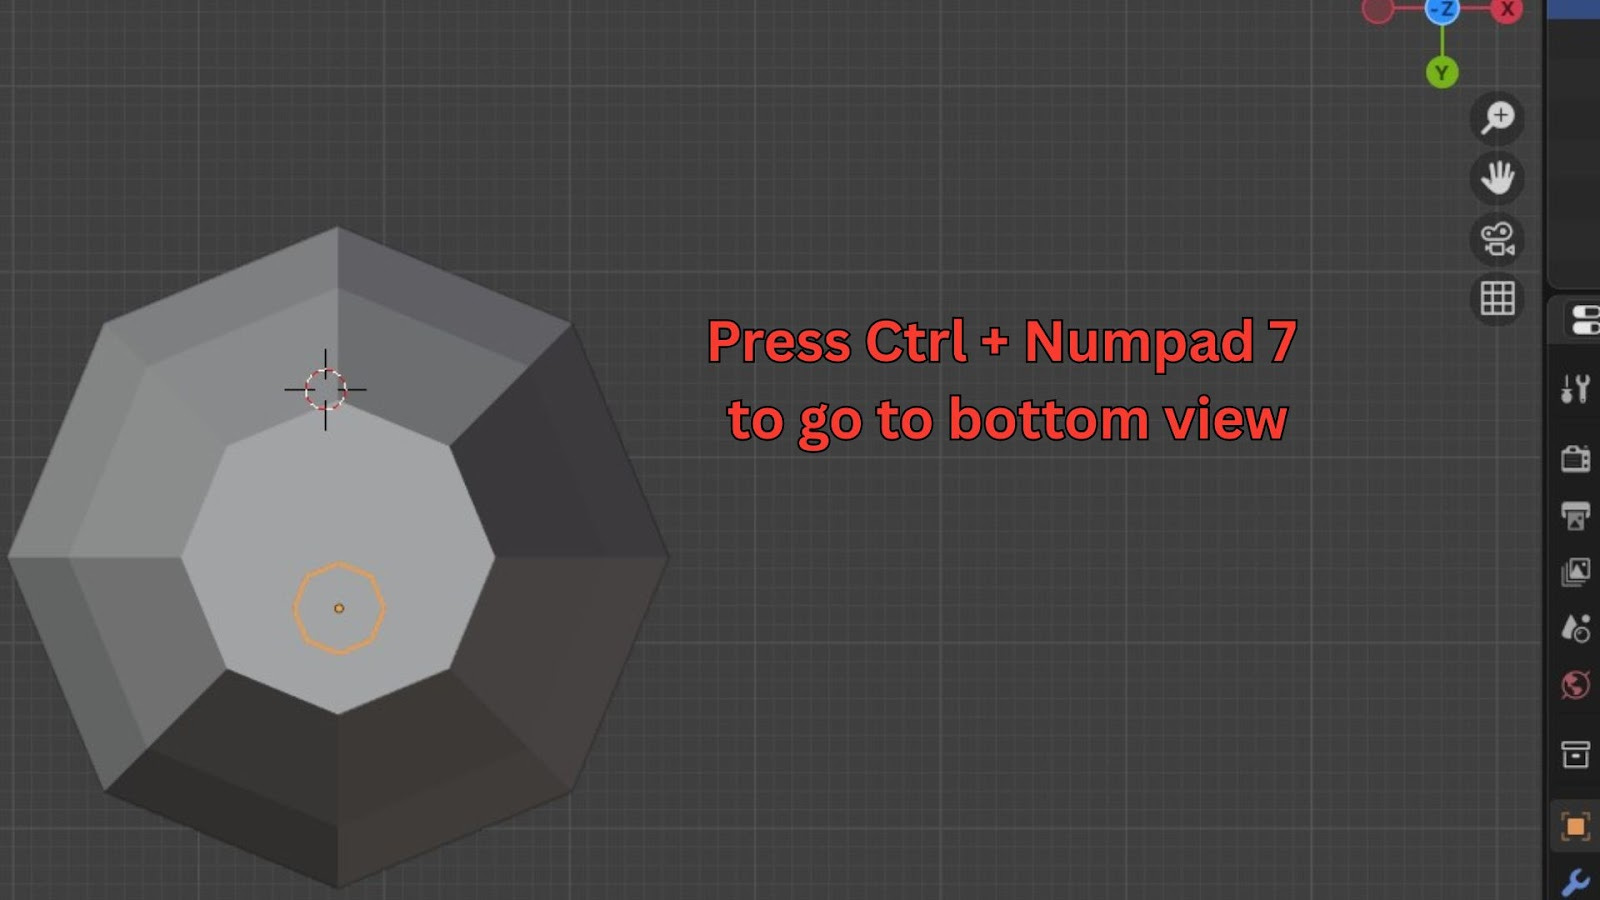
Go to Bottom View (Ctrl + 7) for easier placement.
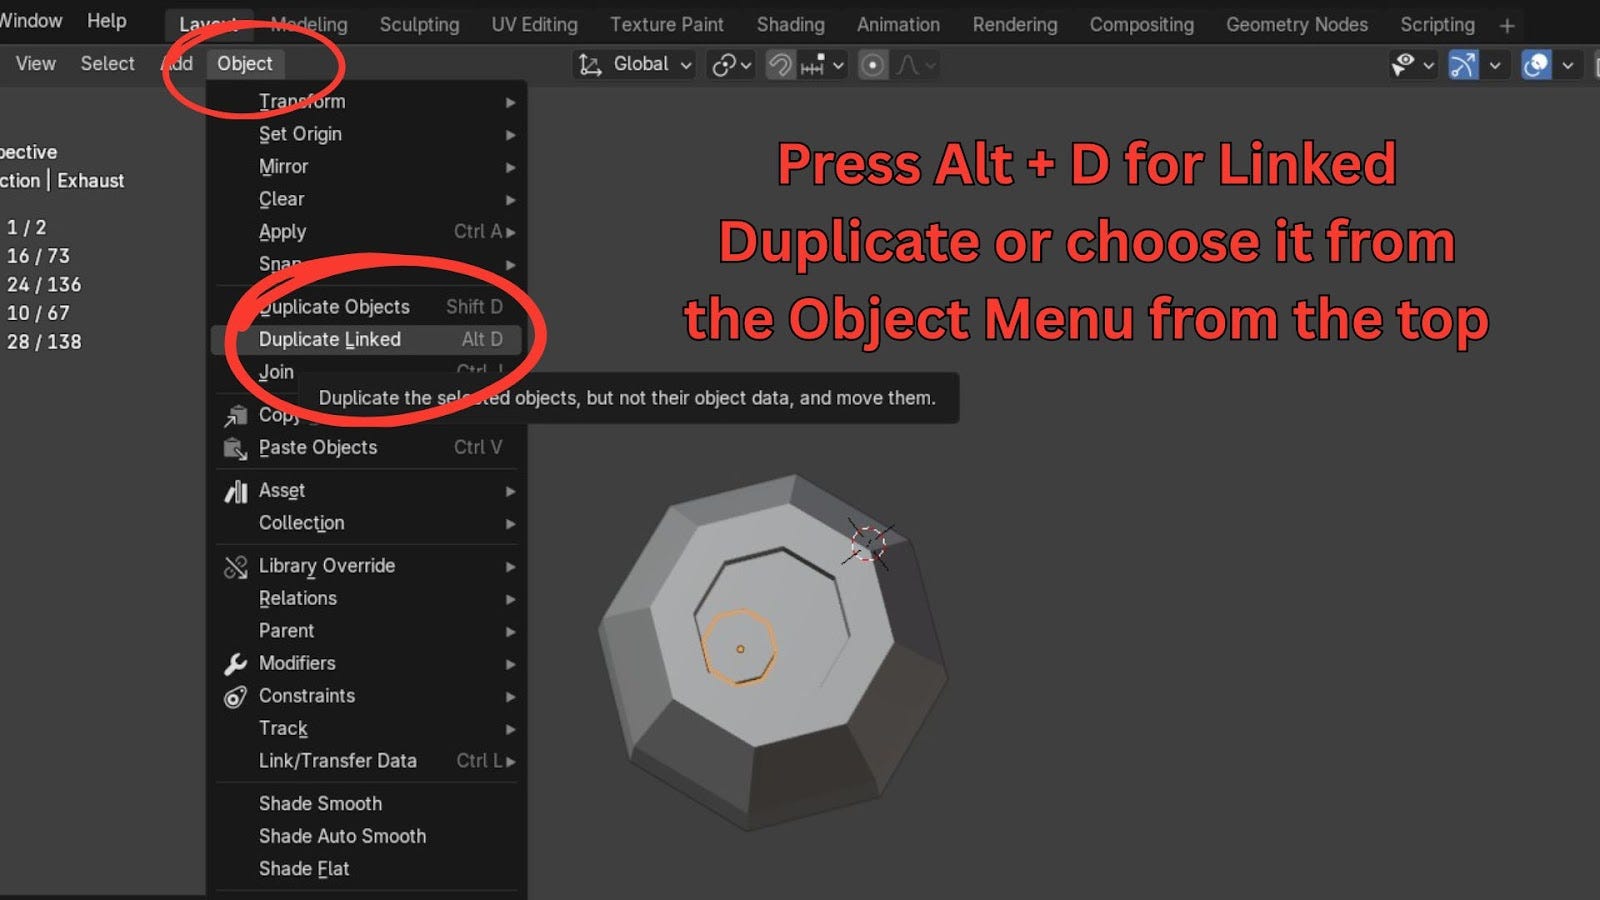
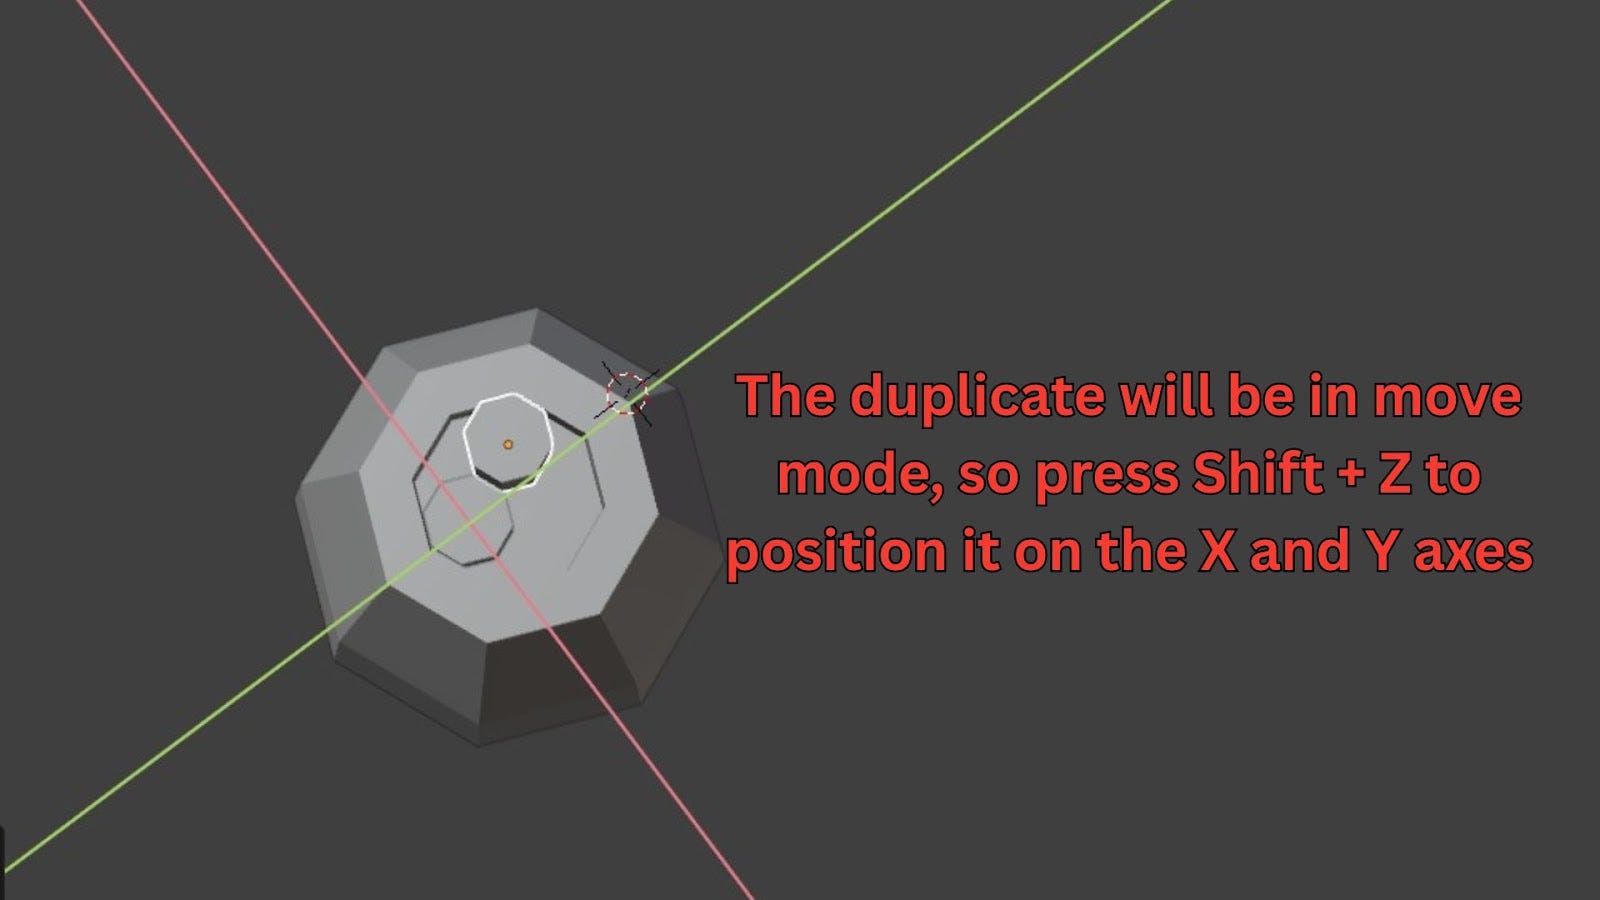
Press Alt + D (or Object > Duplicate Linked) to create a linked duplicate. Linked duplicates mean that if you change any of the linked objects' materials or shape in edit mode, all the duplicates will change as well.
Press Shift + Z to move it along the X and Y axes, positioning it next to the first thruster.
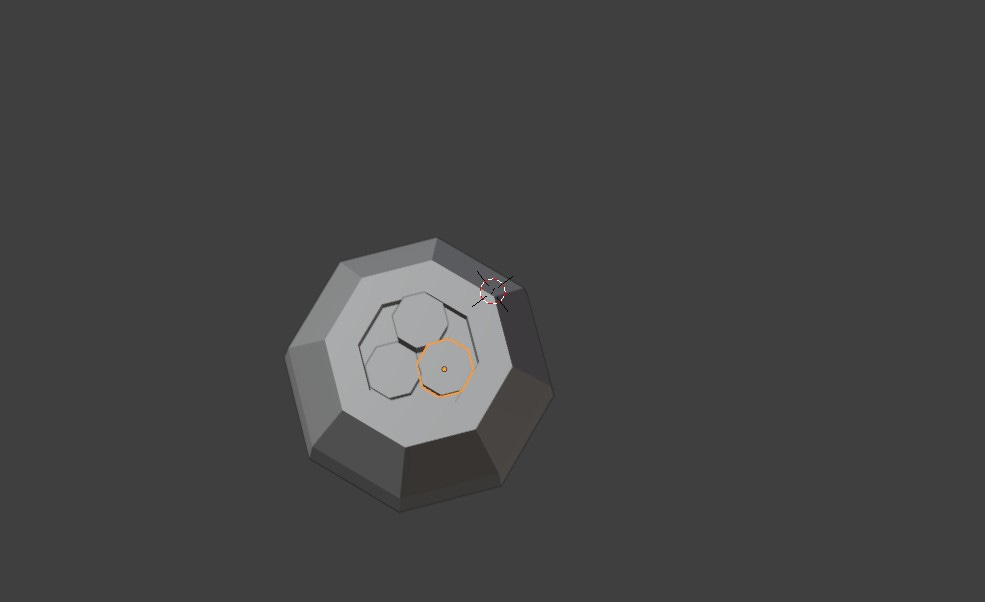
Repeat Alt + D and Shift + Z to create a third thruster.
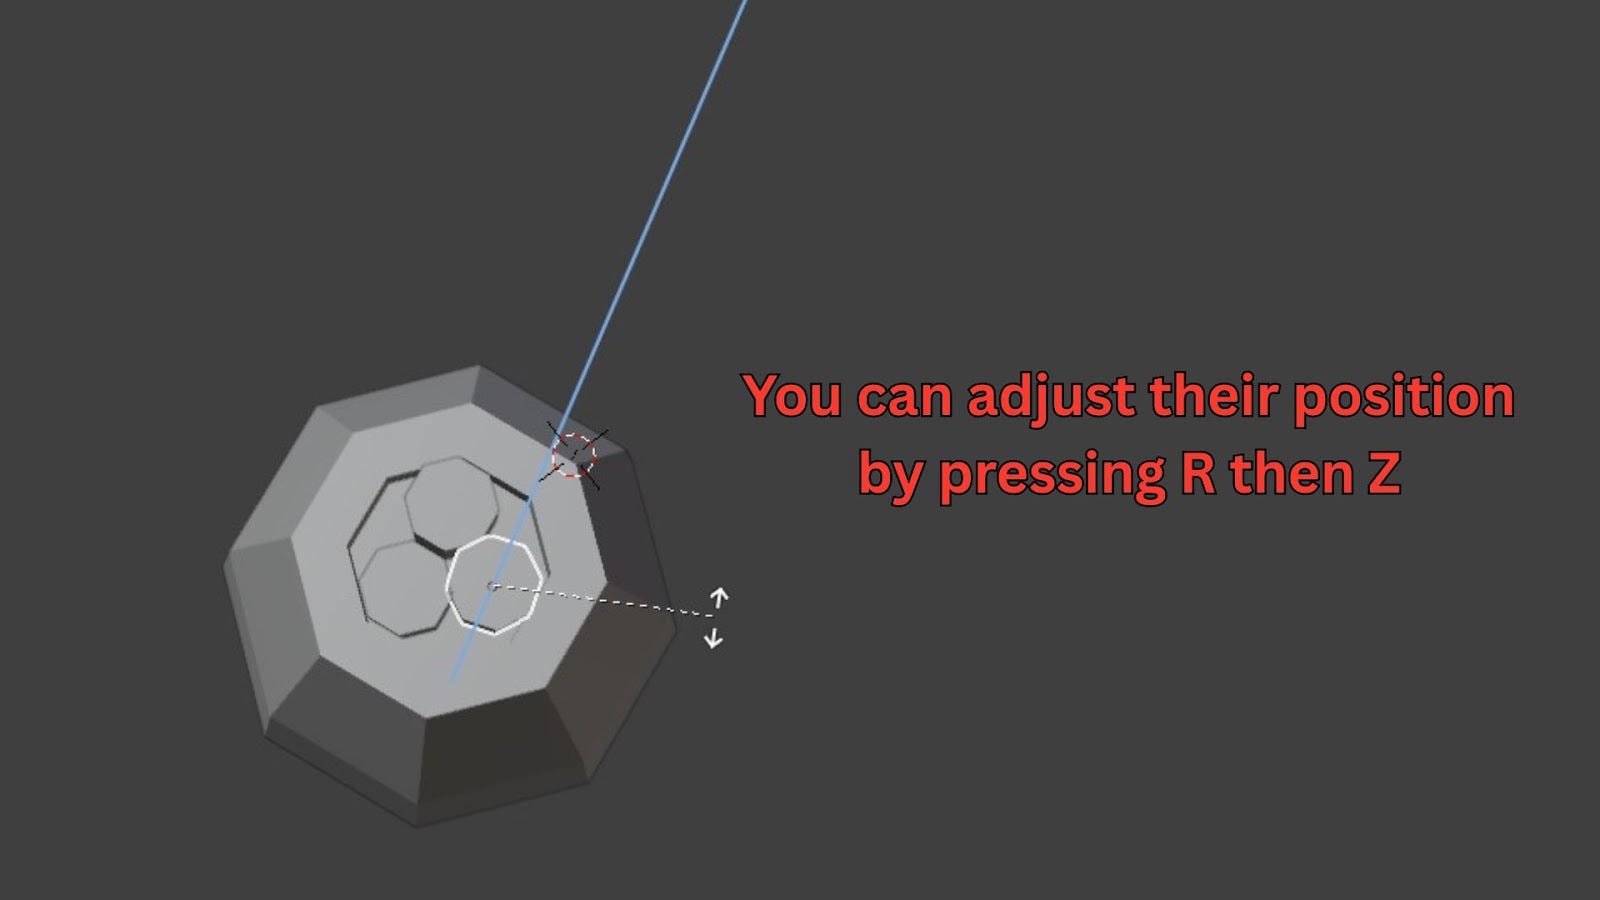
You can also Rotate (R) them slightly around the Z-axis (R then Z) if needed to fit.
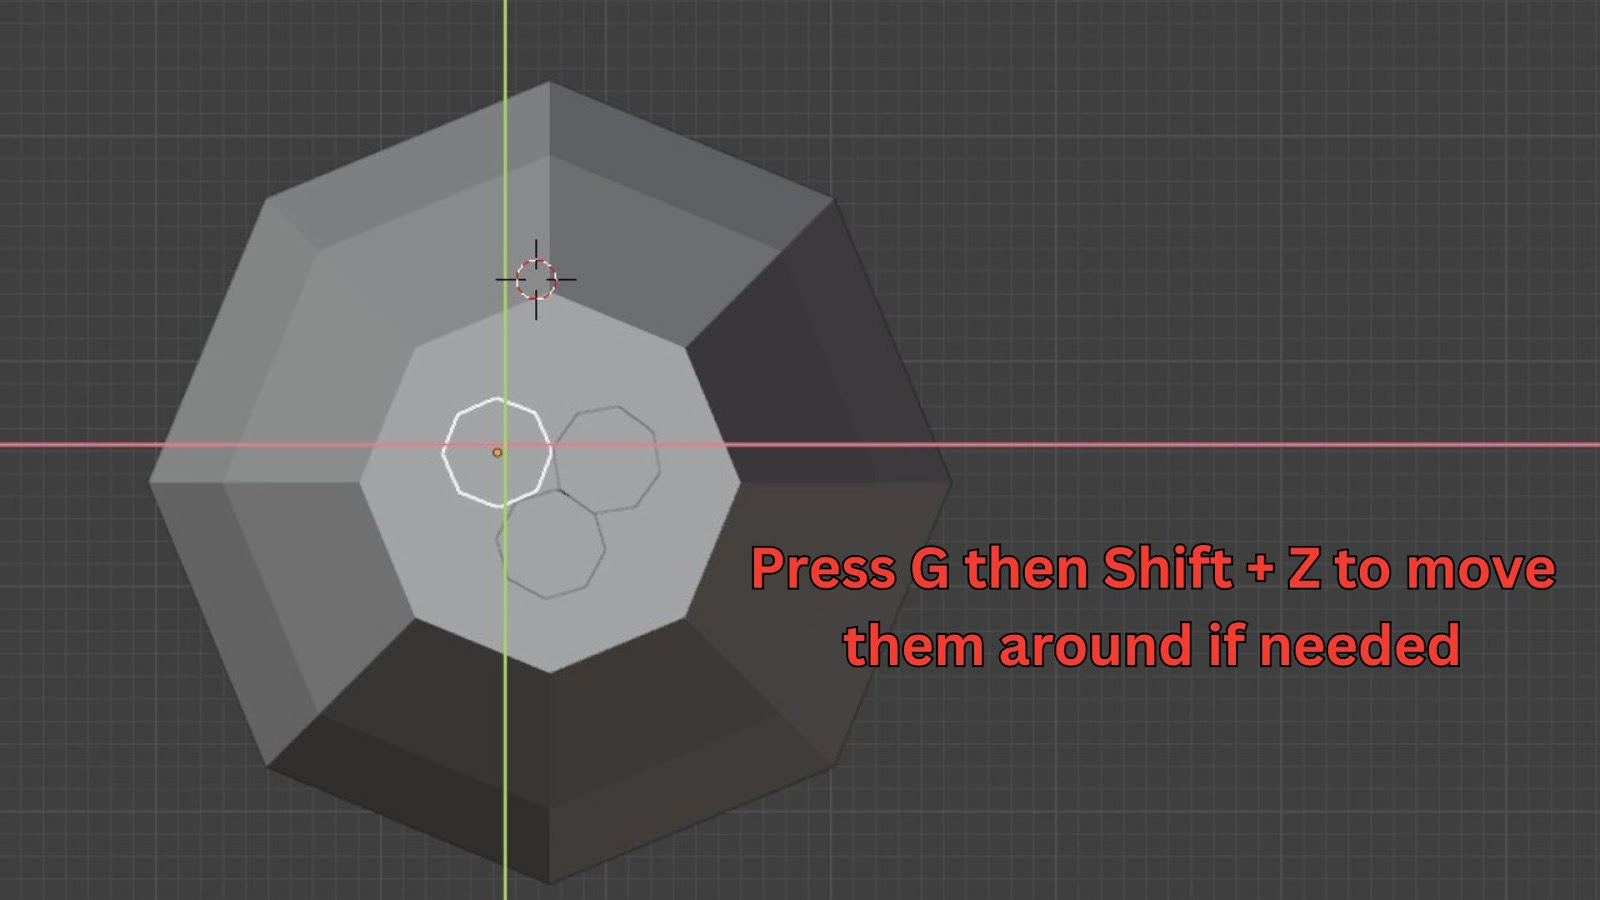
Adjust their positions slightly using G to create an even arrangement.
Edit the Thruster Shape:
Select one of the exhaust thrusters.
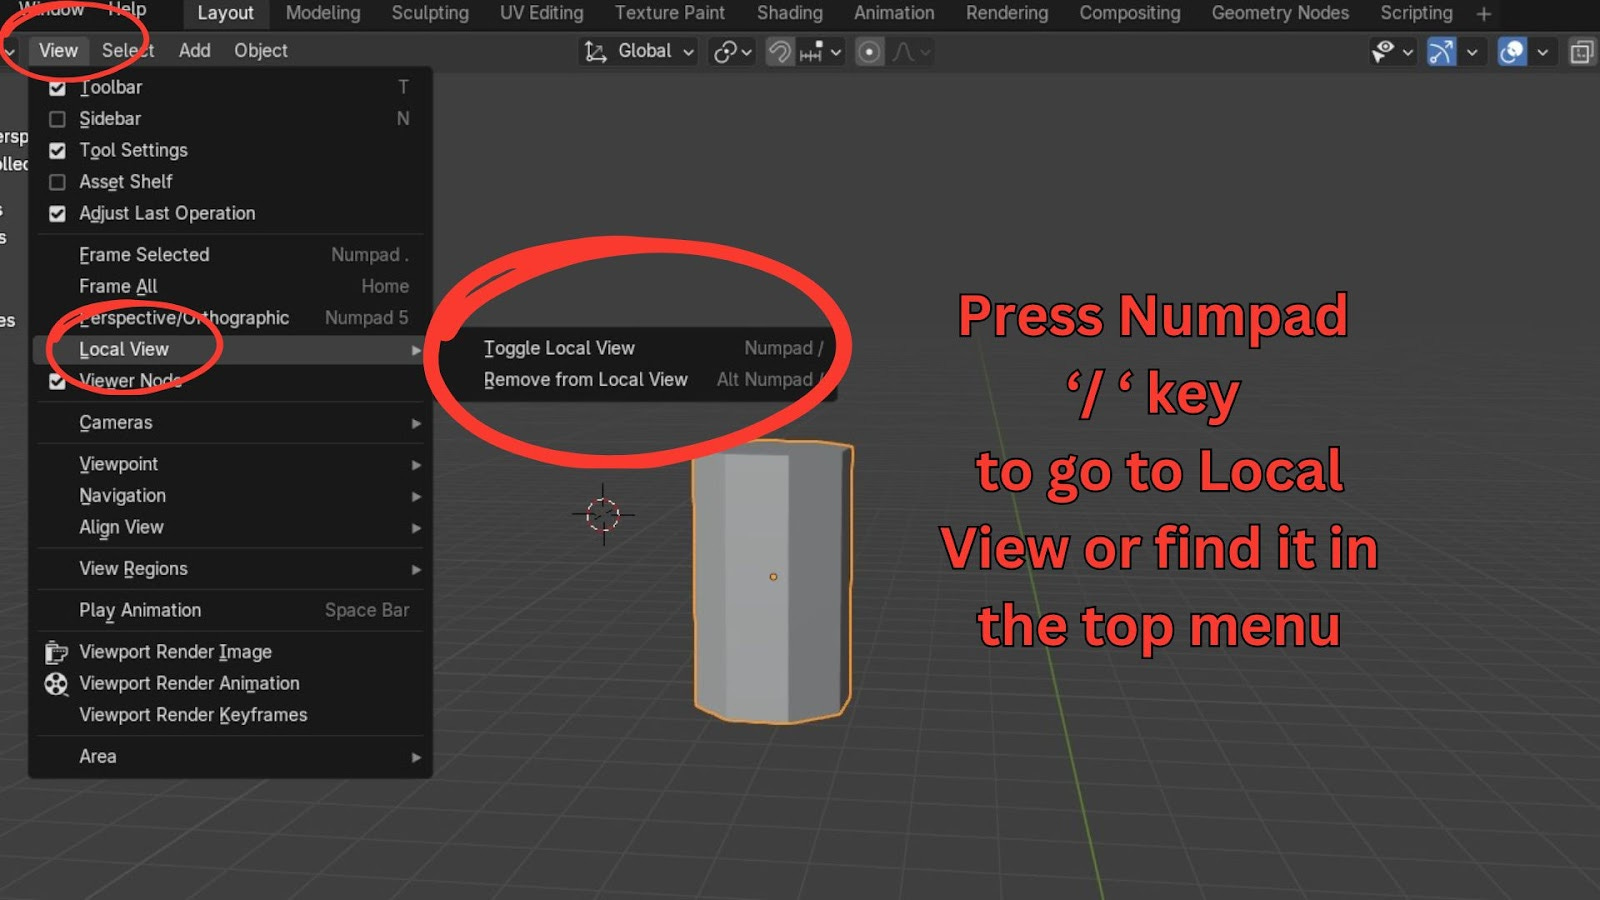
Go into Local View by pressing the Numpad Slash (/) key (or View > Local View > Toggle Local View). This isolates the selected object, making it easier to work with.
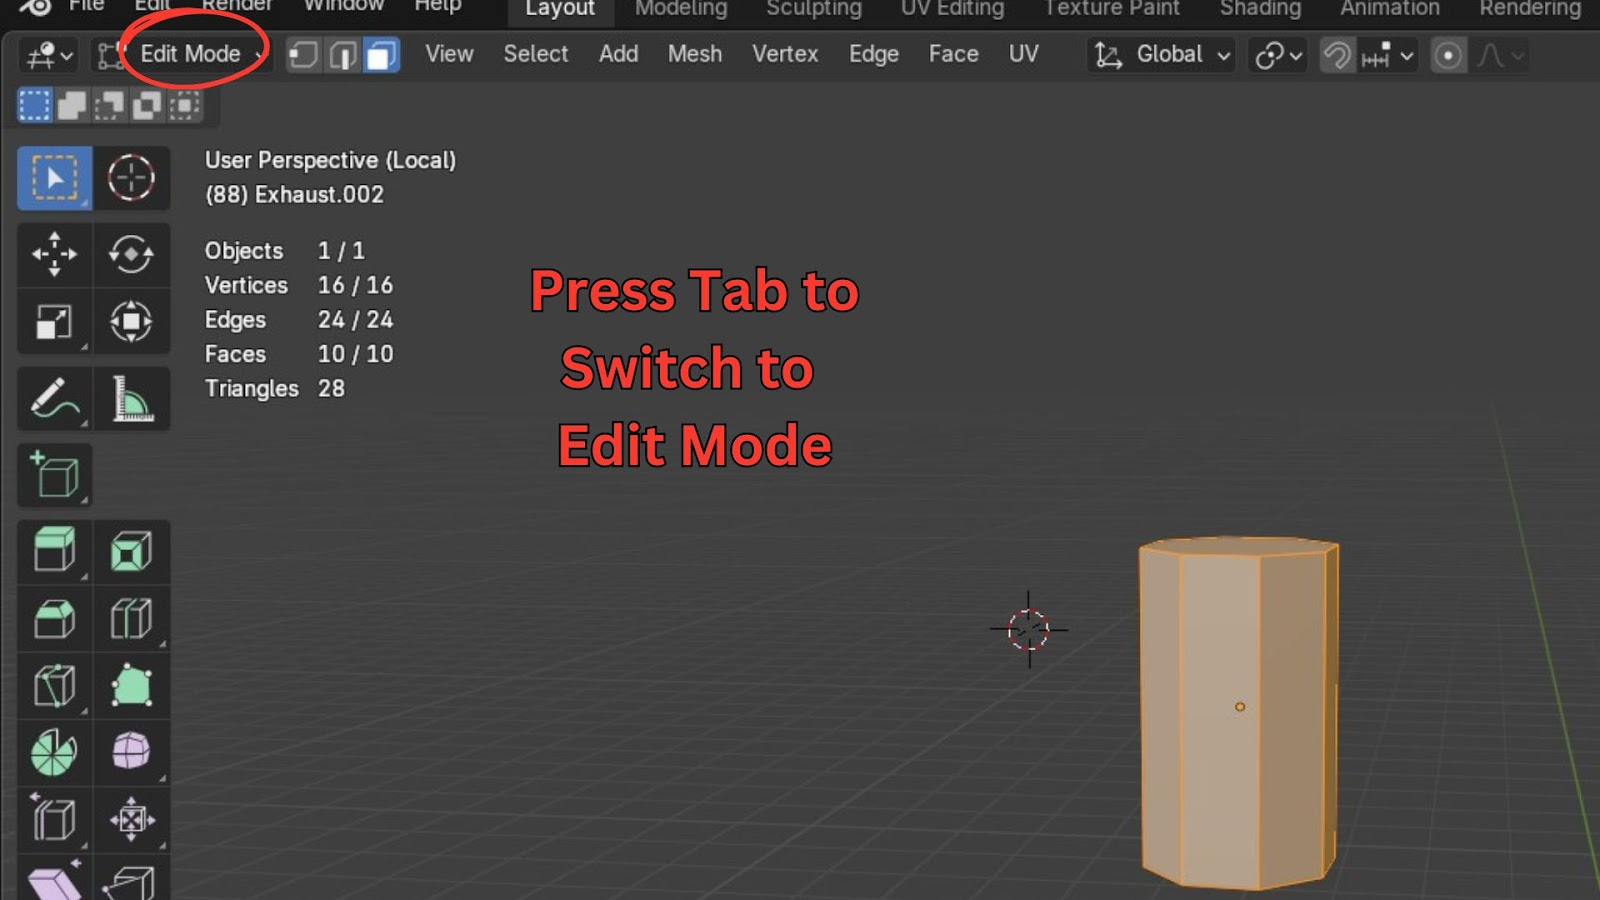
Press Tab to enter Edit Mode.
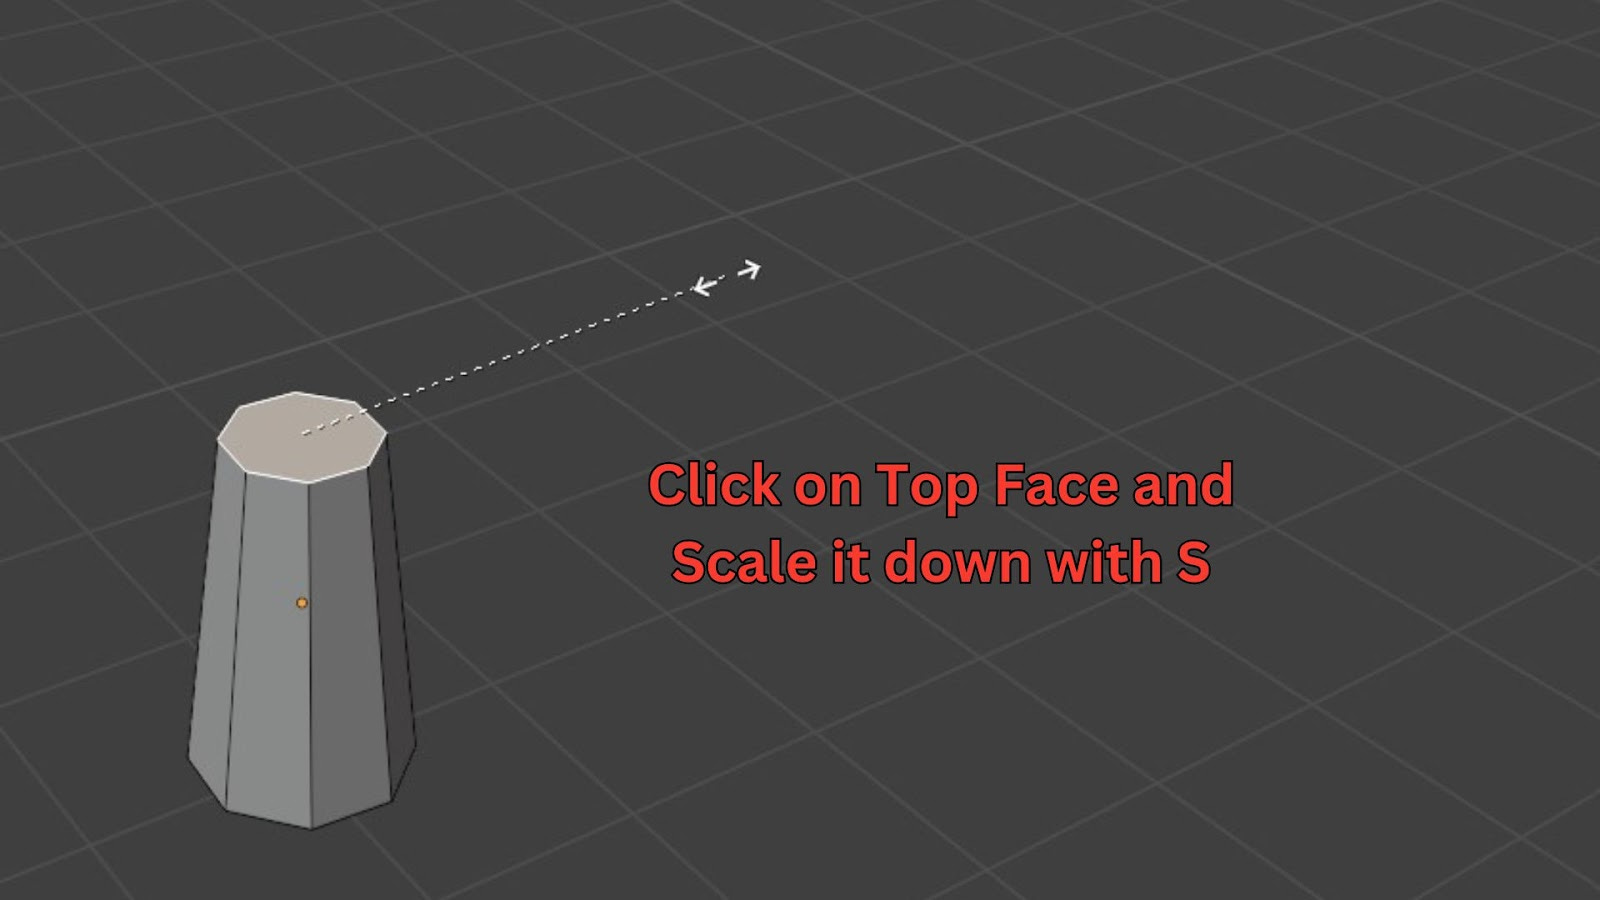
Select the top face, scale it down (S).
Press Ctrl + R to add a loop cut in the middle. Left-click twice to place it.
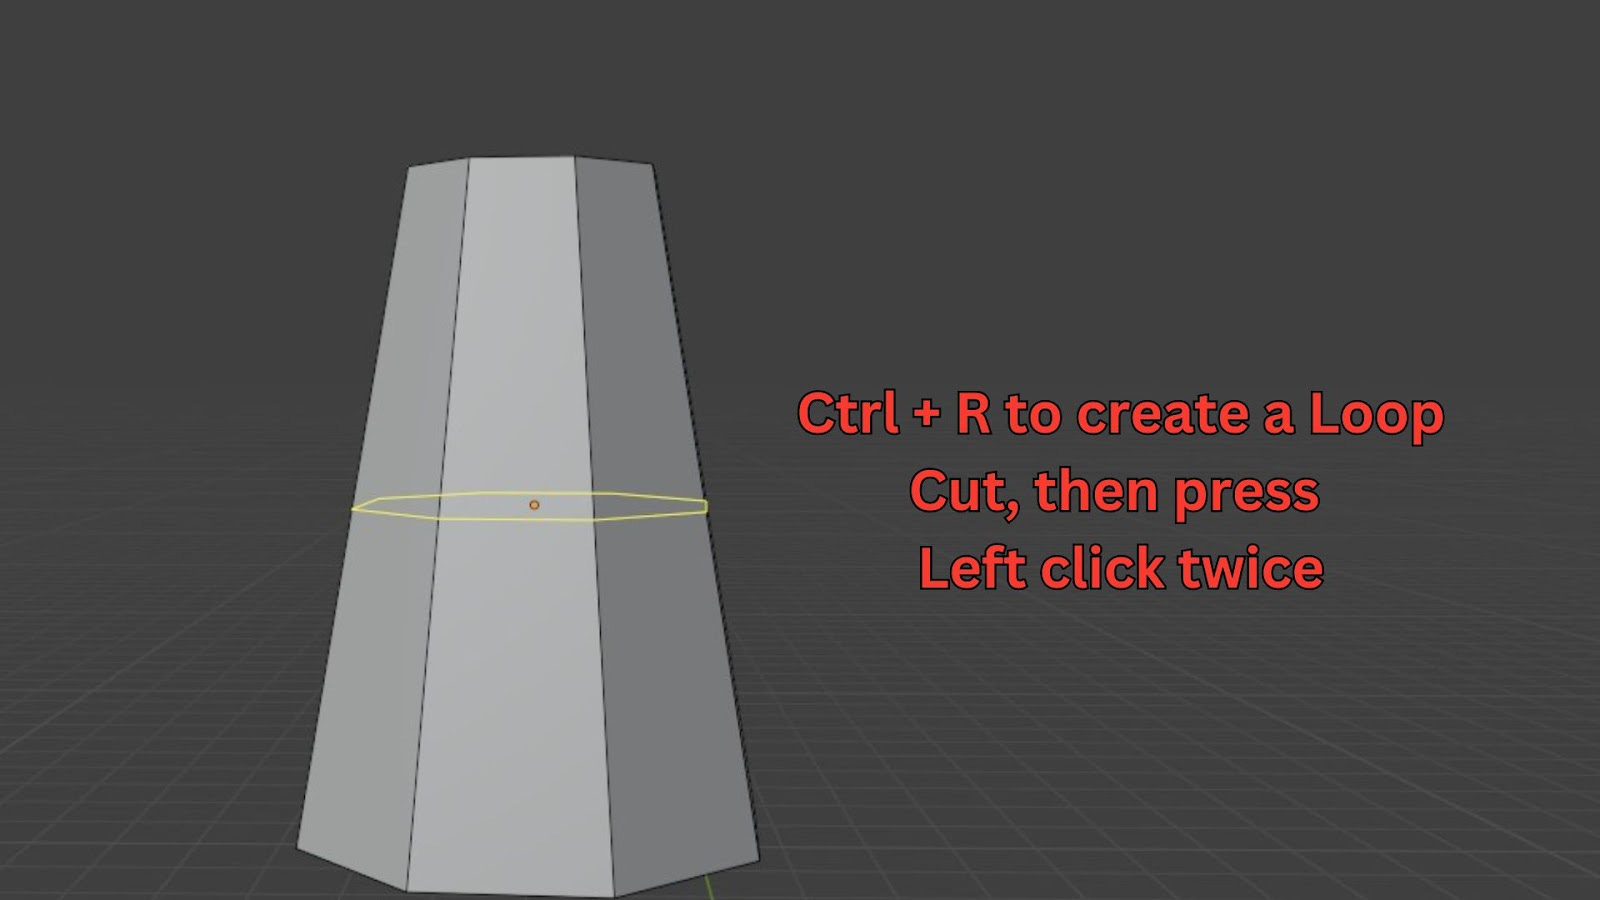
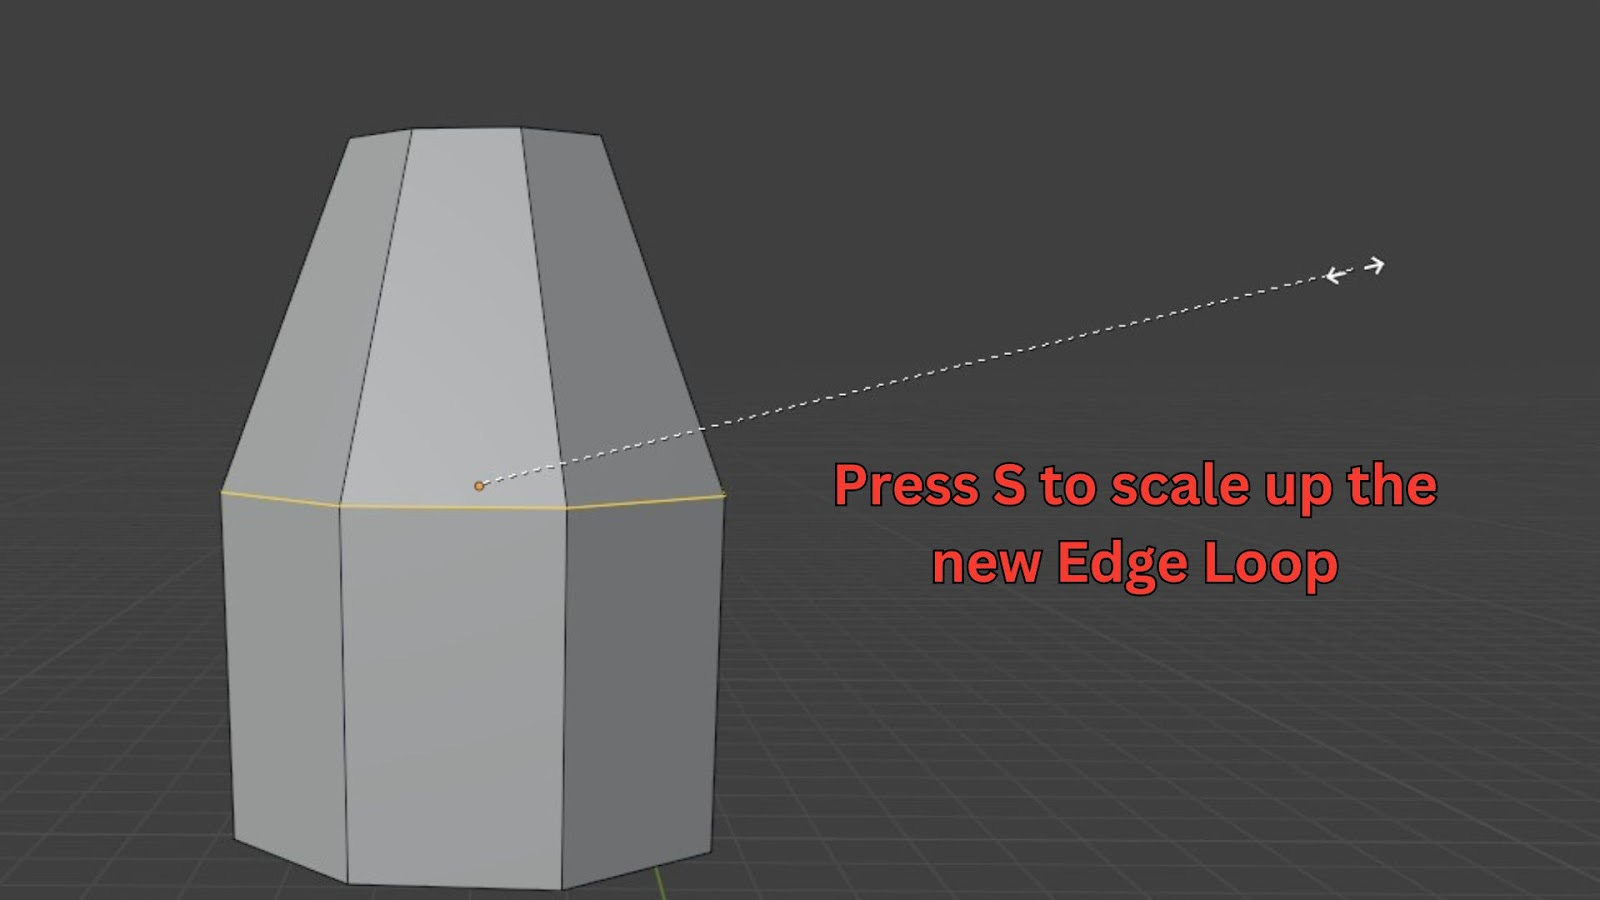
Scale up (S) this new loop cut to create a curved shape for the exhaust.
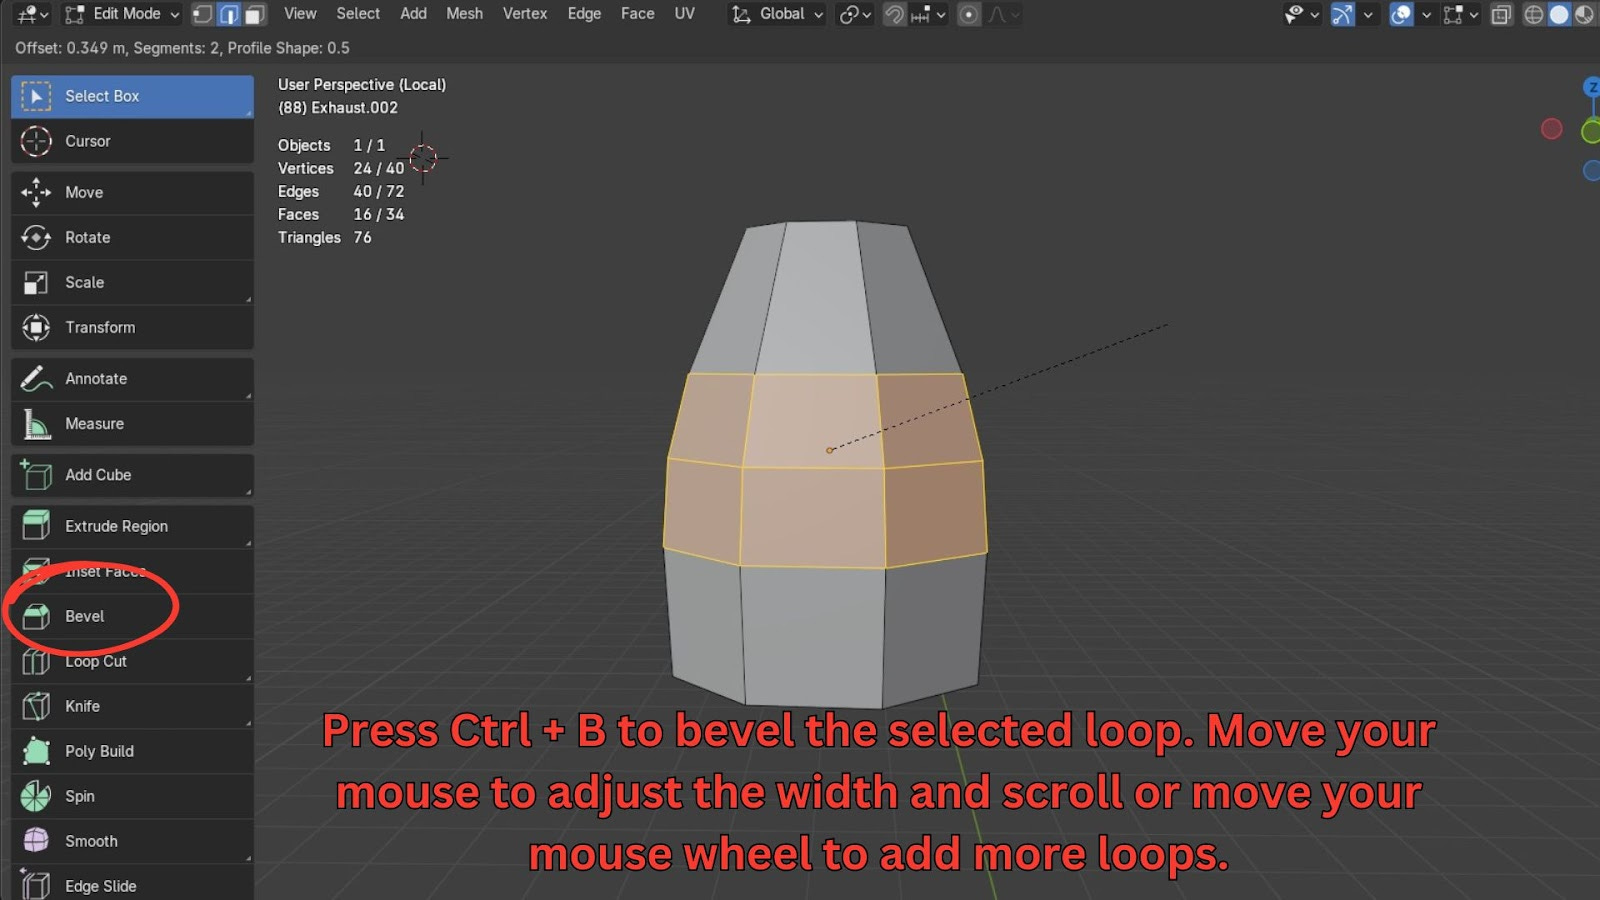
Beveling: With the middle loop cut still selected (Alt + Left-click to select the loop), press Ctrl + B to bevel. Move your mouse to adjust the bevel width, and use the mouse wheel to add more segments for a smoother curve (typically 2-3 is enough).
Challenge: Select the end face of the exhaust, insert (I) it, and extrude (E) it inwards like we did it before with the rocket, so you get the results below:
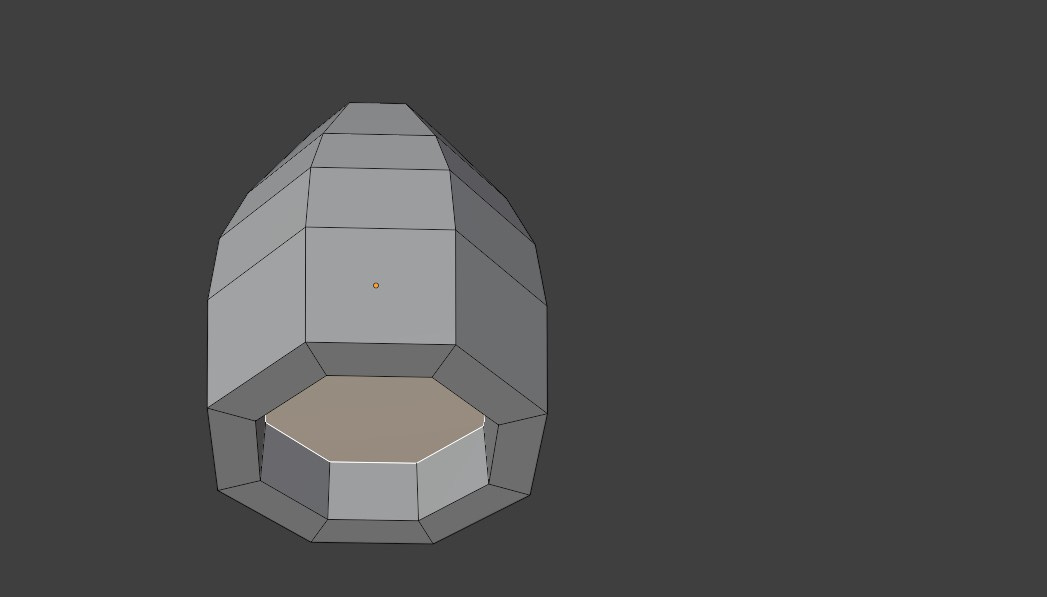
To check for duplicate vertices after extruding inwards, press A to select all, then M and select By Distance. A message will appear at the bottom if any vertices were removed.
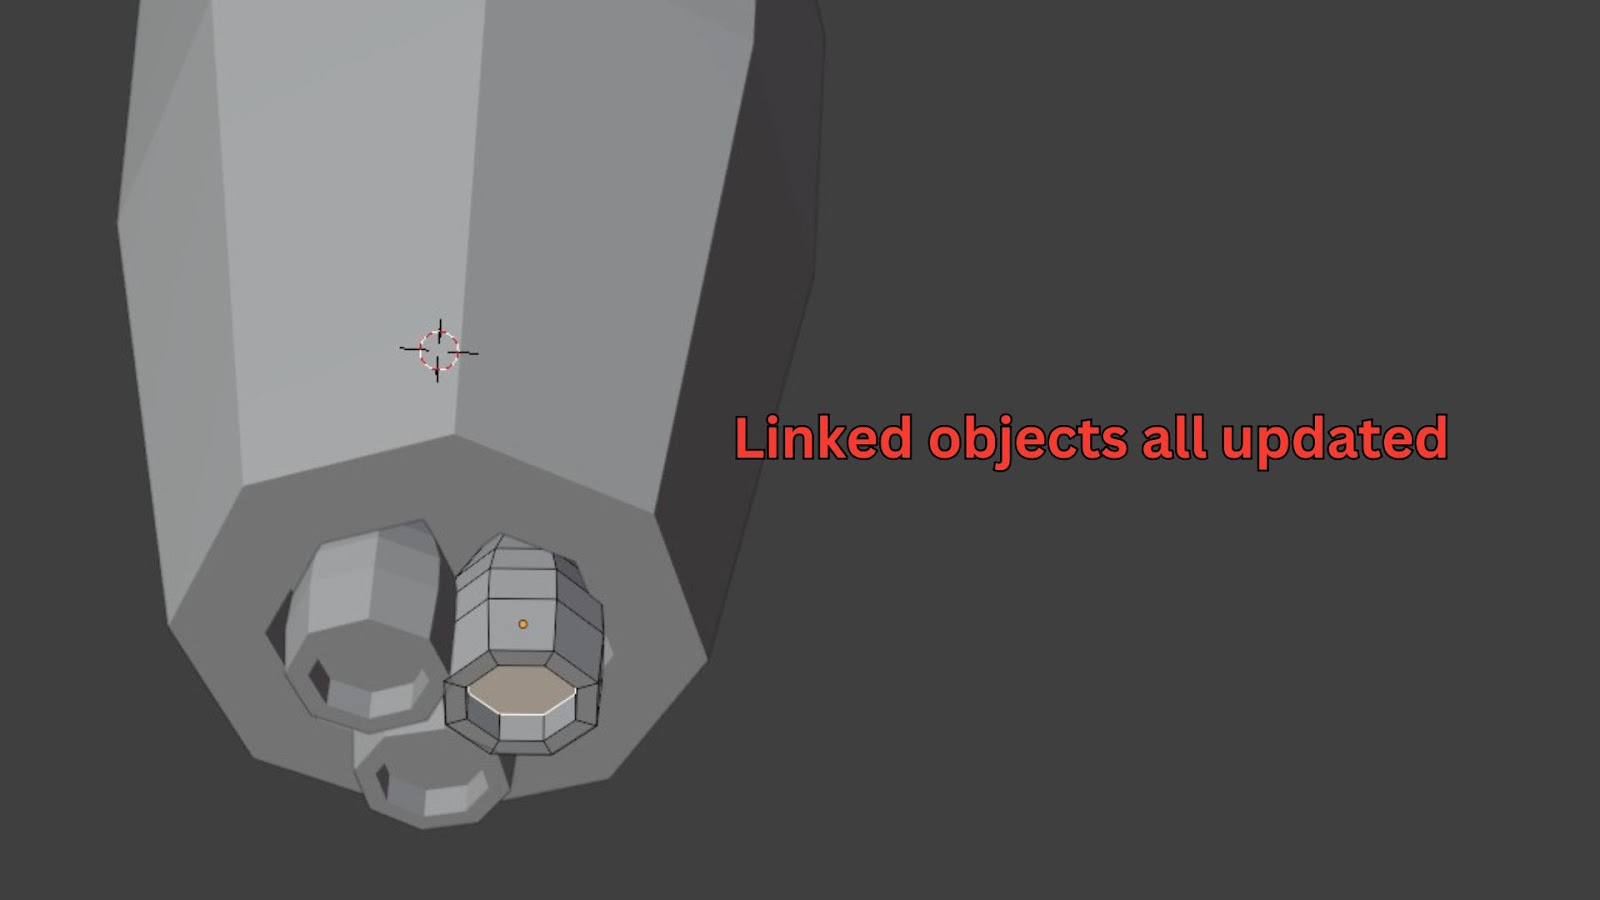
Exit Local View by pressing the Numpad Slash (/) key again. Notice how all the linked duplicates updated!
Now that we have exhausts for our rocket, don't forget to save your work by going to File > Save As. And I will see you in the next part.